Spring Boot is a work of art.
And yes, you should definitely believe the hype. It really is that good. Using Spring Boot, teams with significantly less experience in Java and Spring framework can also start delivering value with a little training.
Spring Boot takes away most of the challenges associated with normal Spring app development. However, having said that, Spring Boot is an inherent part of the overall Spring framework.
It’s primary objective is to bring Rapid Application Development to the world of Spring.
And how does it achieve that?
The concept is pretty simple. Spring Boot provides an opinionated framework to do stuff by means of starter templates. These templates make it exceedingly easy to bootstrap the application.
The best part, however, is that all of it works flawlessly.
So let’s get started with Spring Boot.
Creating a Spring Boot Application
The best way to create a new Spring Boot Application is to use https://start.spring.io
This is what is more commonly known as the Spring Initializr. It’s also my favorite place on the internet. It helps you cook up a working Spring Boot application in almost no time.
On the page that would open, you need to fill a few details. In the field Group, you can enter the high-level package name. This could be your domain. Artifact could be the name of your application.
You can click on Switch to Full Version to see all the details you can enter
I have entered the Group as com.progressivecoder.demo and Artifact as spring-boot-starter. See below image:
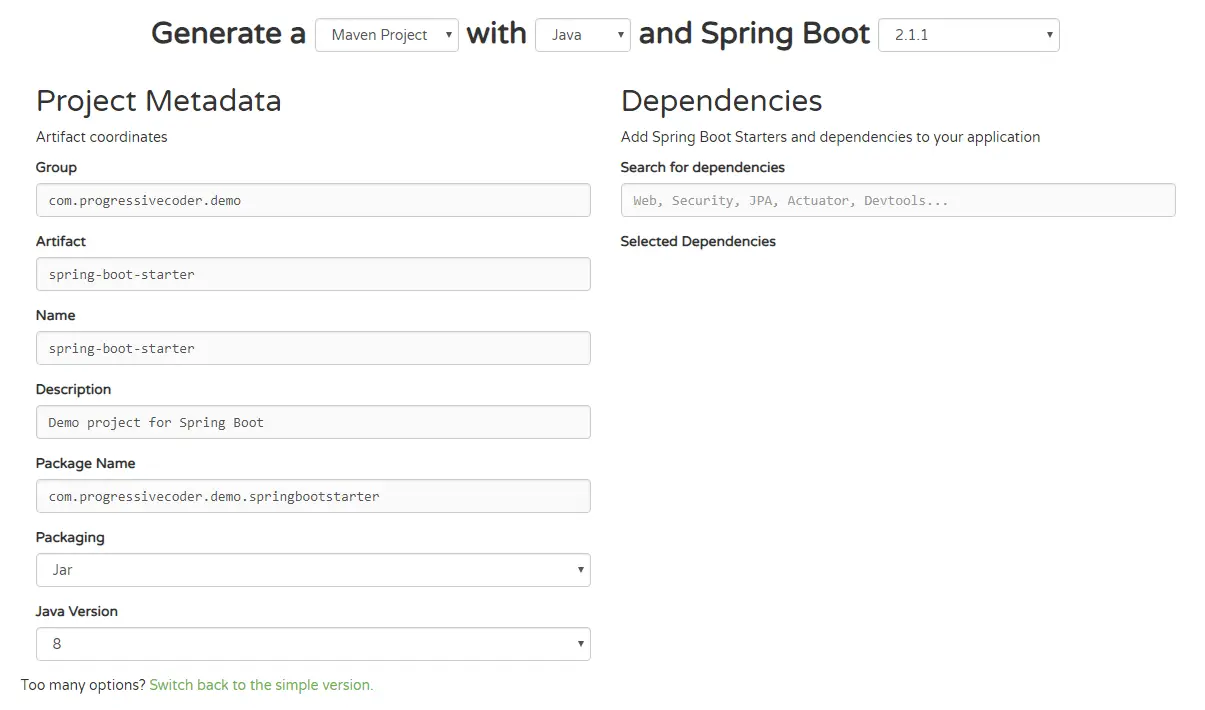
Note that we have selected Maven Project at the top. You could also go for Gradle. In the languages dropdown, you could opt for Kotlin or Groovy. We have selected Java.
You can also play around with the Spring Boot version. At the time of writing this, the latest stable version was 2.1.1 which is what I have selected.
Rest of the details are pretty self-explanatory. And I would not recommend changing anything if you are just starting out with Spring Boot.
The next important step is to select the various packages or features I want in the application. This step is similar to selecting the dependencies in a typical maven or gradle project. In the dialog box, you can scroll down to see the entire list of curated dependencies available.
For the purpose of this post, we would select a few important dependencies like Web, Rest Repositories, JPA, H2, Actuator. We would get into the details of these dependencies later.
At this point, we can now click on the big green button that says Generate Project. Alternatively, you can press Alt + Enter. The project will be downloaded to your computer.
Running the Application
Running the application is pretty simple. Unzip the downloaded project to a suitable place in your computer’s file system. Then, open it in your favorite IDE.
My favorite IDE for Java is IntelliJ from JetBrains. And I wouldn’t hesitate in recommending the same to you. A community edition is available at this location.
Once you open the project, it might take a moment to pull all the dependencies and build the overall project structure. You can grab a coffee during this time.
Once everything is setup, you could simply run the project using IntelliJ’s maven plugin.
The simplest command to run it is clean package spring-boot:run
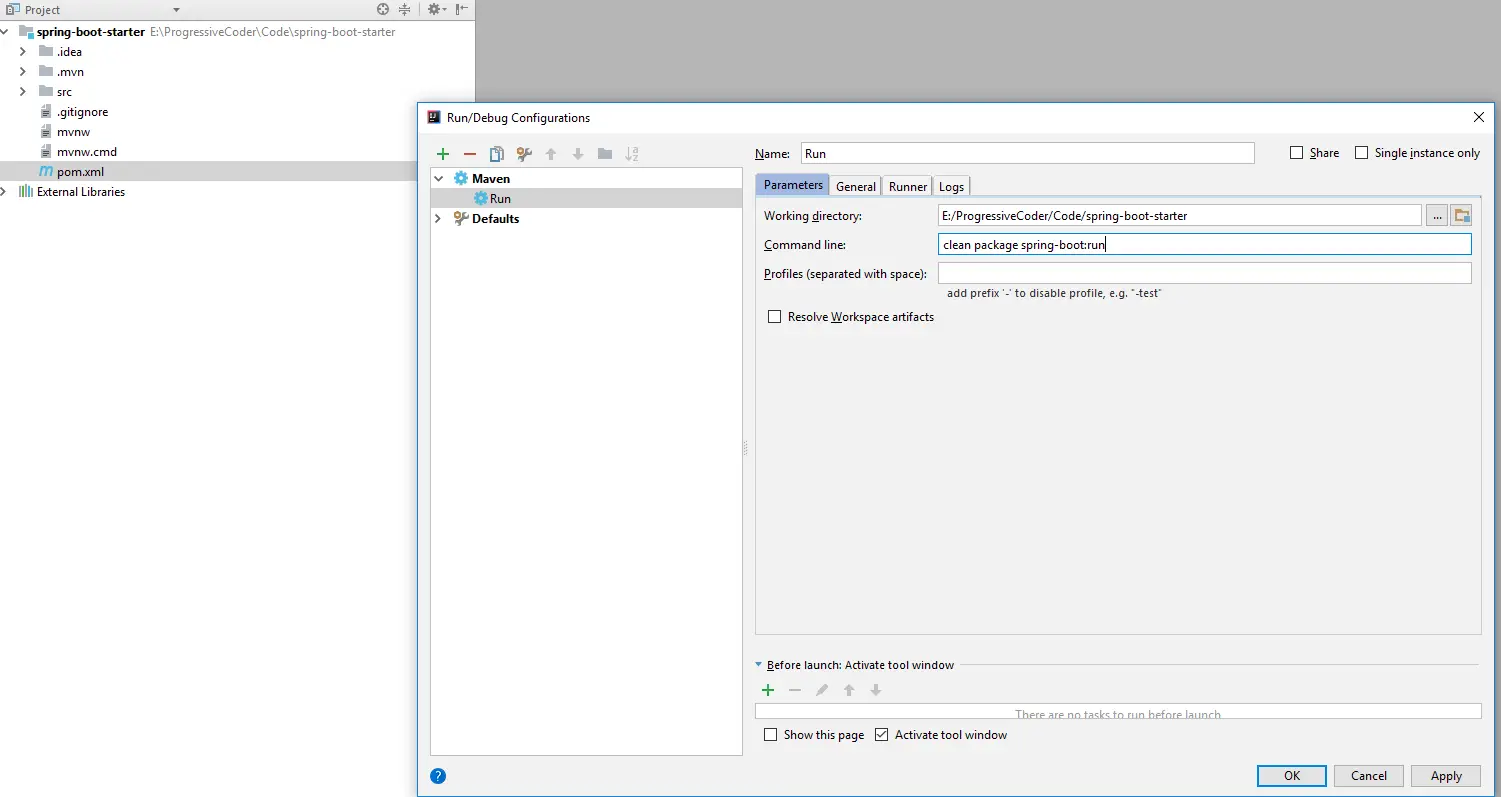
Apply and click OK and then Run the application using the play button that appears near the top-right area of the editor.
Once the build completes successfully, you will be able to see the application start up on port 8080 (unless you aren’t using that port for something else).
You can now check whether your application is actually running successfully by visiting http://localhost:8080/actuator/health. If everything is fine, you would see a message saying {“status”:”UP”} displayed in the browser window.
With this, we have successfully setup a new Spring Boot application. Now we can work on this application and add some real functionality. But before that we need to understand what happens under the hood when you use Spring Boot.
In the next post, we would try and understand how a typical Spring Boot application works.
0 Comments