Spring Cloud Consul is a project that is part of the Spring Cloud family. The aim of this project is to provide easy integration to Consul.
Consul is a tool by Hashicorp. The aim of Consul is to solve some of the most common challenges in a microservices architecture:
- Service Discovery – This pertain to the ability to automatically register and de-register the actual network location of a service instance. We earlier managed Service Discovery using Spring Cloud Eureka.
- Distributed or Externalized Configuration – This is to ensure that all service instances use the same configuration. We also earlier looked at Externalizing Configurations using Spring Cloud Config.
- Health Check – This is to detect when a service is available.
In this post, we will look at how we can configure a typical Spring Boot application to work with Spring Cloud Consul.
Install Consul Agent
The first piece to use Spring Cloud Consul is to install the Consul agent. You can download it from here and choose the operating system of your choice.
A zip file will be downloaded to your machine. Extract it and open the terminal in that folder. After that, you can issue the below command:
./consul agent -server -bootstrap-expect=1 -data-dir=consul-data -ui -bind=127.0.0.1
This will start the Consule agent on localhost:8500. You can then visit the Consul dashboard using http://localhost:8500/ui.
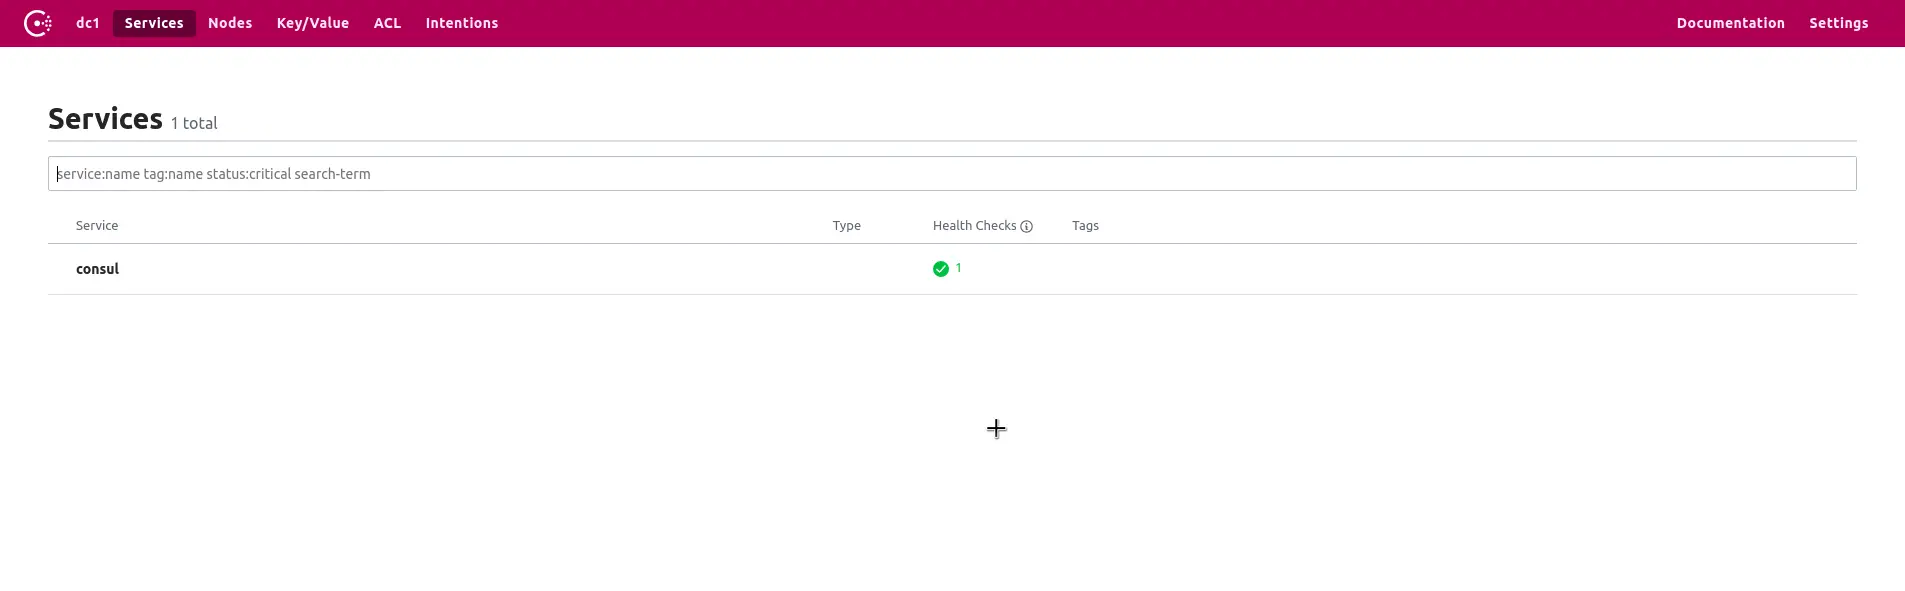
Currently, no service is registered to it. However, the Consul agent is running successfully.
At this point, you should note that this is NOT the recommended way for running Consul in a prod environment. Ideally, you would be running Consul on a docker container. However, the below approach suits for our local development.
Enabling Service Registration
Now that our Consul agent is up and running, the next step is to create a service. And then wire it up with the Consul agent.
We can quickly create a new Spring Boot application using https://start.spring.io.
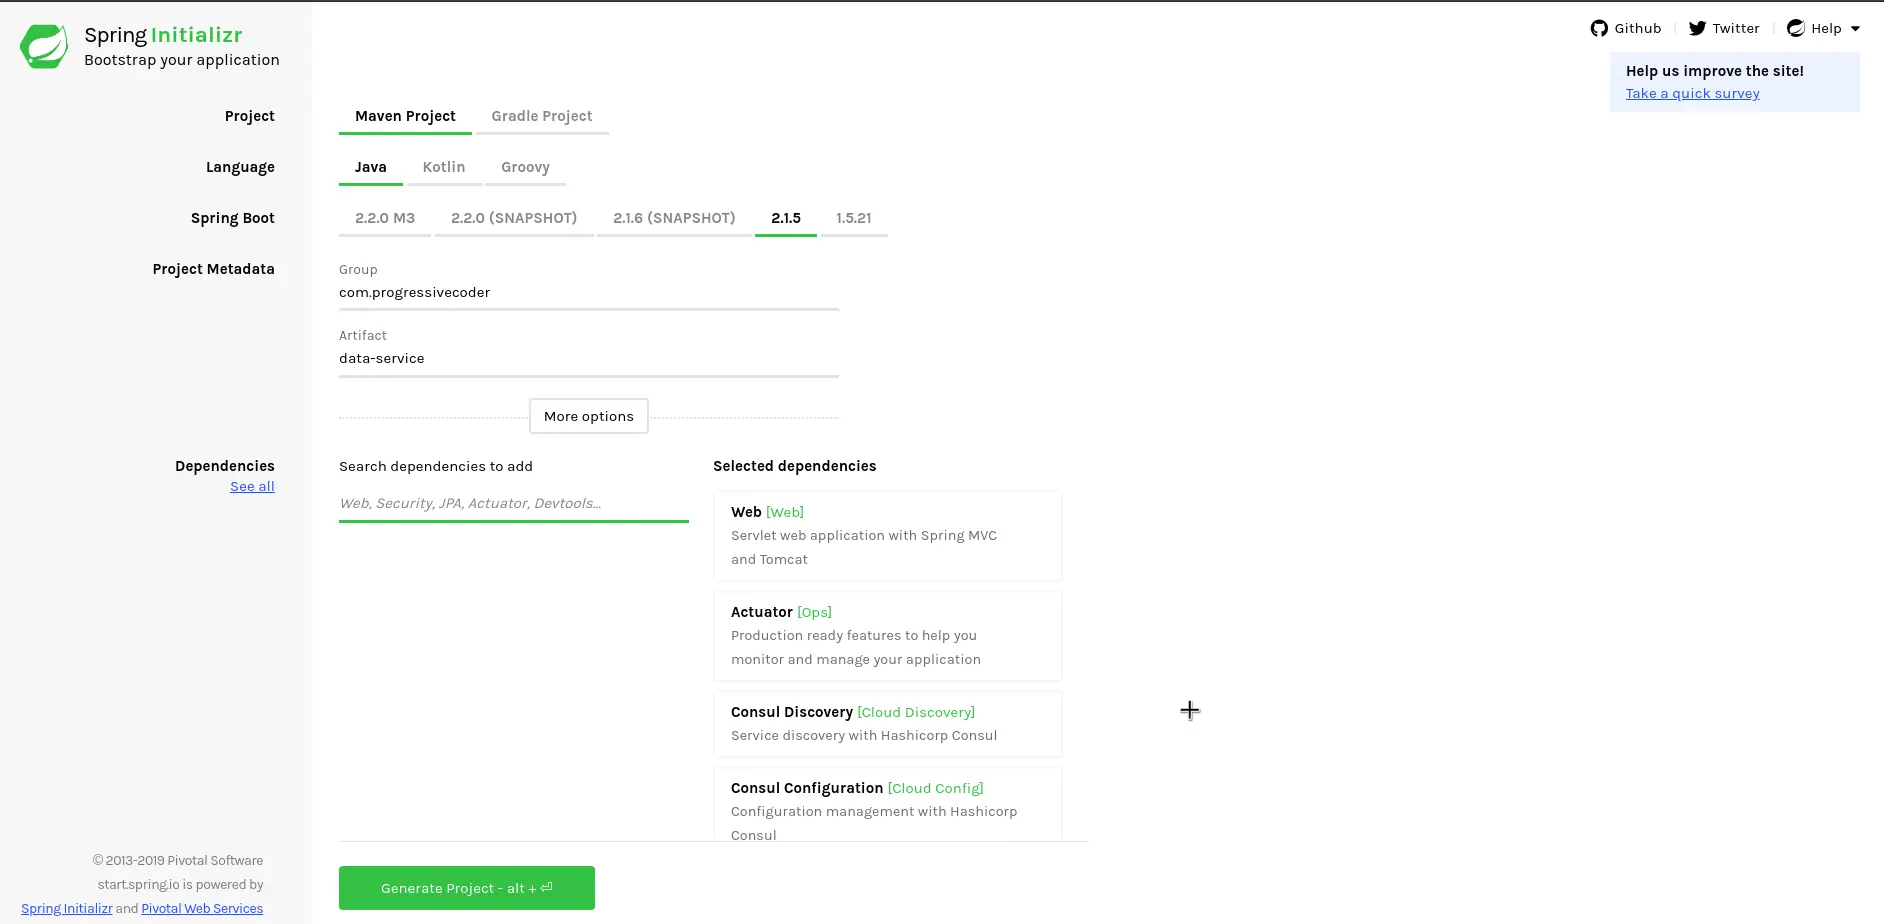
We have chosen dependencies such as Web, Actuator, Consul Discovery and Consul Configuration.
Below are the dependencies in the POM.xml file for the project.
<dependencies>
		<dependency>
			<groupId>org.springframework.boot</groupId>
			<artifactId>spring-boot-starter-actuator</artifactId>
		</dependency>
		<dependency>
			<groupId>org.springframework.boot</groupId>
			<artifactId>spring-boot-starter-web</artifactId>
		</dependency>
		<dependency>
			<groupId>org.springframework.cloud</groupId>
			<artifactId>spring-cloud-starter-consul-config</artifactId>
		</dependency>
		<dependency>
			<groupId>org.springframework.cloud</groupId>
			<artifactId>spring-cloud-starter-consul-discovery</artifactId>
		</dependency>

		<dependency>
			<groupId>org.springframework.boot</groupId>
			<artifactId>spring-boot-starter-test</artifactId>
			<scope>test</scope>
		</dependency>
</dependencies>
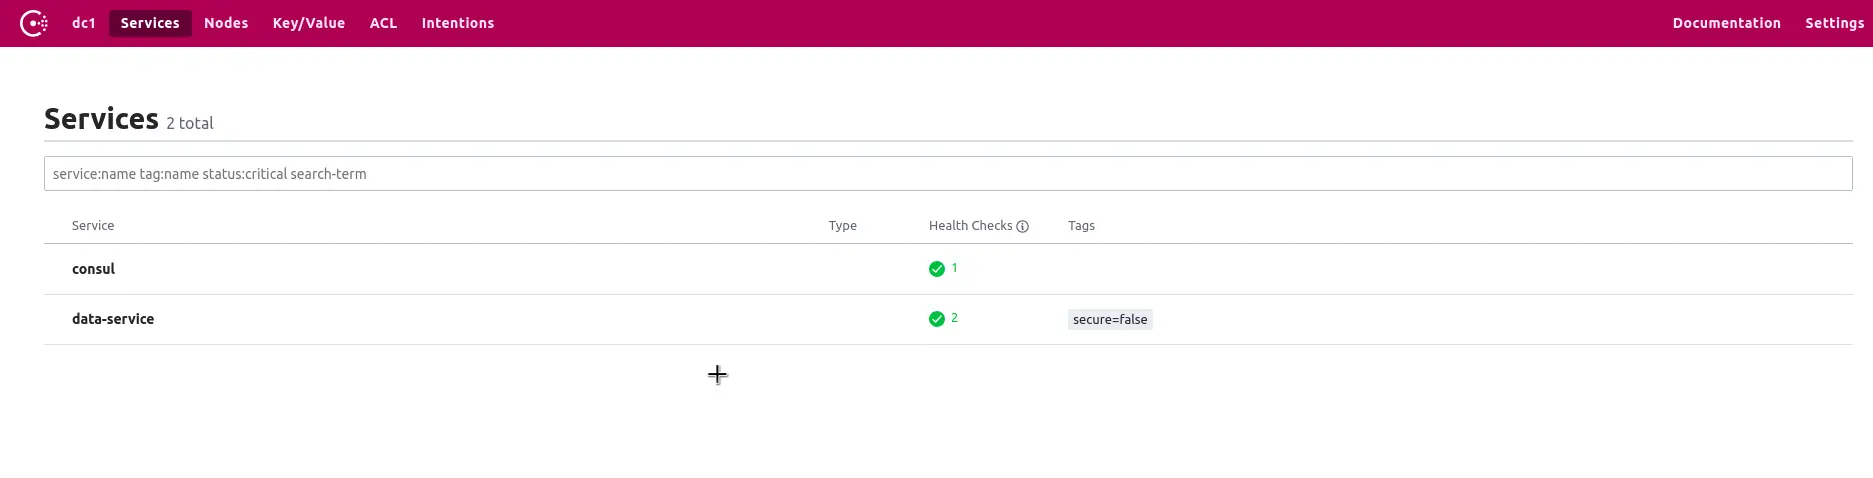
By default, Spring Boot will try to connect to Consul agent at http://localhost:8500. However, as a bare minimum, an application name is required. We can add the application name in the application.properties.
spring.application.name=data-serviceNow, if we start the application and visit the Consul dashboard, we should be able to see our application (data-service) registered with Consul Service Discovery.
Extra Settings for Spring Cloud Consul
As we see, by default, the application tries to connect to Consul agent at localhost:8500. However, if the agent is running on some other location, you need to specify the same in the application.properties using the below parameter.
spring.cloud.consul.host=localhost
spring.cloud.consul.port=8500
Another useful property is when we are running multiple instances of our service application. We would want each instance to be registered separately.
By default, a service is registered in Consul with identifier as “${spring.application.name}:${profiles}:${port}”.
To customize this identifier, we can modify another property as below:
spring.cloud.consul.discovery.instanceid=${spring.application.name}:${random.value}If we start the application again, we would be able to see our data-service registered with a random value at the end.
Enabling Service Discovery
Our application is successfully registered in Consul. But how can clients find the service end-points?
To do so, we need a Discovery client service to get a running and available service from Consul.
Spring Boot provides a Discovery Client API for this. We can enable it using @EnableDiscoveryClient annotation.
See below code for reference:
@SpringBootApplication
@EnableDiscoveryClient
public class DataServiceApplication {

	public static void main(String[] args) {
		SpringApplication.run(DataServiceApplication.class, args);
	}

}

@RestController
class ServiceDiscoveryController{

	@Autowired
	private DiscoveryClient discoveryClient;


	@GetMapping("/services")
	public Optional<URI> serviceURL(){
		return discoveryClient.getInstances("data-service")
				.stream()
				.map(instance -> instance.getUri())
				.findFirst();
	}

}
Here, we inject DiscoveryClient instance into a REST Controller class. We also create a dummy end-point that simply uses the DiscoveryClient instance to get all instances of data-service application. Consul basically provides all available application by the name data-service.
Distributed or Externalized Configuration
Another important application for Spring Cloud Consul is the ability to have distributed or externalized configuration. This is particularly useful if you wish to have all microservices use the same configuration.
We have already included the required dependency in the POM.xml file. Now, we simply need to move the application.properties to bootstrap.properties because Spring loads bootstrap.properties first.
Next, we need the below property to the bootstrap.properties file.
spring.cloud.consul.config.enabled=trueLastly, we have to actually add the configuration property items to the Spring Cloud Consul Dashboard.
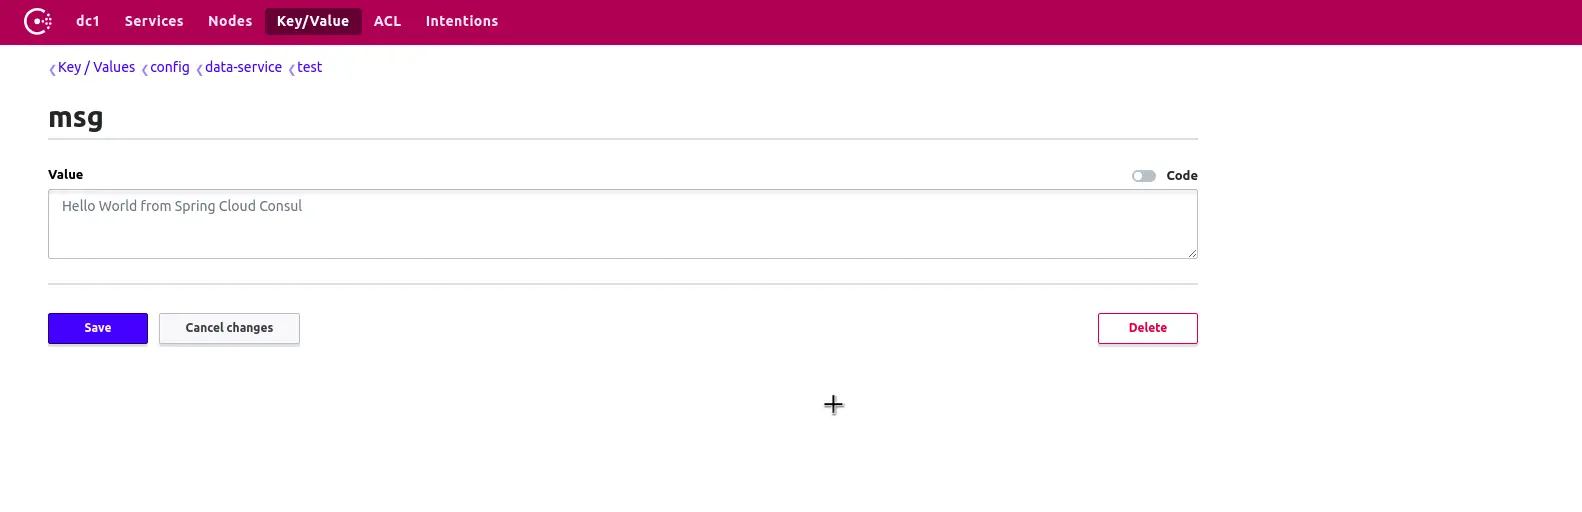
Spring Cloud Consul Config will look for properties in the Consul agent at the “/config/{spring.application.name}”. Therefore, if create a property such as test.msg in the data-service application, we would need to create it in the path “/config/data-service/test/msg”.
Here, msg is the key. And the value of the key is simply “Hello World from Spring Cloud Consul”.
To test things, we also create another end-point in our application as below:
@RestController
class ExternalConfigurationController{

	@Value("${test.msg}")
	String value;

	@GetMapping("/getConfigValue")
	public String getConfigValue(){
		return value;
	}

}
If we now start up the Spring Boot application and hit the end-point http://localhost:8080/getConfigValue, we will see our Hello World message displayed.
Health Checks
The Consul agent also periodically checks the health of the services.
By default, Spring Boot implements a health end-point if we include actuator on the class path. This health end-point returns status code 200 if the application is up and running.
If we wish to customize this end-point and provide our own health end-point, we can tweak the below properties in the bootstrap.properties file.
spring.cloud.consul.discovery.healthCheckPath=/custom-health-check
spring.cloud.consul.discovery.healthCheckInterval=10s
The first property points to a new end-point that should be implemented in the application. The second is used to tweak the interval at which Consul should check the health.
Note that the end-point specified for health check to return status code 200. Only then will the service be considered as UP.
Conclusion
So that is all about Spring Cloud Consul. The code for this post is available on Github for reference.
In this post, we looked at the various uses of Spring Cloud Consul such as Service Registration, Discovery, Externalized Configuration and Health Checks. In other words, Spring Cloud Consul provides a robust alternative to other Spring Cloud projects such as Eureka and Cloud Config.
If you have any questions or queries about this post, sound off in the comments section below.
Happy Learning!!
0 Comments