In Spring Boot JPA Auditing Example, we will look at how Spring Data JPA helps managing audit information. Using the AuditorAware Interface, Spring Data JPA provides mechanism for capturing audit information. Such a functionality is quite important while building Spring Boot Microservices for production usage.
Previously, we have also seen how Spring Boot Hibernate Envers integration helps create audit tables to track changes.
With JPA Auditing, we can take the auditing of our entities to the next level. Basically, Spring Data JPA Auditing automatically captures last updated and created timestamps. It can also tie up with Spring Security to track the user details.
So, let’s start implementing Spring Boot JPA Auditing Example.
1. The Dependencies
From a dependency point of view, we only need the Spring Boot Starter Data JPA dependency and the relevant database dependency.
For example, if we are using H2 Database along with Spring Data JPA, the below dependencies will be enough.
Below are the dependencies in the POM.xml file.
<dependency>
		<groupId>org.springframework.boot</groupId>
		<artifactId>spring-boot-starter-data-jpa</artifactId>
</dependency>
<dependency>
		<groupId>com.h2database</groupId>
		<artifactId>h2</artifactId>
		<scope>runtime</scope>
</dependency>
2. Defining the Auditable Abstract Class
To make it easy to share the audit functionality across multiple entities, it is a good practice to declare a single Auditable class.
Basically, this class will have the necessary attributes for audit purposes. For example, the Creation Date, Last Modified Date, Created By User and Last Modified By User.
import org.springframework.data.annotation.CreatedBy;
import org.springframework.data.annotation.CreatedDate;
import org.springframework.data.annotation.LastModifiedBy;
import org.springframework.data.annotation.LastModifiedDate;
import org.springframework.data.jpa.domain.support.AuditingEntityListener;

import javax.persistence.EntityListeners;
import javax.persistence.MappedSuperclass;
import javax.persistence.Temporal;
import javax.persistence.TemporalType;
import java.util.Date;

@MappedSuperclass
@EntityListeners(AuditingEntityListener.class)
public abstract class Auditable<U> {

    @CreatedBy
    protected U createdBy;

    @CreatedDate
    @Temporal(TemporalType.TIMESTAMP)
    protected Date creationDate;

    @LastModifiedBy
    protected U lastModifiedBy;

    @LastModifiedDate
    @Temporal(TemporalType.TIMESTAMP)
    protected Date lastModifiedDate;

}
If you see above, we have used annotations such as @CreatedBy, @CreatedDate, @LastModifiedBy and @LastModifiedDate for the attributes. These annotations are provided by Spring Data JPA.
Also, we annotate the entire class with @EntityListeners annotation. This annotation basically enables JPA entity listener so that changes to the entity values can be tracked.
3. Extending the Entity Class with Auditable
Next step is extend the actual class or entity we want to put under audit with the Auditable class.
Below is how we do it.
import org.hibernate.envers.Audited;

import javax.persistence.Entity;
import javax.persistence.Id;
import javax.persistence.Table;
import java.util.UUID;

@Entity
@Table(name = "vehicle")
@Audited
public class Vehicle extends Auditable<String> {

    @Id
    private UUID id;

    private String vehicleIdentityNumber;

    private String make;

    private String model;

    private String status;

    public Vehicle() {
    }

    public UUID getId() {
        return id;
    }

    public void setId(UUID id) {
        this.id = id;
    }

    public String getVehicleIdentityNumber() {
        return vehicleIdentityNumber;
    }

    public void setVehicleIdentityNumber(String vehicleIdentityNumber) {
        this.vehicleIdentityNumber = vehicleIdentityNumber;
    }

    public String getMake() {
        return make;
    }

    public void setMake(String make) {
        this.make = make;
    }

    public String getModel() {
        return model;
    }

    public void setModel(String model) {
        this.model = model;
    }

    public String getStatus() {
        return status;
    }

    public void setStatus(String status) {
        this.status = status;
    }

    @Override
    public String toString() {
        return "Vehicle{" +
                "id=" + id +
                ", vehicleIdentityNumber='" + vehicleIdentityNumber + '\'' +
                ", make='" + make + '\'' +
                ", model='" + model + '\'' +
                ", status='" + status + '\'' +
                '}';
    }
}
We simply use the extends keyword to extend the Vehicle class with the Auditable class. Here, we also have the @Audited annotation. This is related to Hibernate Envers to enable history tables for our entities automatically. To know more details about it, you can refer to setting up Hibernate Envers with Spring Boot.
4. Enabling JPA Auditing
Lastly, to enable JPA Auditing in our application, we need to write some configuration classes.
See below code snippet for the same.
import com.progressivecoder.demo.springbootstarter.entities.AuditorAwareImpl;
import org.springframework.context.annotation.Bean;
import org.springframework.context.annotation.Configuration;
import org.springframework.data.domain.AuditorAware;
import org.springframework.data.jpa.repository.config.EnableJpaAuditing;

@Configuration
@EnableJpaAuditing(auditorAwareRef = "auditorAware")
public class PersistenceConfig {

    @Bean
    public AuditorAware<String> auditorAware(){
        return new AuditorAwareImpl();
    }
}
Basically, here we use the annotation @EnableJpaAuditing and also specify that it will be using an instance of AuditorAware interface.
We also specify a Bean for AuditorAware interface type. At the time of application startup, an instance of AuditorAware will be wired up in the application context.
The implementation of the AuditorAware interface is as follows:
import org.springframework.data.domain.AuditorAware;

import java.util.Optional;

public class AuditorAwareImpl implements AuditorAware<String> {

    @Override
    public Optional<String> getCurrentAuditor(){
        return Optional.of("Admin");
    }
}
Here, we are simply returning Admin as the user id but in a more real example, this can also be wired up with Spring Security to return the actual user.
5. Testing the Spring Boot JPA Auditing Example
Now, we can actually test our application and check if audit is happening successfully. We have already created RESTful APIs for our application in an earlier post. If you wish to know about that, you can refer to creating RESTful API using Spring Boot.
To do so, we can start our application using the below maven command.
clean package spring-boot:runOnce the application starts up, we can visit the Swagger UI page of our application. It is accessible at http://localhost:8080/swagger-ui.html.
We have already configured Swagger to work with our application. If you want more details about Swagger, you can refer to setting up Swagger 2 with Spring Boot.
To test our application, we can first create a new vehicle using POST method already created in our sample application.
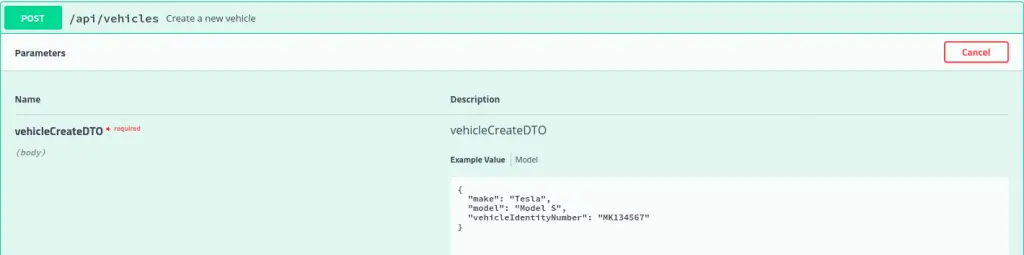
Once the vehicle record is created, we can check in the H2 database at http://localhost:8080/h2-console.

We can see that a new record has been created with a CREATION_DATE and LAST_MODIFIED_DATE. Also, the CREATED_BY and LAST_MODIFIED_BY fields are having the value of Admin.
Next, we can update the data using the PUT operation.
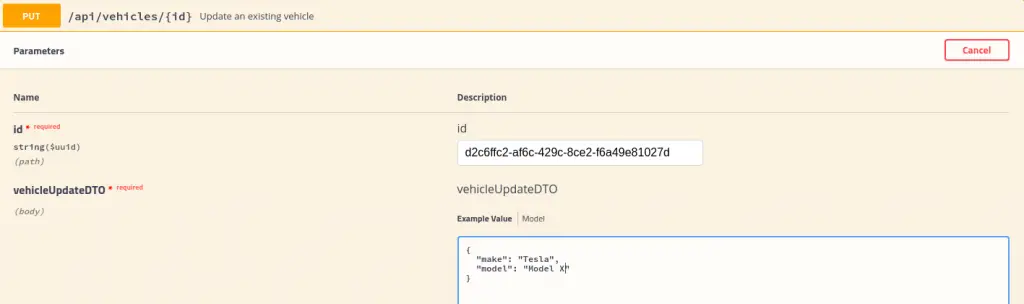
Once the update is successful, we can check the H2 database again.

If you see closely here, the LAST_MODIFIED_DATE is different to the CREATION_DATE now indicating that the record has been updated. Basically, the auditing functionality is now working as expected.
Conclusion
With this, we have successfully completed our Spring Boot JPA Auditing example. The auditing functionality that we built is working as expected. Also, there is an option to enhance it further to wire it up with Spring Security.
The code for this post is available on Github for reference.
If you have any comments or queries, write in the comments section below.
Happy Learning!
9 Comments
Student · April 30, 2020 at 8:17 am
Hi Saurabh,
thanks for the article.
How do you unit test? How to unit test that the values have been set?
Saurabh Dashora · May 6, 2020 at 4:47 am
Hi,
Generally, we don’t write unit tests with database integration. Unit tests should avoid connecting to databases and so on.
If you really wish to test database integration, you can use some BDD frameworks such as Cucumber to write your behavior driven tests.
Gaurav Gupta · August 10, 2020 at 4:18 pm
Hey Saurabh, really nice article. HAd a doubt though, where/how can I check the audit history of the documen?
Saurabh Dashora · August 11, 2020 at 1:59 am
Hi Gaurav, when you use Hibernate Envers, Spring will automatically create a table named_AUD where you can find the entire audit history of the entity/document. This table would also be available along with the normal table for storing the current info.
shivani · August 13, 2020 at 5:51 am
good that helps me
Fernando · October 28, 2020 at 1:29 am
Nice article.
Don’t we have a built-in JPA method? I mean, this solution is so tied to Hibernate framework.
Saurabh Dashora · October 28, 2020 at 2:20 am
Hi Fernando…thanks for the nice feedback!
This specific example was based on Spring Data JPA using Hibernate. However, I believe you can use JPA itself for auditing by using EntityListeners and then implementing lifecycle methods such as @PrePersist, @PreUpdate and so on. I don’t have an example for that but you can probably find something in the documentation.
Darshan · July 14, 2023 at 3:31 pm
Thanks Saurabh for the nice article!!
Saurabh Dashora · July 18, 2023 at 1:00 am
Welcome Darshan! Glad to know it helped…