Spring Data MongoDB project allows easy integration with MongoDB document database. This project is also a part of the overall Spring Data family of projects.
Just like with Spring Data JPA, the Spring Data MongoDB provides repository interfaces. This feature makes Spring Boot MongoDB integration extremely easy.
MongoDB is a NoSQL database and uses JSON-like documents to store data. Basically, it is a document-oriented database.
In this post, we will create a RESTful API using Spring Data MongoDB and Spring Boot. Basically, we will implement REST end-points to Read, Write, Update and Delete data from a MongoDB database. In other words, all the CRUD operations.
If you wish to know more about Spring Boot, you can check out the detailed post on Spring Boot Microservices. Otherwise, you can continue with this post where we will implement everything from scratch.
So let’s start.
1. Creating the Spring Data MongoDB project
As a first step, we need to create a Spring Boot project that uses Spring Data MongoDB. This can be easily achieved using https://start.spring.io.
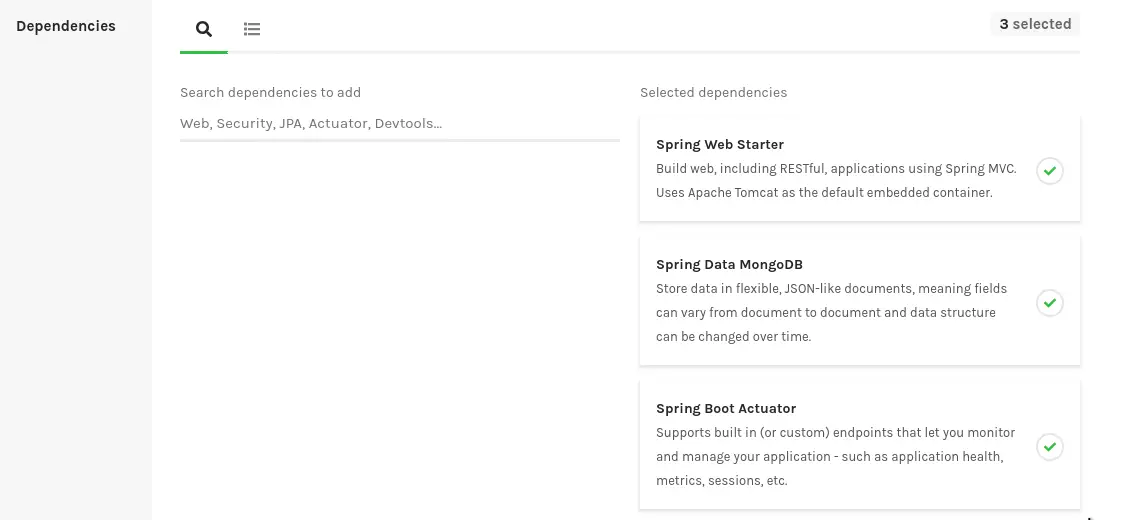
If you see the above screenshot, we are including dependencies such as Spring Web Starter, Spring Data MongoDB and Spring Boot Actuator.
Below are the dependencies in the POM.xml file of our project.
<dependencies>
		<dependency>
			<groupId>org.springframework.boot</groupId>
			<artifactId>spring-boot-starter-actuator</artifactId>
		</dependency>
		<dependency>
			<groupId>org.springframework.boot</groupId>
			<artifactId>spring-boot-starter-data-mongodb</artifactId>
		</dependency>
		<dependency>
			<groupId>org.springframework.boot</groupId>
			<artifactId>spring-boot-starter-web</artifactId>
		</dependency>

		<dependency>
			<groupId>org.springframework.boot</groupId>
			<artifactId>spring-boot-starter-test</artifactId>
			<scope>test</scope>
		</dependency>
</dependencies>
Basically, here Spring Data MongoDB is the project that provides integration with the MongoDB document database.
2. Creating the MongoDB Document Entity
Next, we will create the entity. An entity is nothing but a Collection in MongoDB.
public class Vehicle {

    @Id
    private UUID _id;

    private String make;
    private String model;
    private String registrationNumber;

    public Vehicle() {
    }

    public Vehicle(String make, String model, String registrationNumber) {
        this._id = UUID.randomUUID();
        this.make = make;
        this.model = model;
        this.registrationNumber = registrationNumber;
    }

    public UUID get_id() {
        return _id;
    }

    public String getMake() {
        return make;
    }

    public String getModel() {
        return model;
    }

    public String getRegistrationNumber() {
        return registrationNumber;
    }

    public void setMake(String make) {
        this.make = make;
    }

    public void setModel(String model) {
        this.model = model;
    }
}
As you can see in the above snippet, we have created a Vehicle class with a few fields to describe the vehicle. We also have an Id field annotated as @Id.
To interact with this entity, we also declare a Repository interface as below.
import com.progressivecoder.springbootmongodbsampleapp.documents.Vehicle;
import org.springframework.data.mongodb.repository.MongoRepository;

import java.util.UUID;

public interface VehicleRepository extends MongoRepository<Vehicle, UUID> {
}
Note that here we are extending the MongoRepository<Vehicle, UUID> interface. This interface is provided by the Spring Data MongoDB project and we basically parameterize it.
At the time of application startup, Spring will supply the concrete implementation of this repository interface and also wire it up for any other beans that might need an instance of the repository.
3. The DTO Layer
To facilitate our API interfaces, we will create different DTO classes for creating a vehicle and updating a vehicle.
Vehicle Create DTO
public class VehicleCreateDTO {

    private String make;

    private String model;

    private String registrationNumber;

    public String getMake() {
        return make;
    }

    public void setMake(String make) {
        this.make = make;
    }

    public String getModel() {
        return model;
    }

    public void setModel(String model) {
        this.model = model;
    }

    public String getRegistrationNumber() {
        return registrationNumber;
    }

    public void setRegistrationNumber(String registrationNumber) {
        this.registrationNumber = registrationNumber;
    }
}
Then, we create the VehicleUpdateDTO.
public class VehicleUpdateDTO {

    private String make;

    private String model;

    public String getMake() {
        return make;
    }

    public void setMake(String make) {
        this.make = make;
    }

    public String getModel() {
        return model;
    }

    public void setModel(String model) {
        this.model = model;
    }
}
Basically, here we are simply trying to define that we have different interfaces to create and update a vehicle. In our update case, we don’t take Registration Number as input meaning that you can’t update the vehicle’s registration number after it has been created.
Note that this is completely fictitious requirement and it depends on your business case. Here, we are implementing in this approach just for demo purposes.
4. The Service Layer
Once our repository interface and our DTO classes are defined, we can now create the Service layer. This service layer will simply take care of read, write, update and delete operations for our Vehicle collection.
Since we want to follow SOLID principles, we will first declare an interface for our service.
iimport com.progressivecoder.springbootmongodbsampleapp.documents.Vehicle;
import com.progressivecoder.springbootmongodbsampleapp.dto.VehicleCreateDTO;
import com.progressivecoder.springbootmongodbsampleapp.dto.VehicleUpdateDTO;

import java.util.UUID;

public interface VehicleService {

    public Vehicle getVehicleById(UUID id);
    public Vehicle createVehicle(VehicleCreateDTO vehicleCreateDTO);
    public Vehicle updateVehicle(VehicleUpdateDTO vehicleUpdateDTO, UUID id);
    public Vehicle deleteVehicleById(UUID id);
}
Here, we only define the methods we want to implement.
Next, we implement this interface as below.
import com.mongodb.MongoException;
import com.progressivecoder.springbootmongodbsampleapp.documents.Vehicle;
import com.progressivecoder.springbootmongodbsampleapp.dto.VehicleCreateDTO;
import com.progressivecoder.springbootmongodbsampleapp.dto.VehicleUpdateDTO;
import com.progressivecoder.springbootmongodbsampleapp.repositories.VehicleRepository;
import org.springframework.beans.factory.annotation.Autowired;
import org.springframework.stereotype.Service;

import java.util.UUID;

@Service
public class VehicleServiceImpl implements VehicleService {

    @Autowired
    private VehicleRepository vehicleRepository;

    @Override
    public Vehicle getVehicleById(UUID id) {

        if (vehicleRepository.findById(id).isPresent())
            return vehicleRepository.findById(id).get();
        else
            throw new MongoException("Record not Found");
    }

    @Override
    public Vehicle createVehicle(VehicleCreateDTO vehicleCreateDTO) {
        Vehicle vehicle = new Vehicle(vehicleCreateDTO.getMake(), vehicleCreateDTO.getModel(), vehicleCreateDTO.getRegistrationNumber());

        return vehicleRepository.save(vehicle);
    }

    @Override
    public Vehicle updateVehicle(VehicleUpdateDTO vehicleUpdateDTO, UUID id) {
        if (vehicleRepository.findById(id).isPresent()){
            Vehicle existingVehicle = vehicleRepository.findById(id).get();

            existingVehicle.setMake(vehicleUpdateDTO.getMake());
            existingVehicle.setModel(vehicleUpdateDTO.getModel());

            return vehicleRepository.save(existingVehicle);
        }
        else
            throw new MongoException("Record not found");
    }

    @Override
    public Vehicle deleteVehicleById(UUID id) {
        if (vehicleRepository.findById(id).isPresent()){
            Vehicle vehicle = vehicleRepository.findById(id).get();
            vehicleRepository.delete(vehicle);
            return vehicle;
        }
        else
            throw new MongoException("Record not found");
    }
}
Basically, here we are auto-wiring an instance of the VehicleRepository. Then, we are implementing the CRUD operations one-by-one as defined in the Vehicle service.
5. Creating the REST Controllers
Now, we can create the Controller class to expose our REST end-points.
import com.progressivecoder.springbootmongodbsampleapp.documents.Vehicle;
import com.progressivecoder.springbootmongodbsampleapp.dto.VehicleCreateDTO;
import com.progressivecoder.springbootmongodbsampleapp.dto.VehicleUpdateDTO;
import com.progressivecoder.springbootmongodbsampleapp.services.VehicleService;
import org.springframework.beans.factory.annotation.Autowired;
import org.springframework.http.HttpStatus;
import org.springframework.http.ResponseEntity;
import org.springframework.web.bind.annotation.*;

import java.util.UUID;

@RestController
@RequestMapping(value = "/api")
public class VehicleController {

    @Autowired
    private VehicleService vehicleService;

    @GetMapping(value = "/vehicles/{id}")
    @ResponseStatus(HttpStatus.OK)
    public ResponseEntity<Vehicle> getVehicle(@PathVariable(value = "id") UUID id){
        return new ResponseEntity<>(vehicleService.getVehicleById(id), HttpStatus.OK);
    }

    @PostMapping(value = "/vehicles")
    @ResponseStatus(HttpStatus.CREATED)
    public ResponseEntity<Vehicle> createVehicle(@RequestBody VehicleCreateDTO vehicleCreateDTO){
        return new ResponseEntity<>(vehicleService.createVehicle(vehicleCreateDTO), HttpStatus.CREATED);
    }

    @PutMapping(value = "/vehicles/{id}")
    @ResponseStatus(HttpStatus.OK)
    public ResponseEntity<Vehicle> updateVehicle(@RequestBody VehicleUpdateDTO vehicleUpdateDTO, @PathVariable(value = "id") UUID id){
        return new ResponseEntity<>(vehicleService.updateVehicle(vehicleUpdateDTO, id), HttpStatus.OK);
    }

    @DeleteMapping(value = "/vehicles/{id}")
    @ResponseStatus(HttpStatus.OK)
    public ResponseEntity<Vehicle> deleteVehicle(@PathVariable(value="id") UUID id){
        return new ResponseEntity<>(vehicleService.deleteVehicleById(id), HttpStatus.OK);
    }
}
Basically, we are creating 4 end-points supporting the CRUD operations on the Vehicle entity. To achieve the same, we simply auto-wire an instance of the VehicleService. Next, we also implement GET, POST, PUT and DELETE operations.
These are typical HTTP methods. However, if you wish to have more information about them, refer to a detailed post about creating REST API using Spring Boot and implementing insert and update operations using RESTful API.
6. Enabling Swagger
In order to make our life easy while testing these end-points, we also enable Swagger for our application.
To do so, we first include the Swagger dependencies in our POM.xml file.
<dependency>
			<groupId>io.springfox</groupId>
			<artifactId>springfox-swagger2</artifactId>
			<version>2.9.2</version>
</dependency>
<dependency>
			<groupId>io.springfox</groupId>
			<artifactId>springfox-swagger-ui</artifactId>
			<version>2.9.2</version>
</dependency>
Next, we also declare a class for our Swagger configuration.
import org.springframework.context.annotation.Bean;
import org.springframework.context.annotation.Configuration;
import springfox.documentation.builders.PathSelectors;
import springfox.documentation.builders.RequestHandlerSelectors;
import springfox.documentation.spi.DocumentationType;
import springfox.documentation.spring.web.plugins.Docket;
import springfox.documentation.swagger2.annotations.EnableSwagger2;

@Configuration
@EnableSwagger2
public class SwaggerConfig {

    @Bean
    public Docket api() {
        return new Docket(DocumentationType.SWAGGER_2)
                .select()
                .apis(RequestHandlerSelectors.basePackage("com.progressivecoder.springbootmongodbsampleapp.controllers"))
                .paths(PathSelectors.any())
                .build();
    }

}
Basically, this is a bare-bones configuration to enable Swagger for our application. However, if you wish to have more detailed view on Swagger, you can refer to setting up Swagger with Spring Boot and Advanced Swagger Configuration with Spring Boot.
7. Setting up MongoDB Database
The best way to quickly setup a local MongoDB database is by using Docker. We can simply start up a MongoDB Docker container using the below command.
docker run -it -d mongoNext, we need to find out how to connect to the newly created container. We can check the details of the running containers by executing the below command.
docker ps
Here, we can basically check the name of the running container. In our case, it is called angry_wescoff.
Next, we can spin up another container to act as a client and connect to this container. To do so, we can execute the below command.

Next, we need to execute the env command in the bash shell that opens up. We should be able to see details as below.
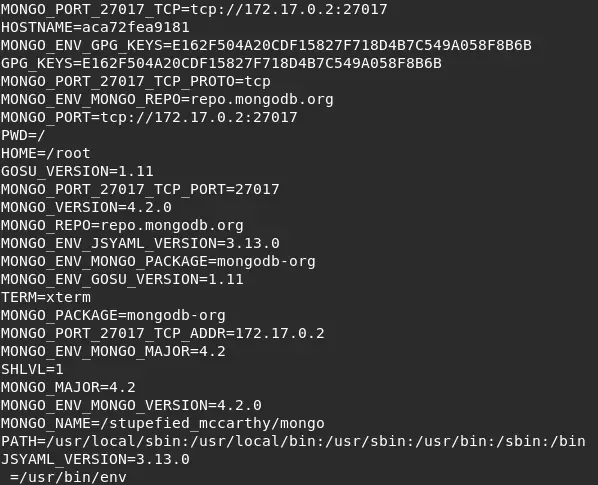
Here, we can note down the MONGO_PORT_27017_TCP value. Basically, this variable contains the value of the IP address and the port that can be used to connect to our MongoDB container.
8. Spring Data MongoDB Connection Parameters
Lastly, we need to tell our Spring Boot application on how to connect to the running MongoDB instance. This step will basically aid Spring Data MongoDB in acquiring the connection.
To do so, we can update the application.properties file as below.
Here, spring.application.name is just the name of the application.
The next property spring.data.mongodb.host is the IP address of the MongoDB container.
The spring.data.mongodb.port is the port number.
Lastly, the spring.data.mongodb.database is used to specify the name of the database. In case the database is not present, Spring Data MongoDB will automatically create the same for us when the application starts up.
With this, we are basically done with our application code. We can simply start up our application using the below command.
clean package spring-boot:runThe application should start up and connect to the MongoDB instance running in the Docker container.
9. Testing the Spring Boot MongoDB Application
Now that our Spring Boot MongoDB application is up and running, we can test the REST end-points. We already wired up Swagger and Swagger UI to our application that will help us test the end-points easily.
To test the end-points, we can visit http://localhost:8080/swagger-ui.html
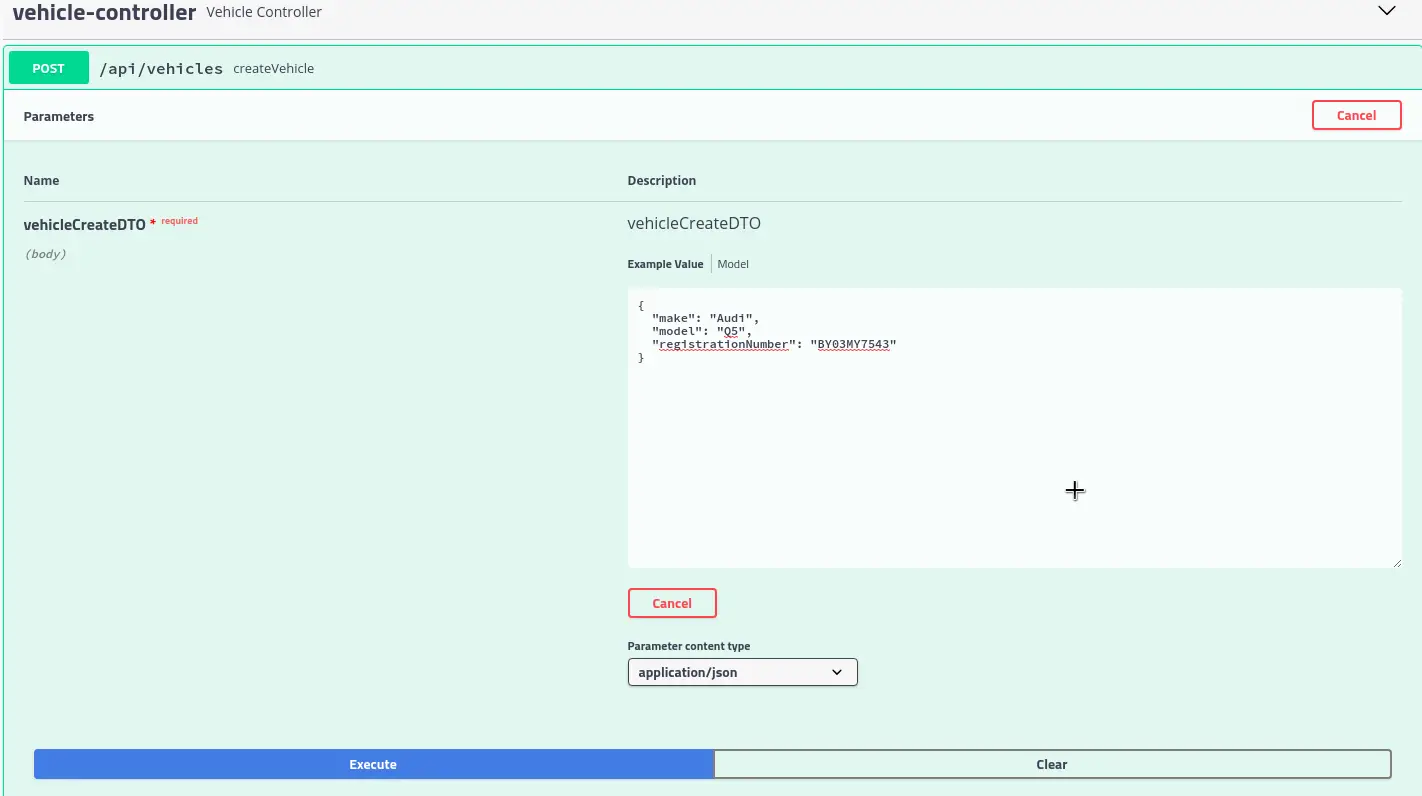
We will first start with the POST endpoint that will allow us to create a new vehicle.
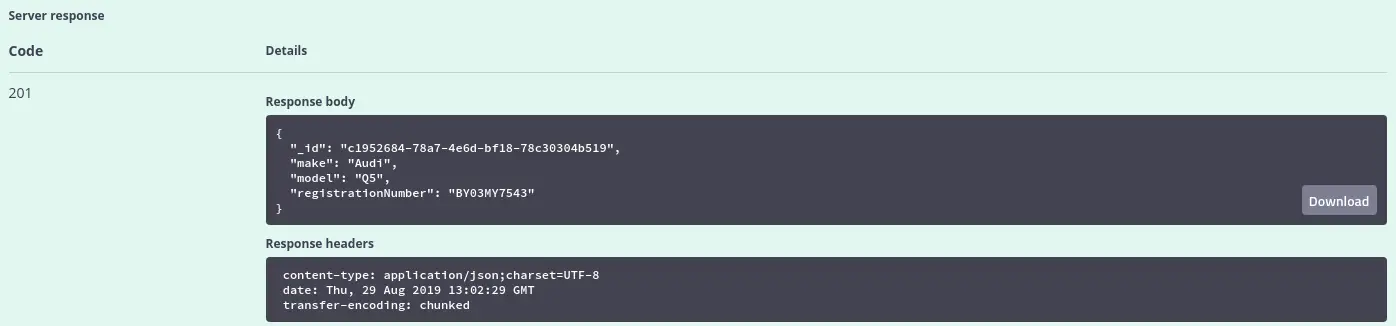
On clicking Execute, the record will be inserted and we will get a response back as follows.
We can also get the data for the UUID by using the GET end-point as below.
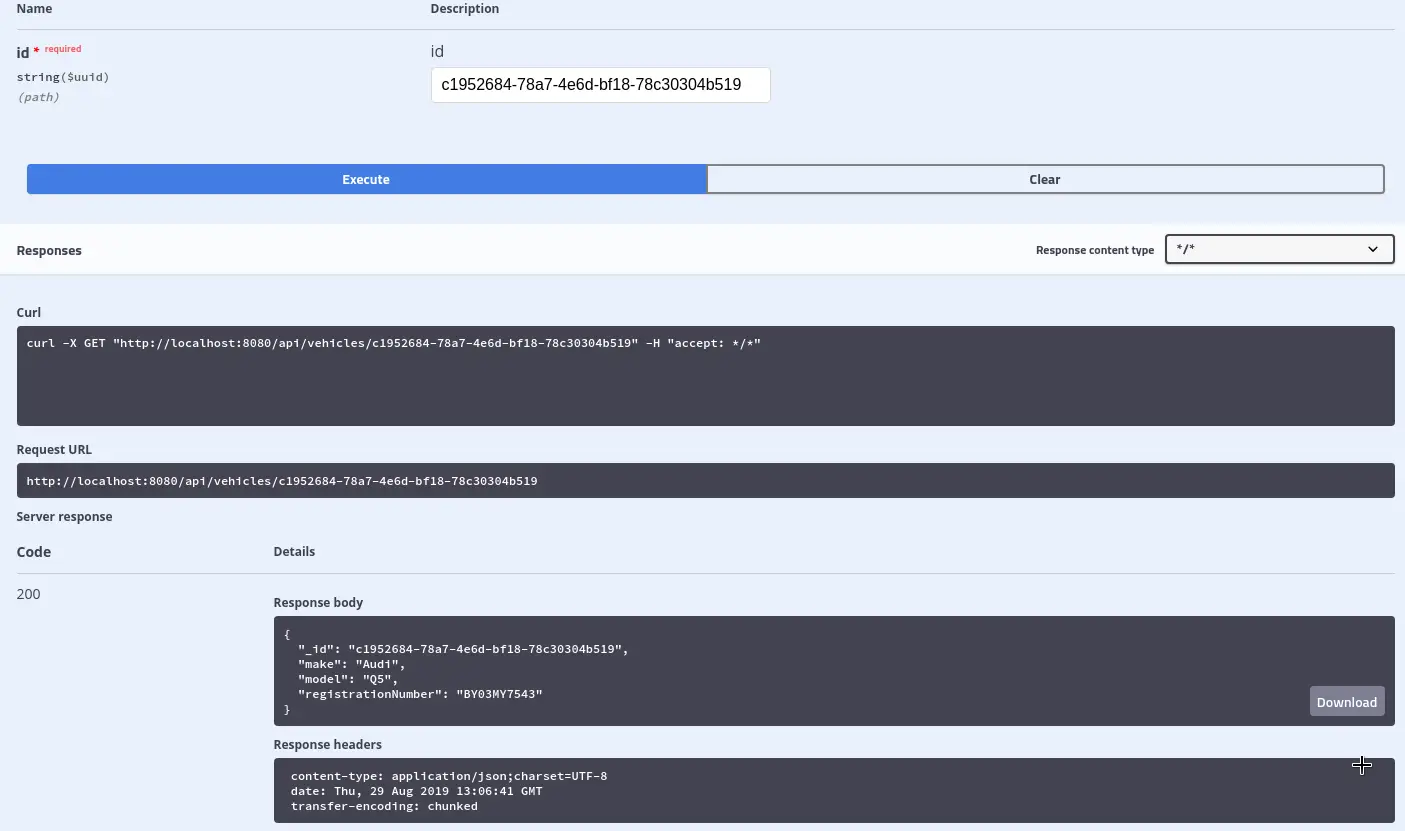
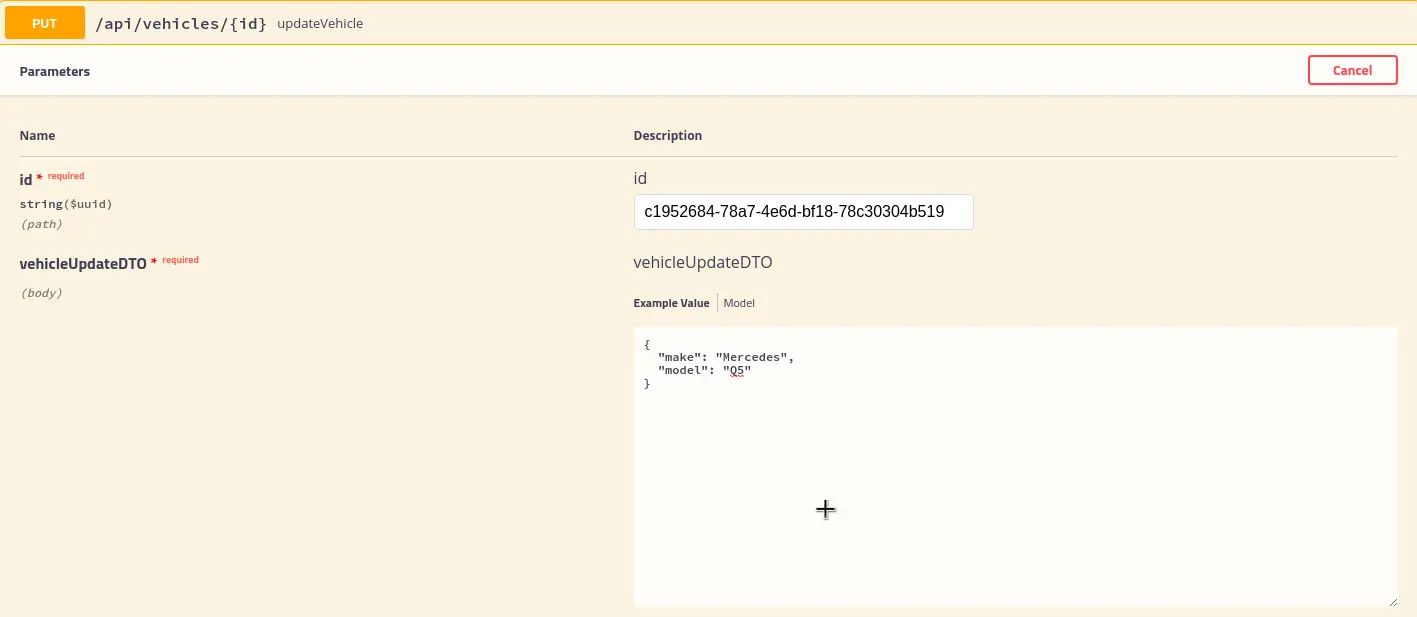
Next, we can also issue a PUT request to update the Vehicle detail by using the PUT end-point.
Once executed, we can check the updated data by issuing another GET request.

Lastly, we can also delete the record by using the DELETE end-point.
Conclusion
With this, we have basically implemented a RESTful API using Spring Data MongoDB.
In this Spring Boot MongoDB application, we have successfully implemented the Create, Read, Update and Delete operations. We have utilized a MongoDB Docker container to act as our local MongoDB database and connected our Spring Boot application to the same.
The code for this post is available on Github for reference.
If you have any queries or comments, you can put it in the comments section below.
Happy Learning!
0 Comments