Docker Multi-Stage build process is a great approach to create production-ready Docker images. In this particular post, we will leverage Docker Multi-Stage build to build and run a React application on Nginx server.
In case you are a beginner to Docker, I would strongly recommend understanding the basics of Docker.
Another interesting post for understanding how Docker works could be creating a Dockerfile for NodeJS application from scratch.
If you already know the basics of Docker, then you can simply continue as we will look at each step in great detail.
1. Why Docker Multi Stage Build?
Docker Multi Stage builds are a relatively new feature available with Docker version 17.05 onward. Multi Stage builds allow us to put multiple FROM statements in the same Dockerfile.
Each FROM instruction can use a different base image. Each of the FROM statements marks the beginning of a new phase in the Docker build process. We can also copy build artifacts from one stage to another stage. Also, we can discard what we don’t need.
Basically, this is a very useful feature in situations where we don’t want the build dependencies to be copied over to our final image. In other words, Docker Multi Stage builds helps us make images that are smaller.
2. Difference between Development and Production Process
To demonstrate Docker multistage build, we will take the example of a React application.
The below illustration shows what needs to be done to successfully build and run a React application.
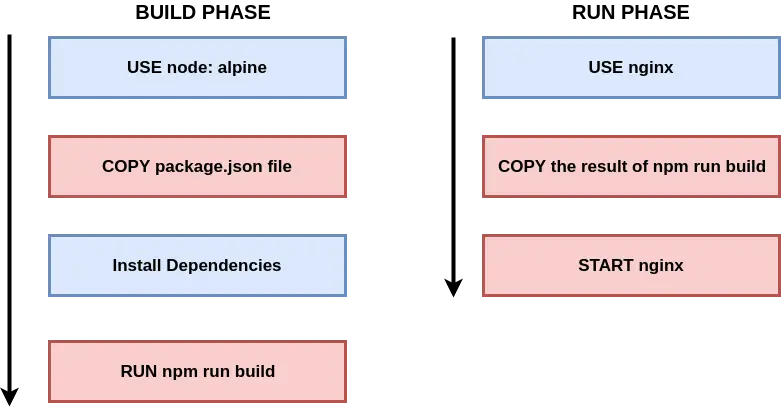
If you see above, the entire process is divided into the build phase and the run phase.
In the build stage, we start off with the node:alpine base image. Basically, we are using NodeJS to install dependencies. Lastly, we use npm run build to build the application for production purpose.
At this point, our build stage is over. Basically, we can now discard the artifacts from build phase and start the run stage. For the run stage, we use nginx as the base image. Then, we copy the result of npm run build command in the build stage to the nginx server directory. At this point all the other files and folders that were generated during the build phase is marooned over and dropped from the final image. Only the build artifacts (such as the index.html and the main.js file) are copied over to the final image.
In the last step, we can start nginx to start serving our React application.
3. Generating React Application
Now, we will start the process of generating a simple React application.
To get started, we will first install a npm package known as create-react-app. Basically, this package allows us to generate a boiler-plate ReactJS application. We will install the package globally using the below command.
npm install -g create-react-appOnce the package is successfully installed, we can use it to generate the project. To do so, navigate to a location in your local machine where you want to save the project and execute the below command.
create-react-app docker-react-appThis will create a project named docker-react-app. Once that is done, you can use the code editor of your choice to open the project. I personally prefer Visual Studio Code for NodeJS and React applications.
4. Create Multi Stage Dockerfile
We can now create the Dockerfile to support our Multi Stage Docker build process. Note here that the Dockerfile needs to be created in the root folder of our project.
Below is the project directory structure for reference. Note the Dockerfile location that is placed in the root of the project.
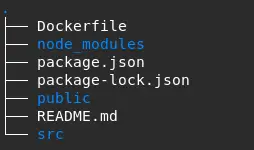
Next, add the below contents to the Dockerfile.
#Build Stage Start

#Specify a base image
FROM node:alpine as builder

#Specify a working directory
WORKDIR '/app'

#Copy the dependencies file
COPY package.json .

#Install dependencies
RUN npm install

#Copy remaining files
COPY . .

#Build the project for production
RUN npm run build

#Run Stage Start
FROM nginx

#Copy production build files from builder phase to nginx
COPY --from=builder /app/build /usr/share/nginx/html
Below is a description of the two stages in the Dockerfile.
The Build Stage
STEP 1 – We start with the node:alpine image as the base image. We also designate the stage with the tag named builder. This will help us reference the stage later in the Dockerfile.
STEP 2 – Next, we specify a working directory for our application. This working directory is the place where our built artifacts will be created.
STEP 3 – We now copy over the package.json file to the working directory. This file is required for npm to install all the required dependencies. Note that by only copying the package.json file, we ensure that for subsequent build due to code changes, we won’t invalidate the docker image cache.
STEP 4 – In the next step, we install the dependencies using npm install command. This will basically install the node_modules.
STEP 5 – Then, we copy the remaining files over to the working directory. Basically, this includes our actual application code.
STEP 6 – Next, we execute the npm run build command. This command will prepare production-ready build artifacts for our React application. In other words, this command will generate the index.html file and the main.js file that we want to serve to clients.
The Run Stage
STEP 1 – Now we can start the Run stage. To begin, we first use the nginx image as the base image for this stage. Nginx is an extremely popular web-server ideal for serving static files.
STEP 2 – Next, we copy over the build artifacts from the builder stage to the file system required by nginx to serve requests. Note that here we use the reference to the build phase by using the –from=builder tag. We copy the files from the working directory of the build phase i.e. /app/build to /usr/share/nginx/html.
With this we are done with the Dockerfile for Docker Multi-Stage build. An important point to note here is that we don’t need an explicit RUN command from nginx. The nginx base image itself starts up the web-server on port 80.
5. Testing the React Application
We can now test our React application.
To do so, first we will build an image using our Multi Stage Dockerfile using the below command.
docker build -t progressivecoder/docker-react-app .It will take some time in the first iteration because all the dependencies will be downloaded. Once the image is successfully built, we can run it using the below command.
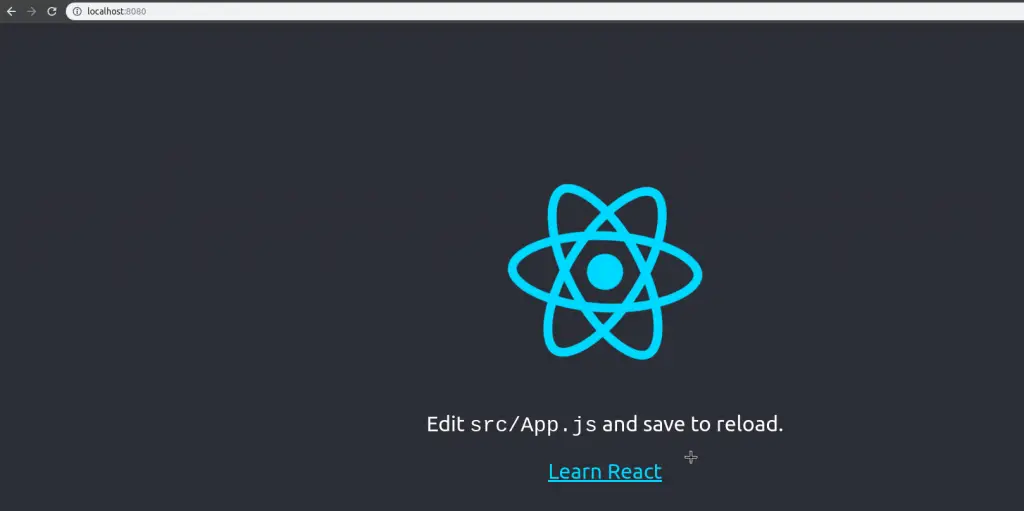
docker run -p 8080:80 progressivecoder/docker-react-appBasically, here we are running the image and also mapping nginx port 80 to 8080 on our local machine.
We won’t see any visible output in the command prompt. This is because nginx doesn’t say much. However, we can visit the browser and access http://localhost:8080. We will see our React application running as below.
Conclusion
With this, we have successfully used Docker Multi Stage build process to run a React application using Nginx server.
Basically, we divided the process of building our Docker image into build and run stages. After building the application in the build stage, we copy over the artifacts to the run stage and drop all that is not required. This reduces the overall size of the image drastically.
The code for this post along with the Dockerfile is available on Github for reference.
If you have any queries or comments, please write in the comments section below.
Happy Learning!
0 Comments