In this post, we will learn how to run a GraphQL API Server using Express GraphQL.
GraphQL is a specification that describes the query language for APIs. If you are totally new to GraphQL, you can go through this detailed post on Introduction to GraphQL.
Basically, it is possible to have various implementations of the specification. You can choose the implementation based on your programming language and overall requirement.
1 – Requirements of a GraphQL API Server
A typical GraphQL API Server needs three things to function:
- A webserver
- An executable GraphQL Schema. In other words, combination of a schema and its resolver
- A request handler to receive incoming requests
There are a lot of things you can add to GraphQL. However, these are the bare minimum requirements to build a working API server that can receive incoming requests and provide appropriate responses.
The official graphql package takes care of the second part. In other words, it can take a string schema and a resolver object and convert it to an executable schema.
For the webserver, we use Express – the popular NodeJS framework for building APIs. The request handler part can be taken care of by using Express GraphQL package. The express-graphql package is basically a middleware for Express that takes care of content negotiation and body parsing.
And that’s all we need to put together a working GraphQL API Server.
2 – Using GraphQL.js
Before we create the server using the express-graphql package, let’s first use the official graphql package to put together a simple GraphQL application.
Create a new project as below:
$ mkdir graphql-demo
$ cd graphql-demo
$ npm init -y
$ npm install graphql --save
The above sequence of commands will prepare our project. Note that you need to have NodeJS installed on your system for the above commands to work.
Next, we create a new file named server.js and place the below code in the file:
var { graphql, buildSchema } = require('graphql');

var schema = buildSchema(`
  type Query {
    hello: String
  }
`);

var rootValue = {
    hello: () => {
      return 'Hello world!';
    },
  };

  graphql({
    schema,
    source: '{ hello }',
    rootValue
  }).then((response) => {
    const obj = JSON.parse(JSON.stringify(response));
    console.log(obj);
  });
We can run this application using the node command and the response will be printed in the console.
$ node server.js
{ data: { hello: 'Hello world!' } }
Let’s go through the code in steps.
STEP – 1
We first create a schema using buildSchema function.
var schema = buildSchema(`
  type Query {
    hello: String
  }
`);
Basically, we are using the GraphQL Schema language. You can read more about schema language in this post on GraphQL Core Concepts.
STEP – 2
Next, we provide resolver function for each query.
var rootValue = {
    hello: () => {
      return 'Hello world!';
    },
  };
For example, when there is a query of type hello, the hello resolver will be invoked.
STEP – 3
Finally, we run the GraphQL query ‘{ hello }‘ and display the response.
graphql({
    schema,
    source: '{ hello }',
    rootValue
  }).then((response) => {
    const obj = JSON.parse(JSON.stringify(response));
    console.log(obj);
  });
Here, the graphql function takes the schema, the query and the resolvers as input. It returns a promise. Once the promise is resolved, we simply display the response object.
3 – The Express GraphQL package
While the approach in previous section worked, it is far from an ideal way to run your GraphQL application. You cannot expect queries to be hard-coded and the client to execute your code every time using the node command.
Basically, we need a server that can listen to incoming requests.
To do so, let’s create a new application as below:
$ mkdir graphql-express-demo
$ cd graphql-express-demo
$ npm init -y
$ npm install express express-graphql graphql --save
Basically, we create a new project and install the three packages. First is the express package (for the webserver). Second is the express-graphql middleware. Third is the official graphql package.
We can now create a new file named server.js and place the below code in that file:
var express = require('express');
var { graphqlHTTP } = require('express-graphql');
var { buildSchema } = require('graphql')

var schema = buildSchema(`
    type Query {
        hello: String
    } `)

var root = {
    hello: () => {
        return "Hello, World"
    },
}

var app = express();

app.use("/graphql", graphqlHTTP({
    schema: schema,
    rootValue: root,
    graphiql: true
}));

app.listen(4000);

console.log('GraphQL API server available at http://localhost:4000/graphql');
Let’s walk through the various blocks of the above code for better understanding.
STEP – 1
First, we use the buildSchema function to create a GraphQL schema.
var schema = buildSchema(`
    type Query {
        hello: String
    } `)
This is similar to the previous section.
STEP – 2
The second step is also the same where we define the resolvers for the query types.
var root = {
    hello: () => {
        return "Hello, World"
    },
}
Here, we return the hello message when the query with type hello is received.
STEP – 3
This is where the magic of Express happens.
var app = express();

app.use("/graphql", graphqlHTTP({
    schema: schema,
    rootValue: root,
    graphiql: true
}));

app.listen(4000);

console.log('GraphQL API server available at http://localhost:4000/graphql');
We create an express application. Then, instead of running a GraphQL query using the graphql function, we use graphqlHTTP (from express-graphql package) to mount the API server on the /graphql endpoint.
In simple terms, when the server receives a query on the /graphql endpoint, the express-graphql package uses the schema and the resolver to provide a response.
We start the server on port 4000.
Since, we also set the property graphiql to true in the graphqlHTTP configuration, we get a graphical user interface to play around with our queries. This interface can be accessed on http://localhost:4000/graphql.
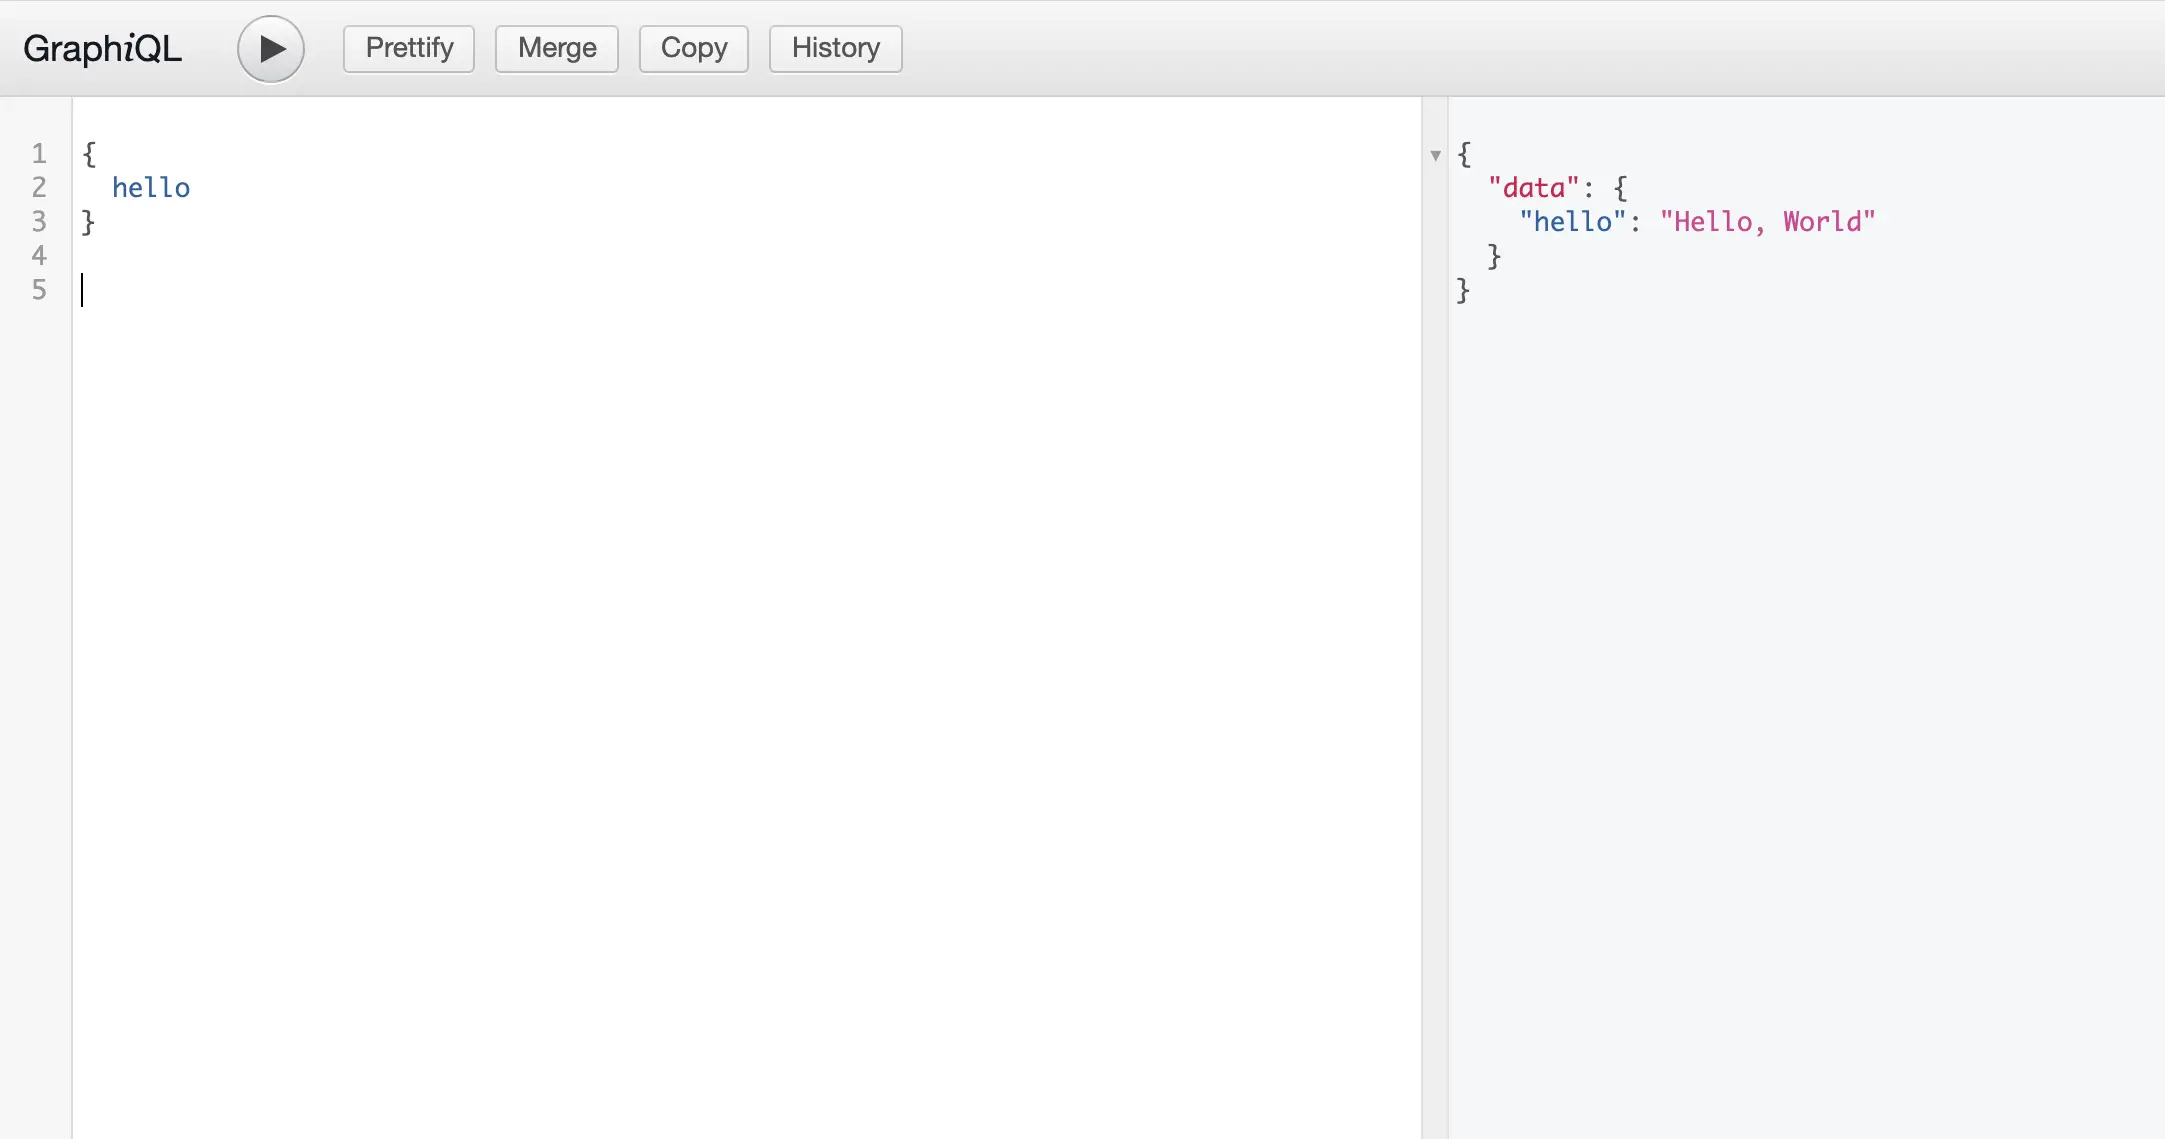
We can make a request as above using the GraphiQL user interface. The response will be available in the adjacent box.
In case, we query for something other than hello (such as hello1), we get a response as below:
{
  "errors": [
    {
      "message": "Cannot query field \"hello1\" on type \"Query\". Did you mean \"hello\"?",
      "locations": [
        {
          "line": 2,
          "column": 3
        }
      ]
    }
  ]
}
If we put something drastically different than hello (such as test), we get the below response.
{
  "errors": [
    {
      "message": "Cannot query field \"test\" on type \"Query\".",
      "locations": [
        {
          "line": 2,
          "column": 3
        }
      ]
    }
  ]
}
GraphiQL is a great tool for playing around with your GraphQL API Server during development mode. It makes testing quite easy.
Conclusion
With this, we have successfully learnt how to create a GraphQL API Server using Express GraphQL package. A simple GraphQL server does not need a lot to get started.
The Express webserver and the Express GraphQL package fulfil the minimum requirements quite easily and helps us get quickly started with GraphQL. In the next post, we create a GraphQL Schema using GraphQLObject.
If you have any comments or queries about this post, please mention them in the comments section below.
0 Comments