Spring Cloud Hystrix is another important component of the Spring Cloud project. It is used to implement the Circuit Breaker pattern. The role of circuit breaker is to enable fault tolerance in a microservice architecture in case some underlying service is down.
In other words, using circuit breaker, we can fall back to a different path of the program automatically. Spring Cloud Hystrix helps make the switch seamlessly.
In this post, we will build upon our Spring Cloud Starter project from the previous post about Spring Cloud Netflix Zuul. We will create another Spring Boot application to consume the APIs exposed by the Product-Application. However, we will implement the circuit breaker pattern in the consumer application.
So let’s start with the implementation.
Building the Consumer Application
The consumer application can be easily bootstrapped using https://start.spring.io. This site is also known as the Spring Initializr.
Below are the dependencies:
<dependencies>
		<dependency>
			<groupId>org.springframework.boot</groupId>
			<artifactId>spring-boot-starter-actuator</artifactId>
		</dependency>
		<dependency>
			<groupId>org.springframework.boot</groupId>
			<artifactId>spring-boot-starter-web</artifactId>
		</dependency>
		<dependency>
			<groupId>org.springframework.cloud</groupId>
			<artifactId>spring-cloud-starter-netflix-hystrix</artifactId>
		</dependency>
		<dependency>
			<groupId>org.springframework.cloud</groupId>
			<artifactId>spring-cloud-starter-netflix-hystrix-dashboard</artifactId>
		</dependency>

		<dependency>
			<groupId>org.springframework.boot</groupId>
			<artifactId>spring-boot-starter-test</artifactId>
			<scope>test</scope>
		</dependency>
</dependencies>
Important dependencies to note here are the spring-cloud-starter-netflix-hystrix and spring-cloud-starter-netflix-hystrix-dashboard. Basically, these dependencies are used to enable Hystrix and the Hystrix Dashboard.
Next, we can change the server.port in the application.properties file. Also, we enable the actuator end-points.
server.port=8086
management.endpoints.web.exposure.include=*
Now, we can enable Hystrix using a few annotations in the main class. The annotations are @EnableHystrixDashboard and @EnableCircuitBreaker.
@SpringBootApplication
@EnableHystrixDashboard
@EnableCircuitBreaker
public class ProductsConsumerApplication {

	public static void main(String[] args) {
		SpringApplication.run(ProductsConsumerApplication.class, args);
	}

}
This is the bare minimum required to setup the application use Spring Cloud Hystrix.
Creating New End-point
Now, we will create a new end-point expose the Product information. Basically, this end-point will simply return the product data it receives from the product-application. Also, to make the actual call to the product-application, we will create a service layer.
See below:
@Service
public class ProductService {

    @Autowired
    private RestTemplate restTemplate;

    @HystrixCommand(fallbackMethod = "callProductApplication_Fallback")
    public String callProductApplication(){

        System.out.println("Fetching Product Information");

        String response = restTemplate
                .exchange("http://localhost:8085/product-application/products"
                        , HttpMethod.GET
                        , null
                        , new ParameterizedTypeReference<String>() {
                        }
                        , "").getBody();

        System.out.println("Response Received from Product Application");

        return "NORMAL CALL Successful" + "Product Details:  " + response;

    }

    @SuppressWarnings("unused")
    private String callProductApplication_Fallback(){

        System.out.println("Product Application is down! Fallback enabled!");

        return "CIRCUIT BREAKER ENABLED!! No response from Product Application at this time";

    }

}
Let’s understand what’s happening here:
- We autowire an instance of the RestTemplate. Using the RestTemplate we invoke the product-application end-point through the Spring Cloud Zuul Gateway.
- We annotate the callProductApplication() method with @HystrixCommand. Also, we provide a value for fallbackMethod. Basically, this is the method that will be called in case of the product-application going down.
- Lastly, we create the actual fallback method callProductApplication_Fallback(). Note that the name of this method should match the value of the fallbackMethod in the @HystrixCommand annotation.
Note that we simply return some response text in the above example. However, in a real application it could also be some hard-coded product information depending on the use-case.
Next, to consume this service and return the response, we create a Rest Controller as follows:
@RestController
public class ProductDataController {

    @Autowired
    ProductService productService;

    @GetMapping(value = "/getProductInfo")
    public String getProducts(){
        System.out.println("Making a call to the product application");
        return productService.callProductApplication();
    }
}
Lastly, we need to wire up an instance of the RestTemplate in the application context.
@SpringBootApplication
@EnableHystrixDashboard
@EnableCircuitBreaker
public class ProductsConsumerApplication {

	public static void main(String[] args) {
		SpringApplication.run(ProductsConsumerApplication.class, args);
	}

	@Bean
	public RestTemplate restTemplate(){
		return new RestTemplate();
	}

}
And that’s all there is to implement a simple Circuit Breaker using Spring Cloud Hystrix.
Testing the Spring Cloud Hystrix Circuit Breaker
Now, we can test the Circuit Breaker implementation. To do so, we will first start all our applications in the Spring Cloud Starter. Below is the correct order to start them:
- The Config Server
- The Eureka Registry
- Product Application
- The Zuul Gateway
- Product Consumer Application.
Now, we can hit the end-point http://localhost:8086/getProductInfo. We will get the below response.
NORMAL CALL SuccessfulProduct Details: {"productName":"Laptop","productDescription":"The best laptop in the world"}Basically, this is the normal response where the product-application is healthy and available. In other words, this is the ideal situation.
Now, we stop the product-application and again access the end-point http://localhost:8086/getProductInfo. This time the Spring Cloud Hystrix Circuit Breaker kicks in and we get the below response. In other words, this is the fault case.
CIRCUIT BREAKER ENABLED!! No response from Product Application at this timeThis is the message we return in the fallbackMethod. Therefore, we can see that our Circuit Breaker implementation is working as expected.
Spring Cloud Hystrix Dashboard
We also included @EnableHystrixDashboard annotation in our implementation. This provides a few nice features.
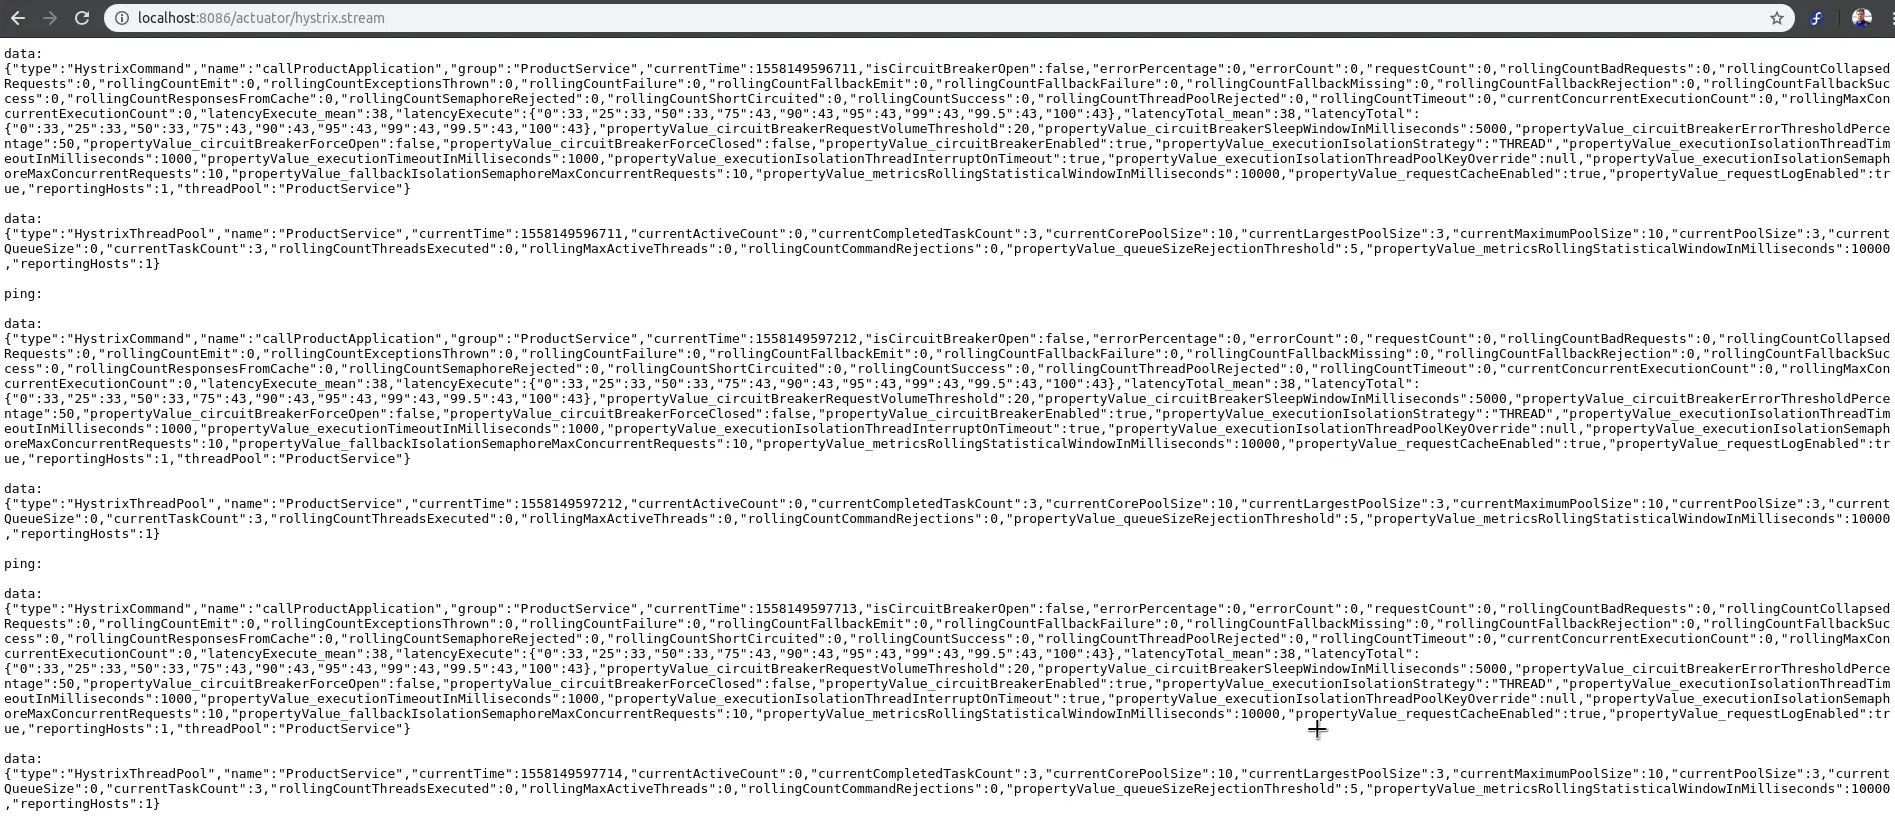
One of them is a stream of service calls. The stream is accessible at http://localhost:8086/hystrix.stream.
The other is a nice dashboard view accessible at http://localhost:8086/hystrix.
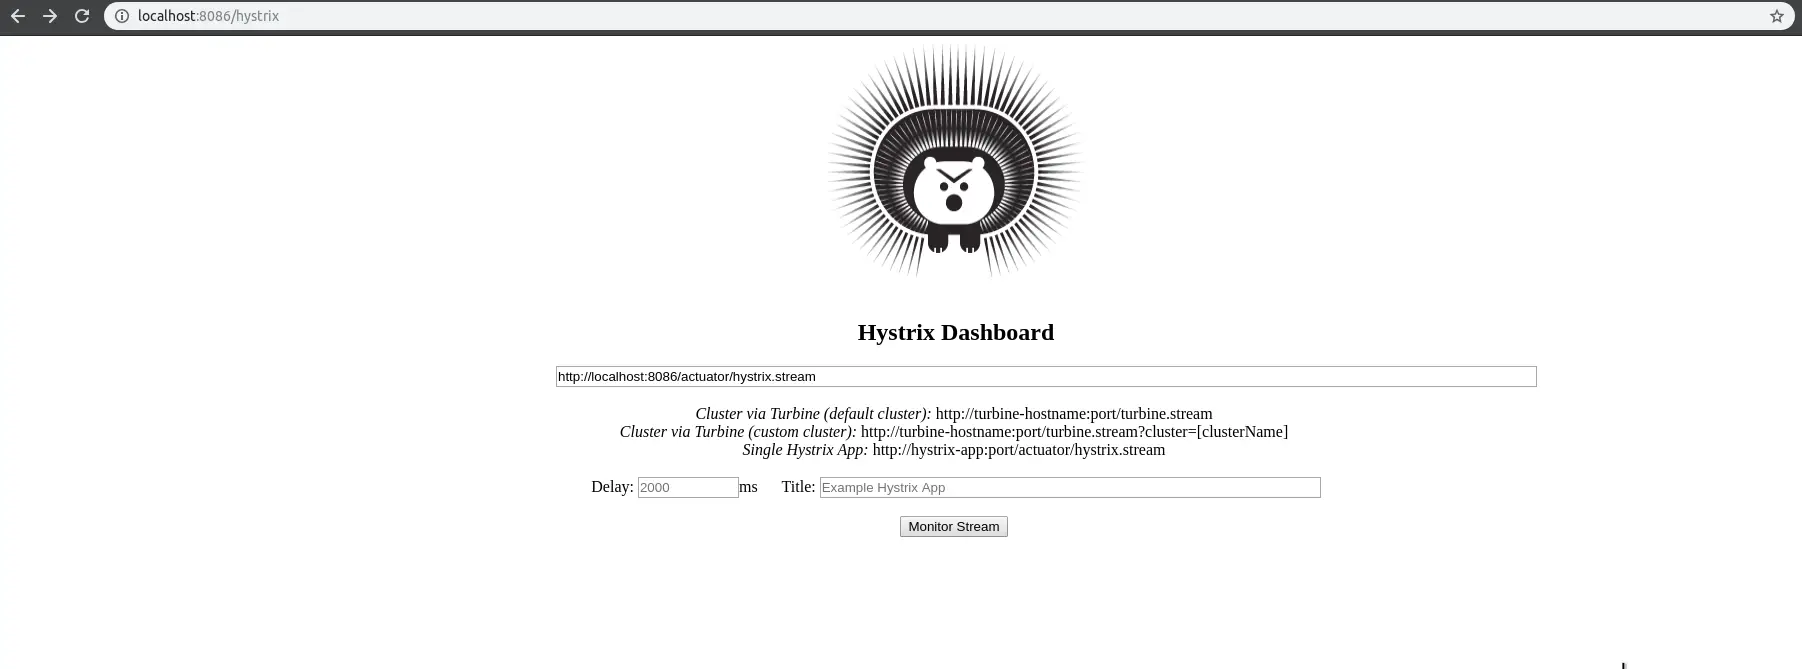
We can enter the stream URL and also see how our service calls are performing in terms of failures and so on.

Conclusion
This is all about implementing Circuit Breaker pattern using Spring Cloud Hystrix. We successfully tested our circuit breaker implementation. Also, we monitored our application using the Hystrix Dashboard that is provided by default.
The code till this point is available on Github in our Spring Cloud Starter Project for your reference.
However, if you have any questions or queries, please sound off in the comments section below.
0 Comments