In this post, we will look at the steps to launch HTTPD Server on AWS EC2 Instance and start serving HTML pages.
AWS EC2 (also known as Amazon Elastic Compute Cloud) provides scalable computing capacity on-demand. It is a core component of Amazon Web Services. You can think of AWS EC2 as a server that you pay for based on your usage.
In case you have never used it before, I have a detailed guide on AWS EC2 and launching an EC2 instance.
However, if you already know about EC2, let’s start with the steps to launch HTTPD Server on AWS EC2 Instance.
Prerequisites
There are a couple of prerequisites you need in order to try a hands-on for the steps we will perform:
- First, you need to have an AWS Account. We have a detailed guide on creating an AWS Account.
- Second, you need to create an IAM user. IAM stands for Identity and Access Management and is a vital piece of Amazon Web Services. We also have a step-by-step guide on how to create an IAM User for reference.
Let’s now continue with the steps to launch HTTPD Server on AWS EC2 Instance.
Step 1 – Launch an AWS EC2 Instance
As the first step, we need to launch a new EC2 Instance.
To do so, you need to login to the AWS Management Console using your new IAM user. Once you are logged in, you can search for the EC2 service in the search box and click the Launch Instance button to start the workflow.

You will see the below screen where you can select the AMI. In our case, we will go for Amazon Linux 2.
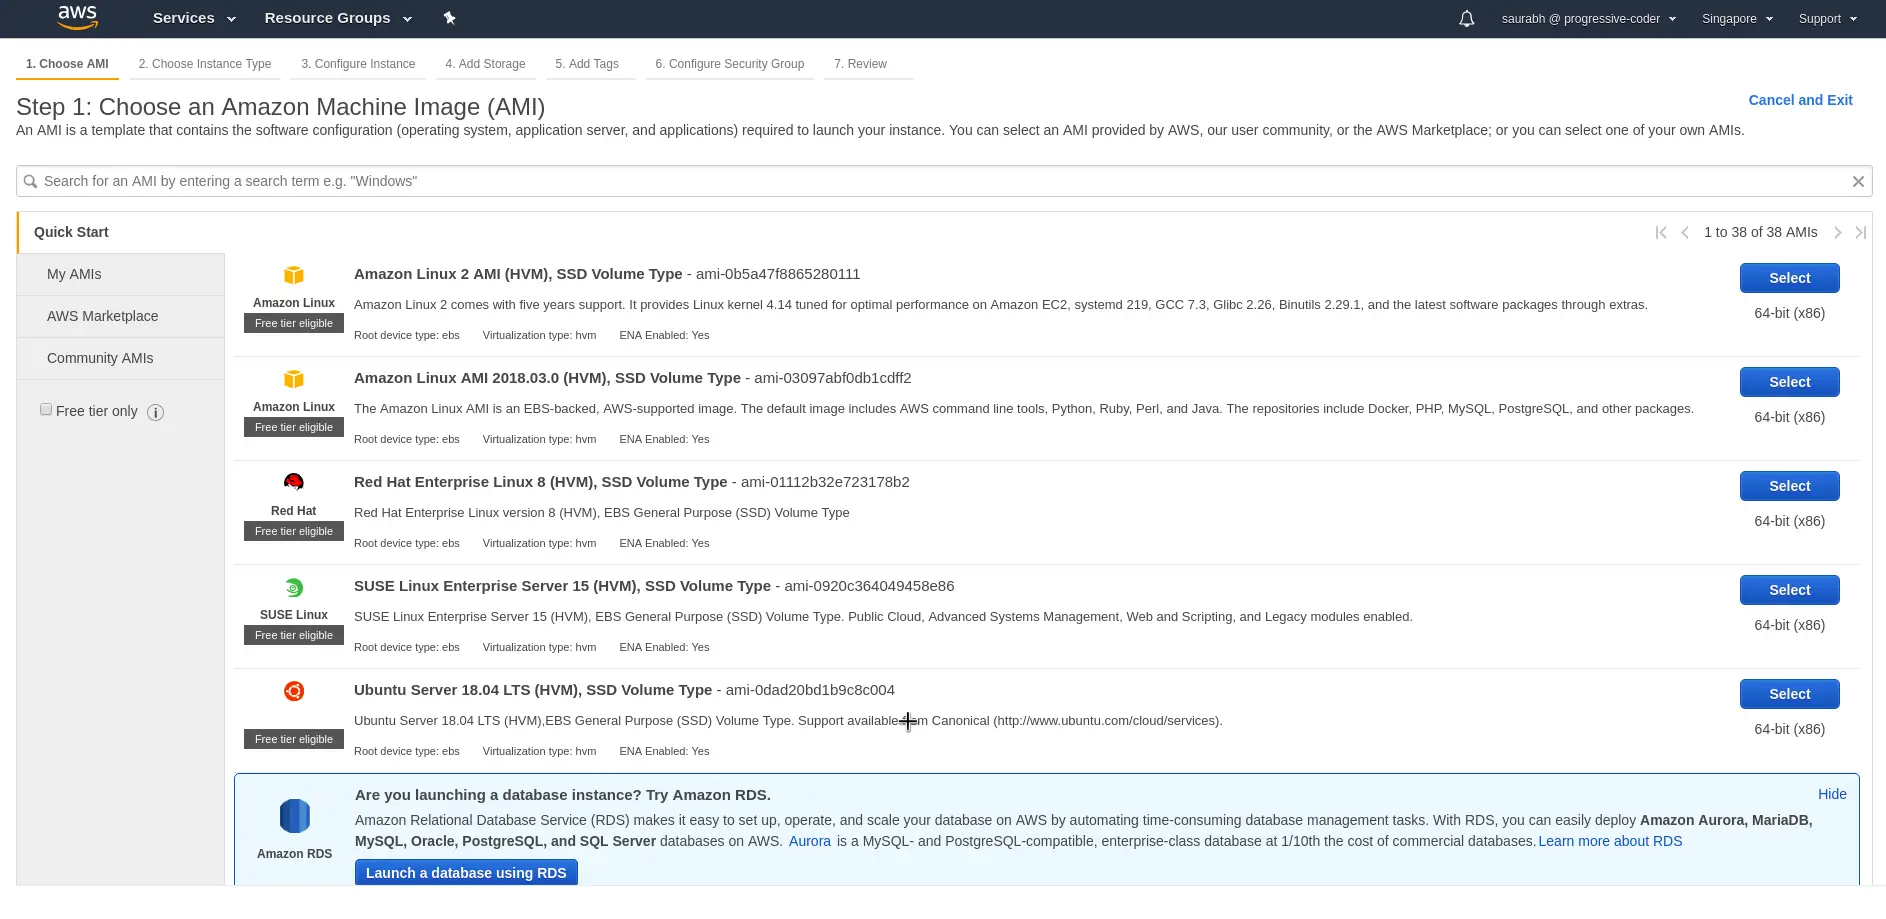
You can simply follow the workflow from here on. However, if you wish to know more, follow the detailed process to launch AWS EC2 instance as a reference where we discuss each step in the workflow.
Step 2 – Login to AWS EC2 Instance
If you complete the above workflow, you should have an AWS EC2 instance up and running. It will be visible in the list of instances.
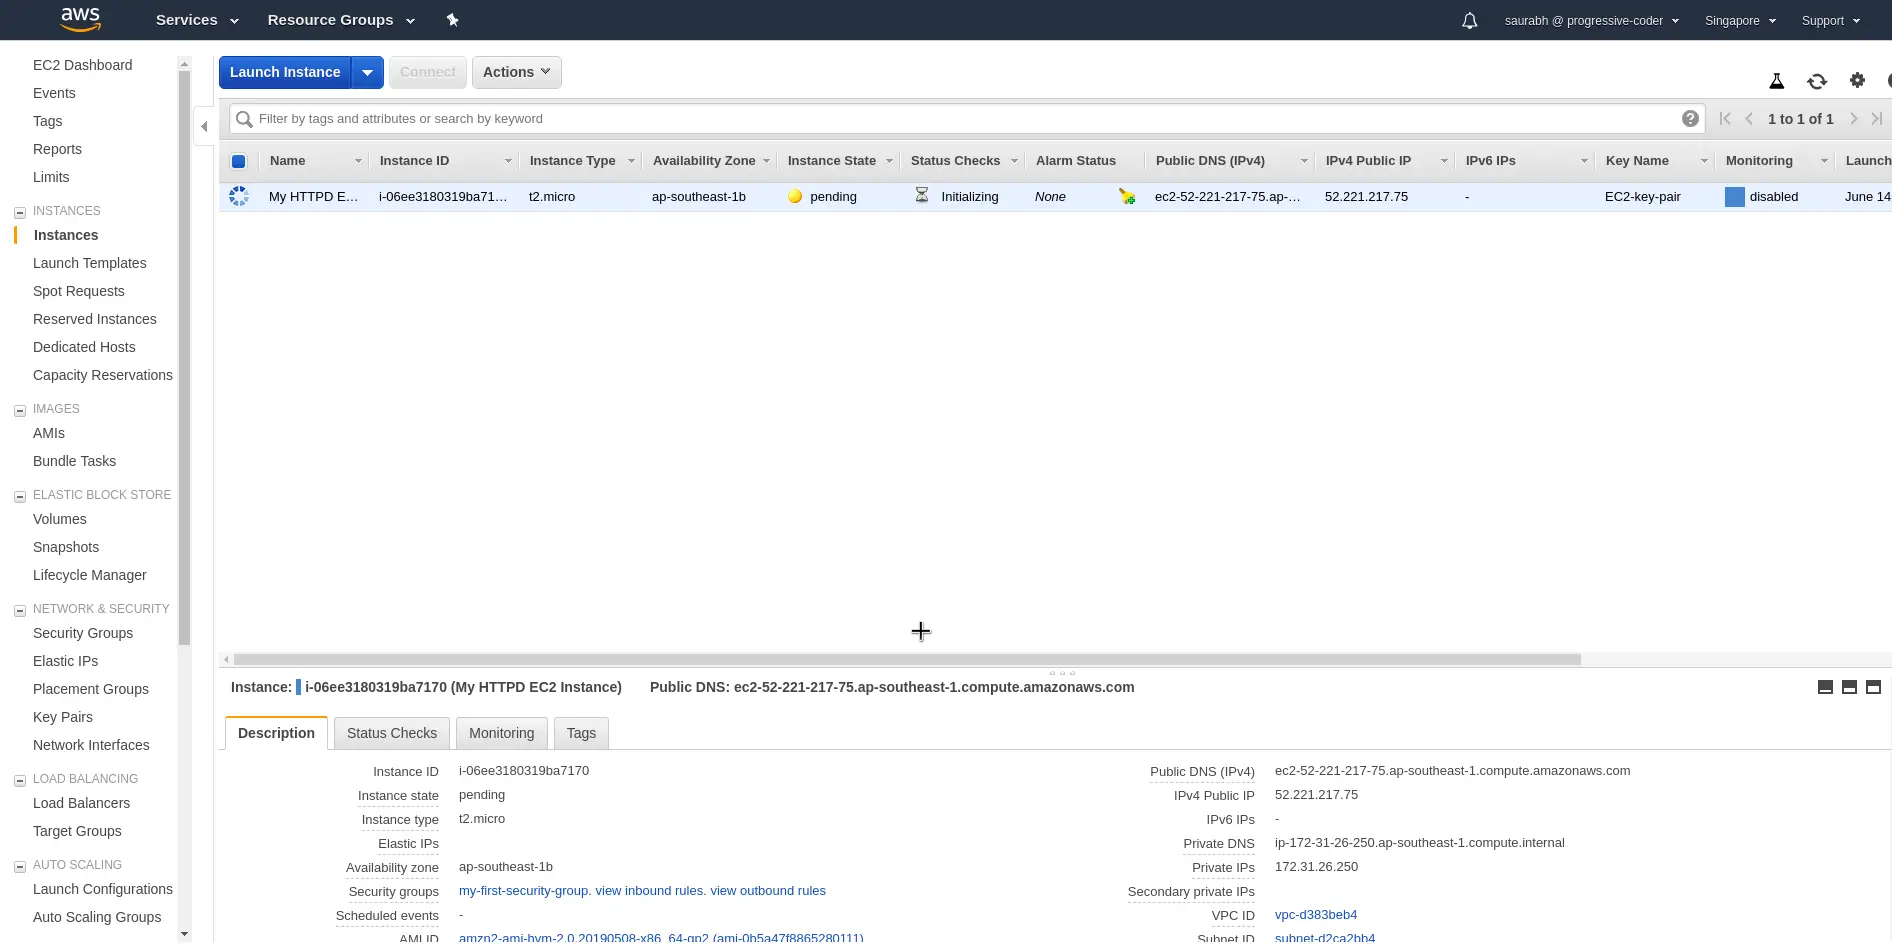
Note down the public IP of the instance. Using this we can login to our machine using SSH.
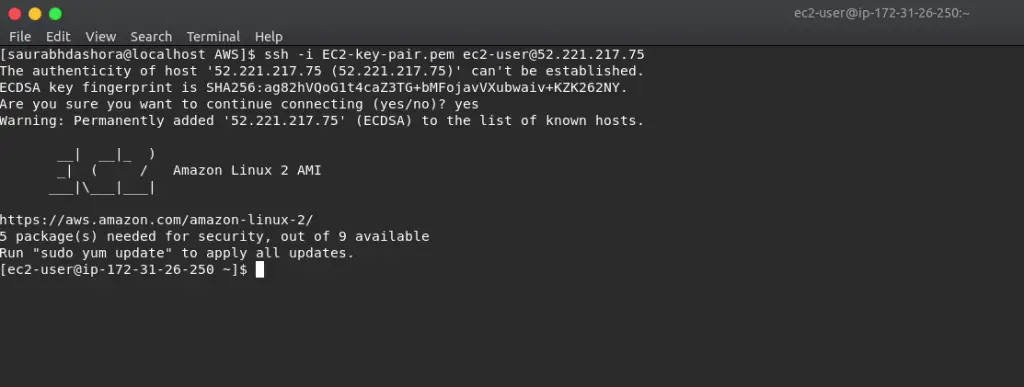
Remember that you will need the private key that was provided during EC2 instance launch process. If you use the correct private key, you should be able to login to the instance as below.
Step 3 – Install HTTPD Server on AWS EC2
Now that we have access to our EC2 instance, we can install HTTPD Server on it.
To do so, you have to issue the below commands.
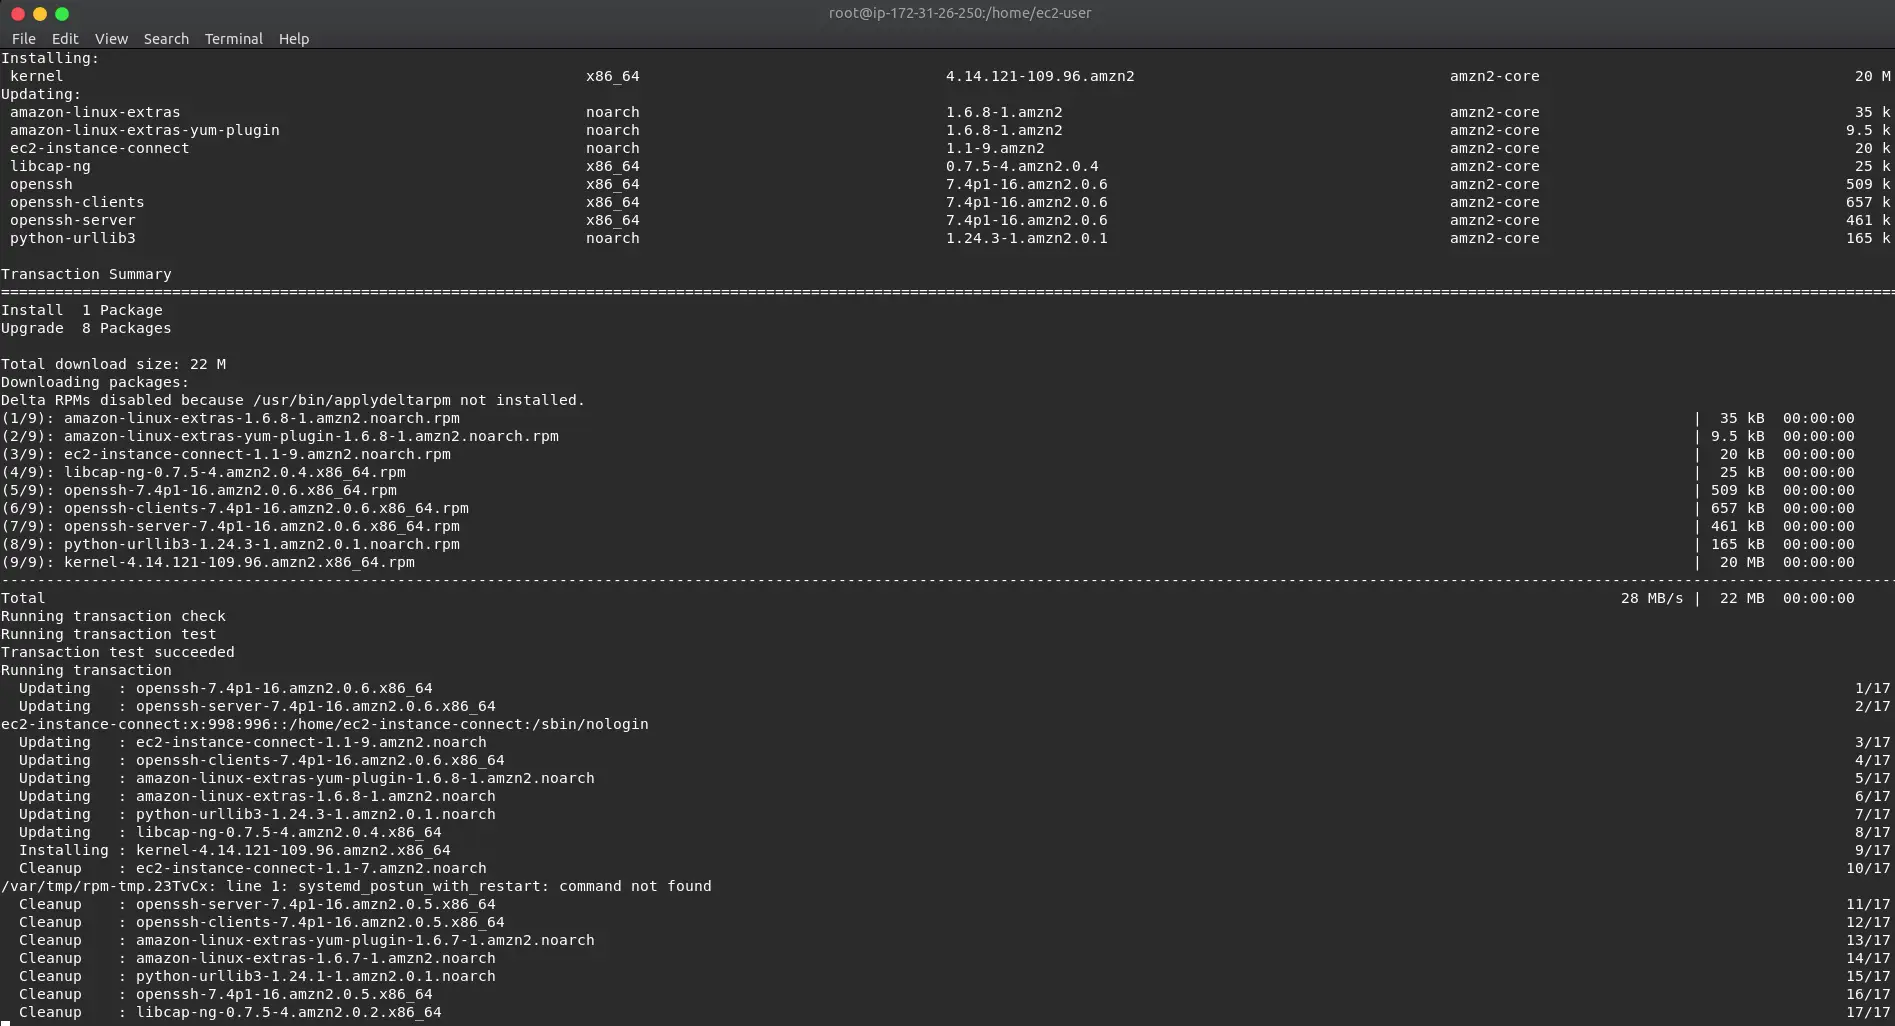
sudo su
yum update -y
The first command will elevate you as the root user on the EC2 instance. The second command will update all the packages. Note that -y flag is used to simply answer the confirmation prompt as yes.
You should see the packages updated successfully.
Next, we need to install HTTPD server. It can be done using the below command.
yum install -y httpd.x86_64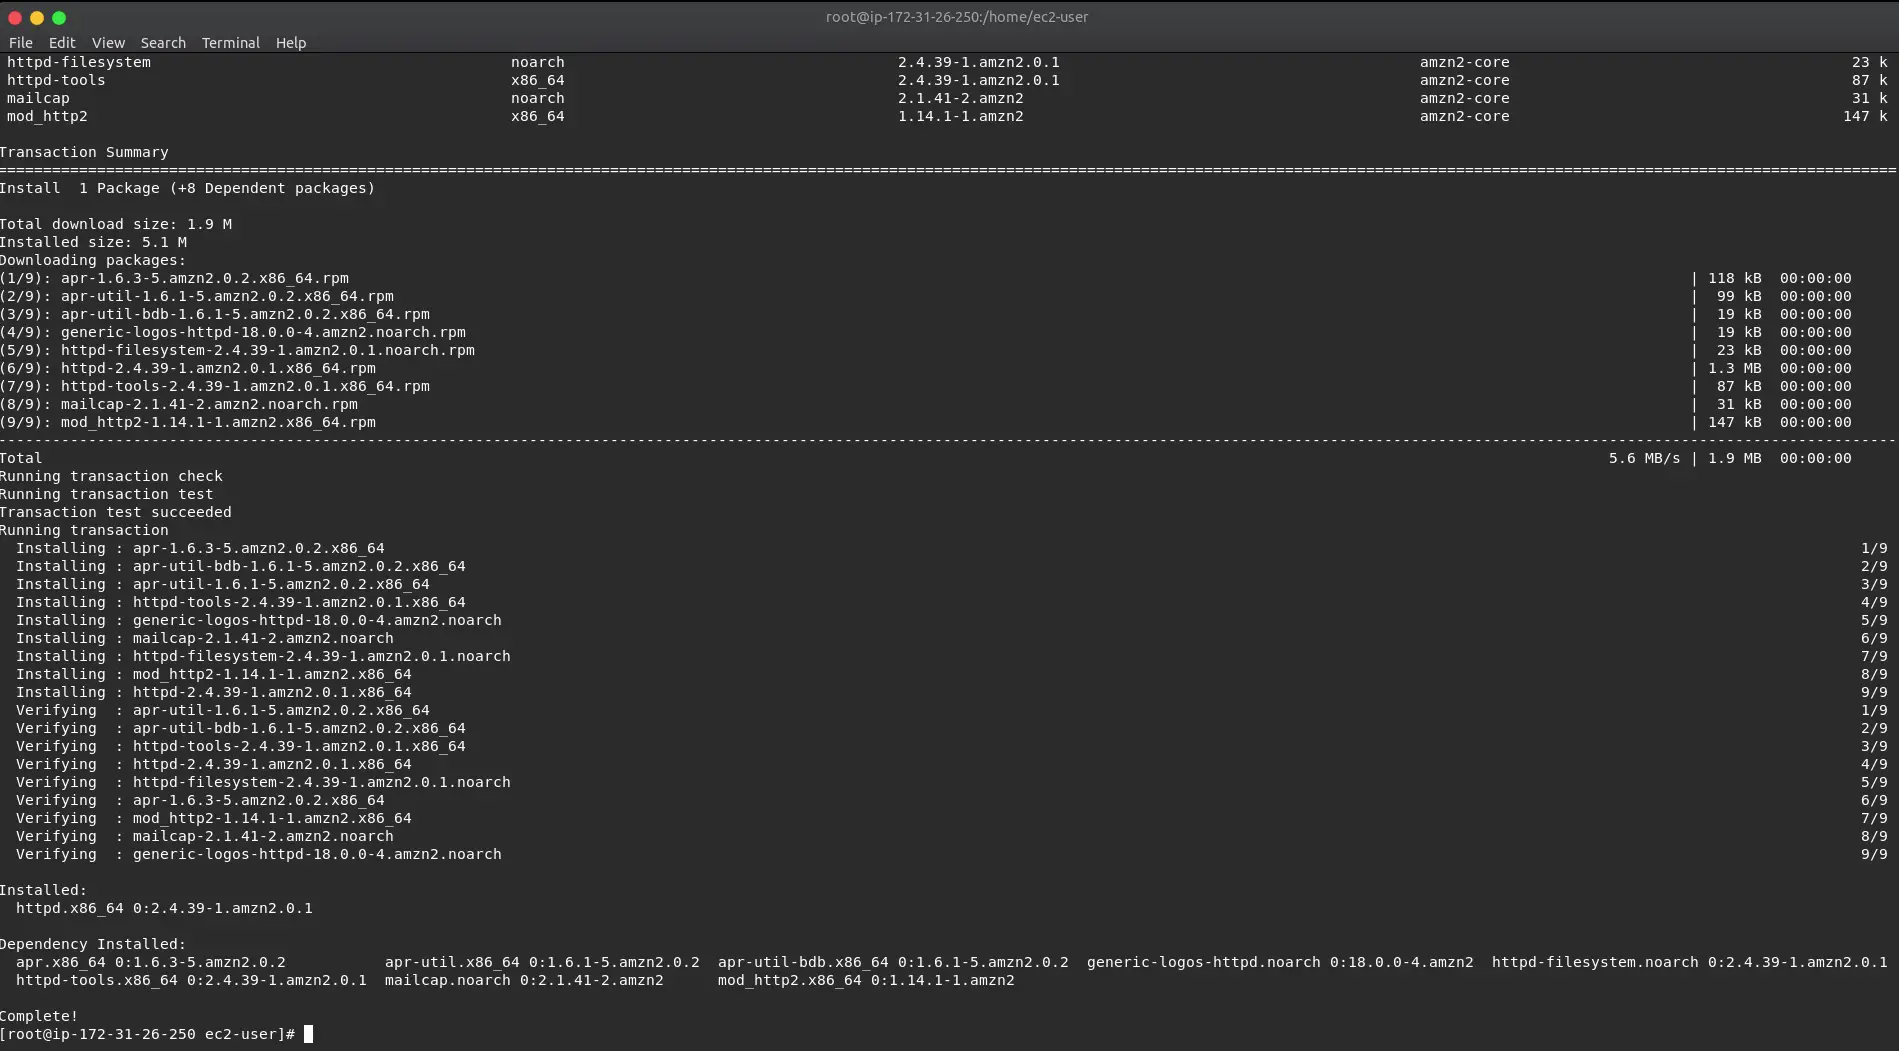
Step 4 – Start the HTTPD Server
The next step to launch HTTPD Server on AWS EC2 is to start the HTTPD Server.
To do so, you need to issue the below commands in the terminal.
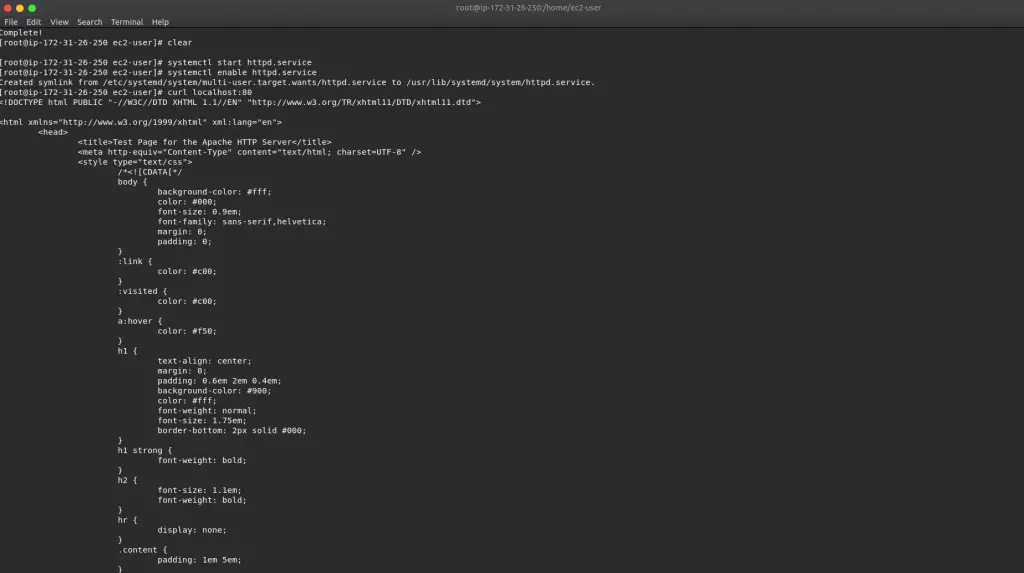
systemctl start httpd.service
systemctl enable httpd.service
The first command basically starts the httpd service on the instance. The second instance enables our httpd service to run across reboots.
After issuing the commands you can issue the below curl command.
curl localhost:80If everything has gone through properly, you should see a big HTML document being shown as below. This is basically the test page of HTTPD server.
At this point, you can imagine that our HTTPD Server is up and running and we should be able to access it from the browser.
However, if you visit a browser and try to access the EC2 instance IP address and port 80, you will not get any output whatsoever. The browser progress bar will keep rotating. This is because there is additional setup required to make our HTTPD Server available over the internet network.
Step 5 – Configure Security Groups
If you see the security group configuration for our EC2 instance, it is very clear that our EC2 instance can only be accessed using SSH over port 22. No other access options have been specified.
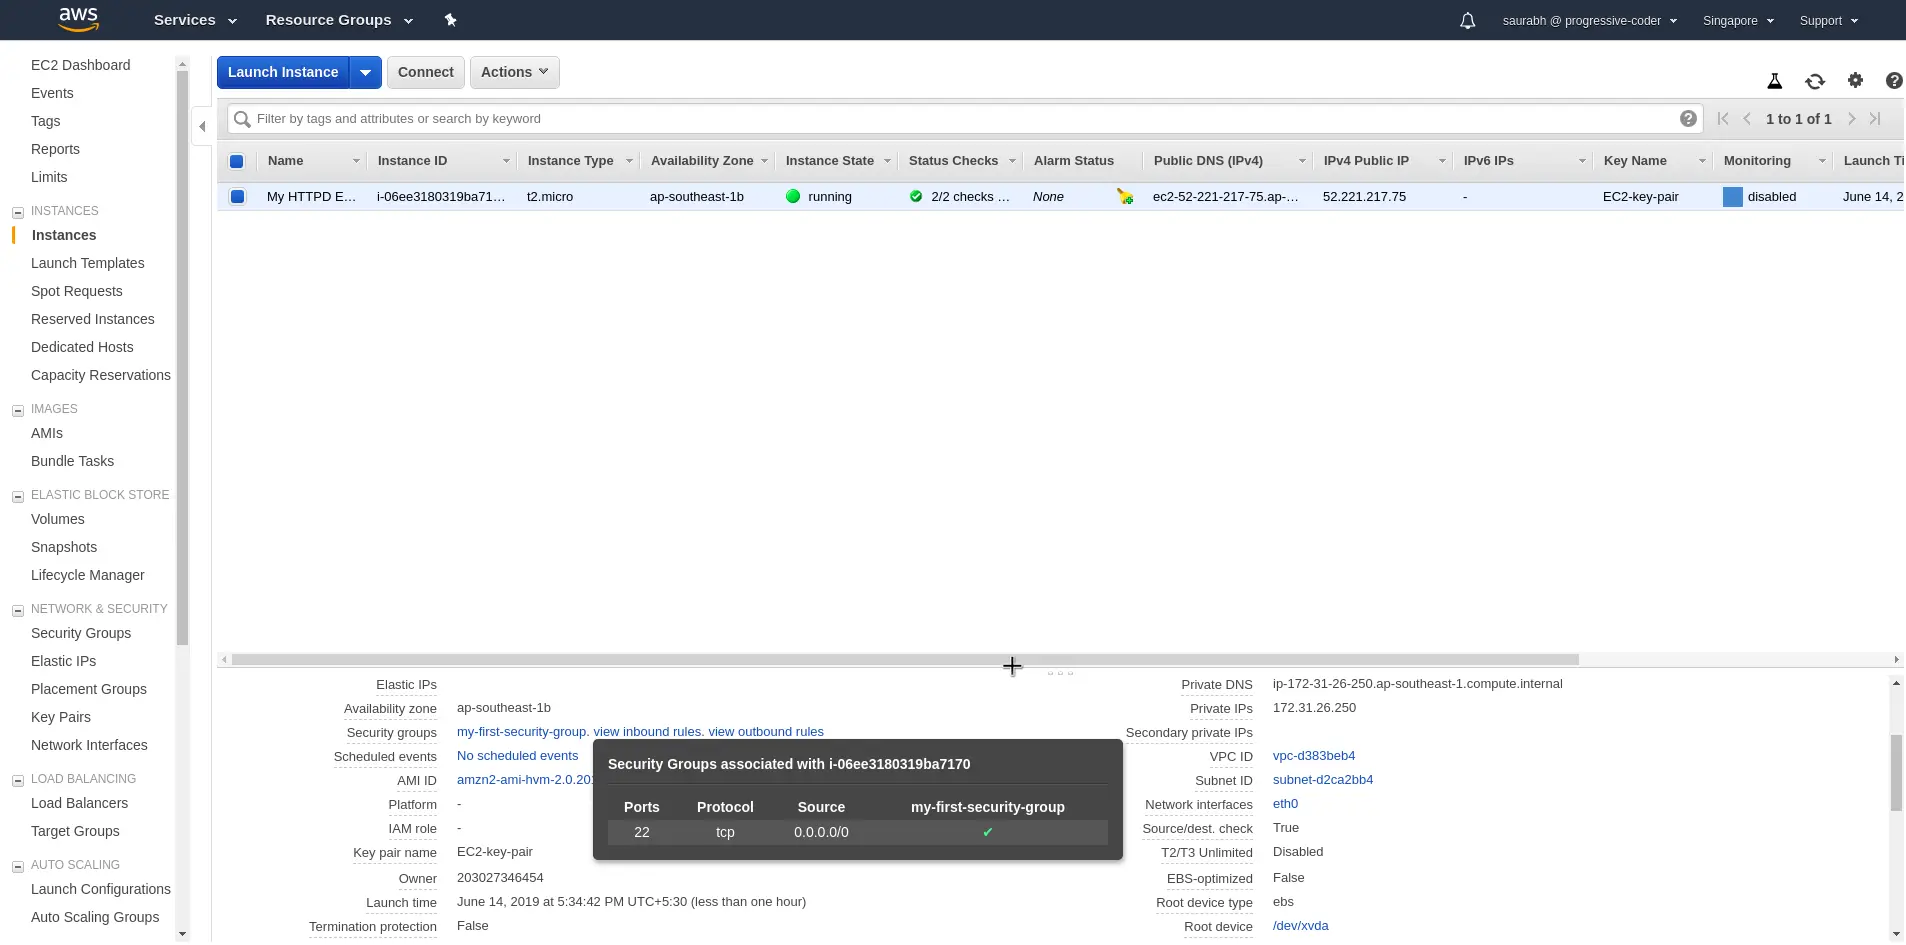
To enable our EC2 instance and the underlying HTTPD server to be accessible over the internet, we need to add a new entry to the Security Group.
You can access the security groups from the sidebar options and add a new inbound rule as below.
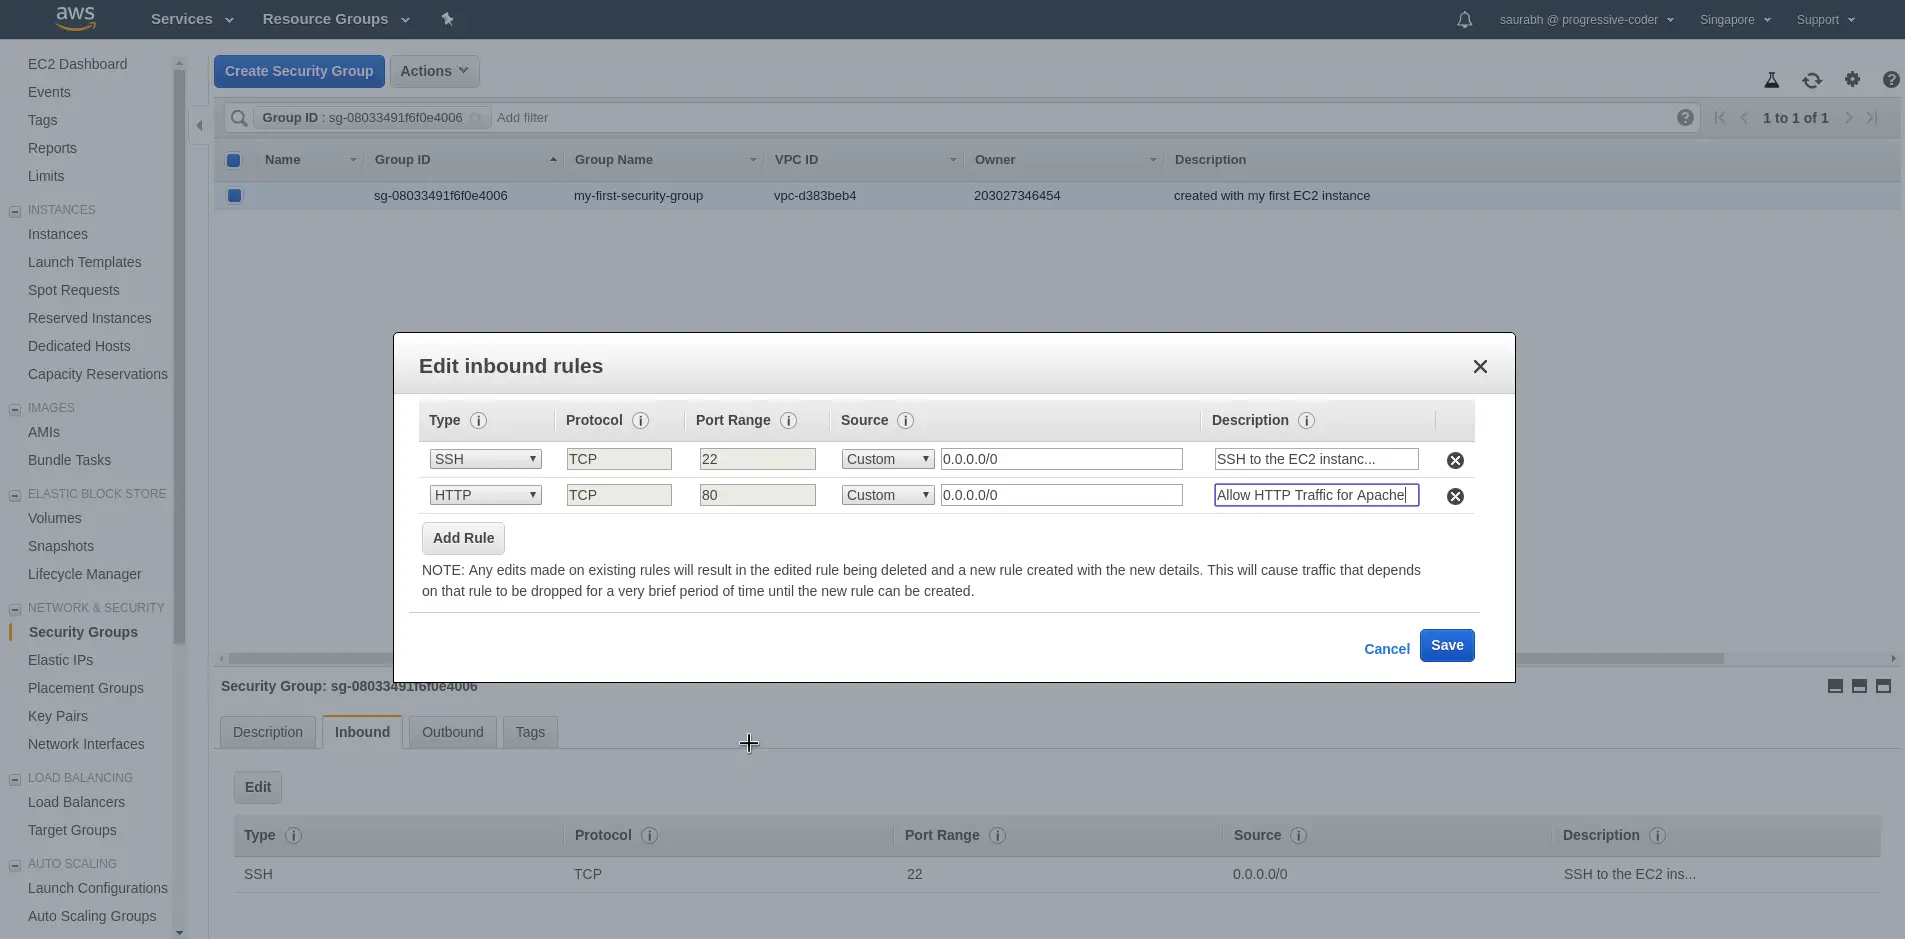
Basically, this inbound rule is allowing HTTP traffic over Port 80 to be enabled for our EC2 instance.
Now, if you access the EC2 Public IP over port 80 in the browser, you should see the HTTPD Server’s test page.
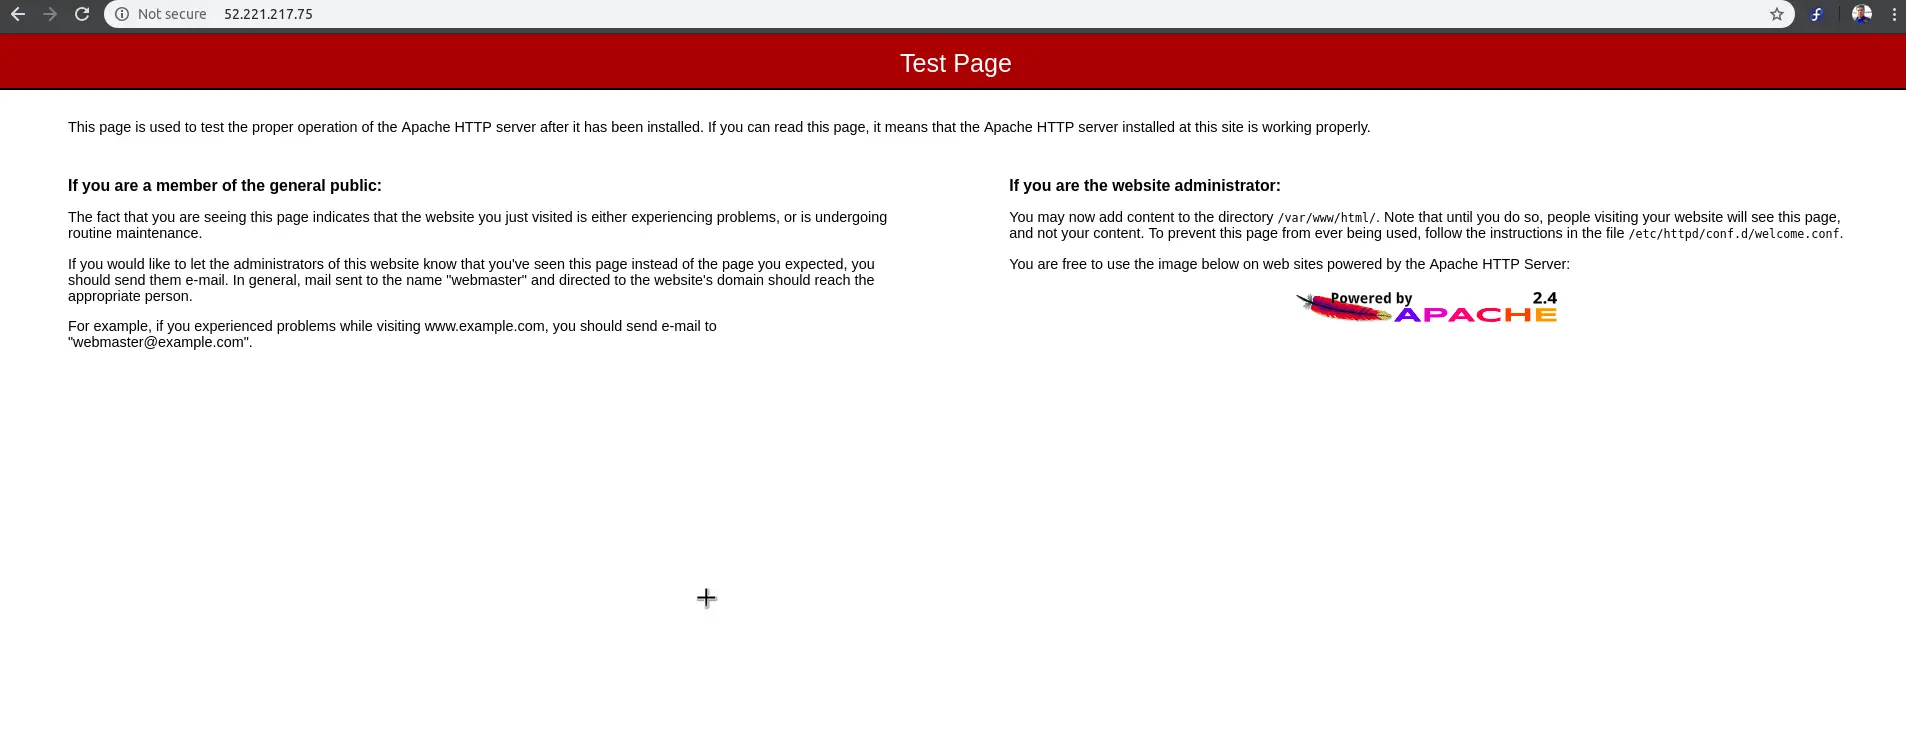
Step 6 – Accessing our own Index.html file
Basically, our HTTPD Server is now up and running. However, we are seeing the default test page.
If we want to display our own page, we need to add an index.html file to /var/www/html folder. This can be easily done using the below command.
echo "Hello World from $(hostname -f)" > /var/www/html/index.html
hostname -f
cat /var/www/html/index.html
The first command basically places a Hello World line into an index.html file in the folder /var/www/html. We use hostname -f command to display the hostname (our EC2 instance).
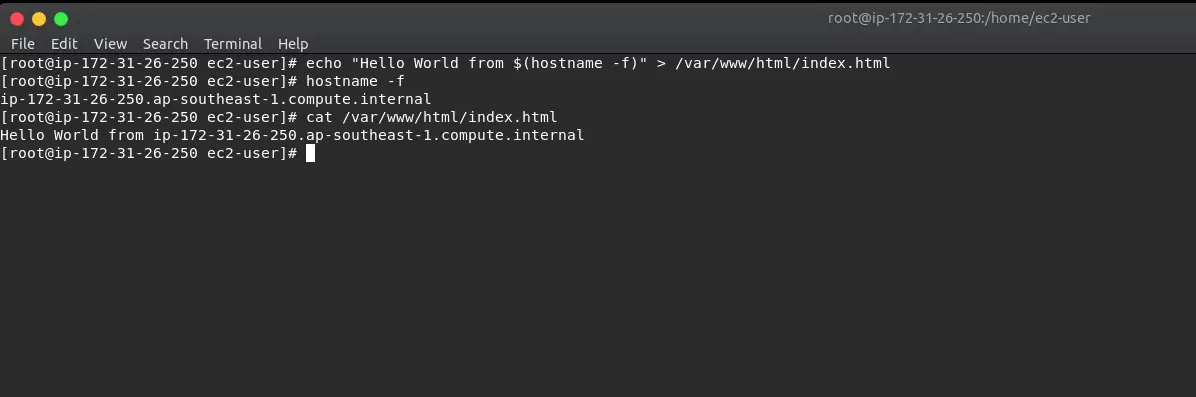
Now, if you access the HTTPD Server again using the browser over port 80, you will see our index.html file.

Conclusion
With this we are basically done with all steps to launch HTTPD Server on AWS EC2 Instance.
We successfully created a new instance, installed HTTPD server on the instance and created our own index.html file to be displayed when a user accesses our server from a browser.
The important point to remember is with regards to the security group setting without which this would not have worked.
If you have any comments or queries, do sound off in the comments section below.
Happy Learning!
0 Comments