You already got a taste of working on a NestJS project in the post about controllers.
However, despite their enormous importance, creating an interface using controllers is only half the journey in building an application.
You need something meaningful to happen when someone accesses the interface.
This is where providers play a critical role in learning NestJS fundamentals.
In this post, I’m going to show you how you can handle business logic in your application with NestJS providers.
Here’s what you’ll learn:
- Dependency injection with providers
- Creating your first NestJS service using a provider
- Injecting the NestJS provider into a controller
- Registering the provider in the application context
- Testing the GET, POST, PUT & DELETE operations
- Understanding how the Nest IOC container works
1 – What is a NestJS Provider?
Providers are an extremely important concept in NestJS. In my view, they are far more important than even controllers and rely on the principles of dependency injection in NestJS.
Think of providers as ingredients in a kitchen. Each ingredient has a different purpose. When a chef wants to cook a delicious meal, he/she will use a combination of ingredients.
In NestJS, providers play a similar role.
The idea behind a provider is that you inject it as a dependency within a class to establish a relationship. The job of creating the actual instances and wiring them up falls on the NestJS runtime system. This is the essence of dependency injection.
In the context of our demo example, we can have a provider that acts as the service for the ProductsController.
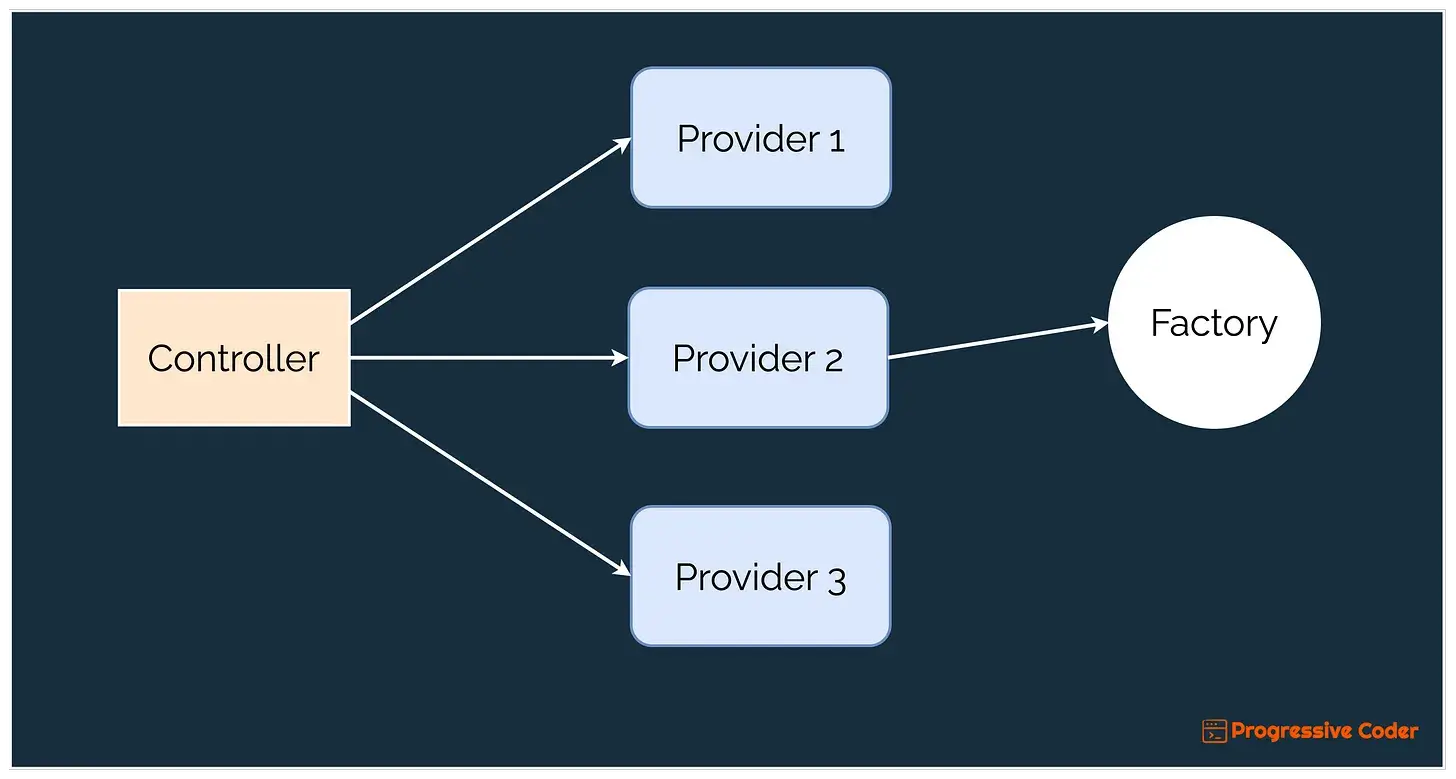
In fact, a single controller can utilize multiple providers as shown in the below illustration.
2 – Creating a NestJS Service with a Provider
Let us understand the concept of providers with a code example.
Create a file named products.service.ts in the src directory with the below contents.
import { Injectable } from '@nestjs/common';

@Injectable()
export class ProductsService {
  private products = [];

  getAllProducts() {
    return this.products;
  }

  getProduct(id: number) {
    return this.products.find(product => product.id == id);
  }

  createProduct(product) {
    this.products.push(product);
    return product;
  }

  updateProduct(id: number, product) {
    const index = this.products.findIndex(p => p.id == id);
    if (index === -1) {
      return null;
    }
    this.products[index] = { ...this.products[index], ...product, id };
    console.log(this.products)
    return this.products[index];
  }

  deleteProduct(id: number) {
    this.products = this.products.filter(product => product.id !== id);
  }
}
In this example, the ProductService class is decorated with the @Injectable() decorator. The NestJS injectable decorator turns the service class into a NestJS provider that can be injected into other components.
Basically, the @Injectable() decorator signals to NestJS that this class must be managed by the Nest IOC container. IOC stands for Inversion of Control.
But what’s going on inside this class?
Think of this NestJS class as the backend service for the ProductsController you saw in the previous post.
Within the class, you declare an array called products that acts as an extremely simple in-memory storage for the product details.
Then, you implement 5 operations for manipulating the products array: getAllProducts, getProduct, createProduct, updateProduct, and deleteProduct.
These methods perform the corresponding operations on the products array and return the result. Nothing too serious about them except for the array manipulation operations.
? A short note on Inversion of Control
Let’s say you’re having a party and you want to make some delicious pizzas for your guests.
You start off by trying to make the pizzas yourself – you roll out the dough, spread the sauce, add the toppings and pop it in the oven. But before you know it, you’re overwhelmed with guests, music, drinks and everything else that comes with hosting a party.
Making pizzas is the last thing on your mind now!
This is where Inversion of Control comes in. Instead of making the pizzas yourself, you hand over control to someone else – in this case, a pizza chef. The chef takes over and makes the pizzas for you, freeing you up to enjoy the party and take care of your guests.
In software development, Inversion of Control works in much the same way. Instead of your code being responsible for performing certain tasks, it hands over control to another component – a service, a library or a framework. This allows you to focus on the bigger picture and not get bogged down with the details of implementation.
So, in a nutshell, Inversion of Control is like having a party and letting someone else make the pizzas so you can focus on having a good time!
3 – Injecting a NestJS Provider
Declaring a provider is one part of the puzzle. But as discussed earlier, you want to use it for something.
In our case, the provider takes care of the basic backend operations of our RESTful API interface. If you can use this provider within the controller, you can make an application that works on a superficial level.
Here’s how you can use the ProductsService provider in the ProductsController class.
import { Body, Controller, Delete, Get, Param, Post, Put, Req, Res } from "@nestjs/common";
import { ProductsService } from "./products.service";

@Controller('products')
export class ProductsController {

    constructor(private readonly productsService: ProductsService) {}

    @Get()
    getAllProducts() {
        return this.productsService.getAllProducts();
    }

    @Get(':id')
    getProduct(@Param('id') id: number) {
        return this.productsService.getProduct(id);
    }

    @Post()
    createProduct(@Body() productData) {
        return this.productsService.createProduct(productData)
    }

    @Put(':id')
    updateProduct(@Param('id') id: number, @Body() productData) {
        return this.productsService.updateProduct(id, productData);
    }

    @Delete(':id')
    deleteProduct(@Param('id') id: number) {
        return this.productsService.deleteProduct(id);
    }
}
The ProductsService is injected within the controller using a constructor. Just by including it in the constructor, you are declaring and initializing the productsService member in the controller class.
The productsService member is basically an instance of the ProductsService class and has access to all the methods exposed by the class.
After this step, it is a simple matter of calling the appropriate method of the ProductsService in the various operations such as createProduct(), updateProduct() and so on.
4 – Registering the NestJS Provider
The final piece of the puzzle is actually registering the provider in the module just like we did with the controller.
Head over to app.module.ts and add ProductsService to the providers array.
import { Module } from '@nestjs/common';
import { AppController } from './app.controller';
import { AppService } from './app.service';
import { ProductsController } from './products.controller';
import { ProductsService } from './products.service';

@Module({
  imports: [],
  controllers: [AppController, ProductsController],
  providers: [AppService, ProductsService],
})
export class AppModule {}
Without this step, the application would have no idea of how to create the ProductsService instance.
You are now in a position to test the code.
Execute the npm run start command and once the application starts up, you can use the below commands to test the API endpoints:
Creating a Product
$ curl -X POST \\\\
  <http://localhost:3000/products> \\\\
  -H 'Content-Type: application/json' \\\\
  -d '{
  "id": 1,
  "name": "New Product",
  "description": "A product description",
  "price": 50
}'
Fetching All Products
$ curl -X GET <http://localhost:3000/products>Fetching a Single Product by Id
curl -X GET <http://localhost:3000/products/1>Updating a Product
curl -X PUT <http://localhost:3000/products/1> -H "Content-Type: application/json" -d '{"name": "Product 1 - Updated", "description": "A updated description of product 1", "price": 200.0}'Deleting a Product
curl -X DELETE <http://localhost:3000/products/1>5 – Nest IOC Container and Providers
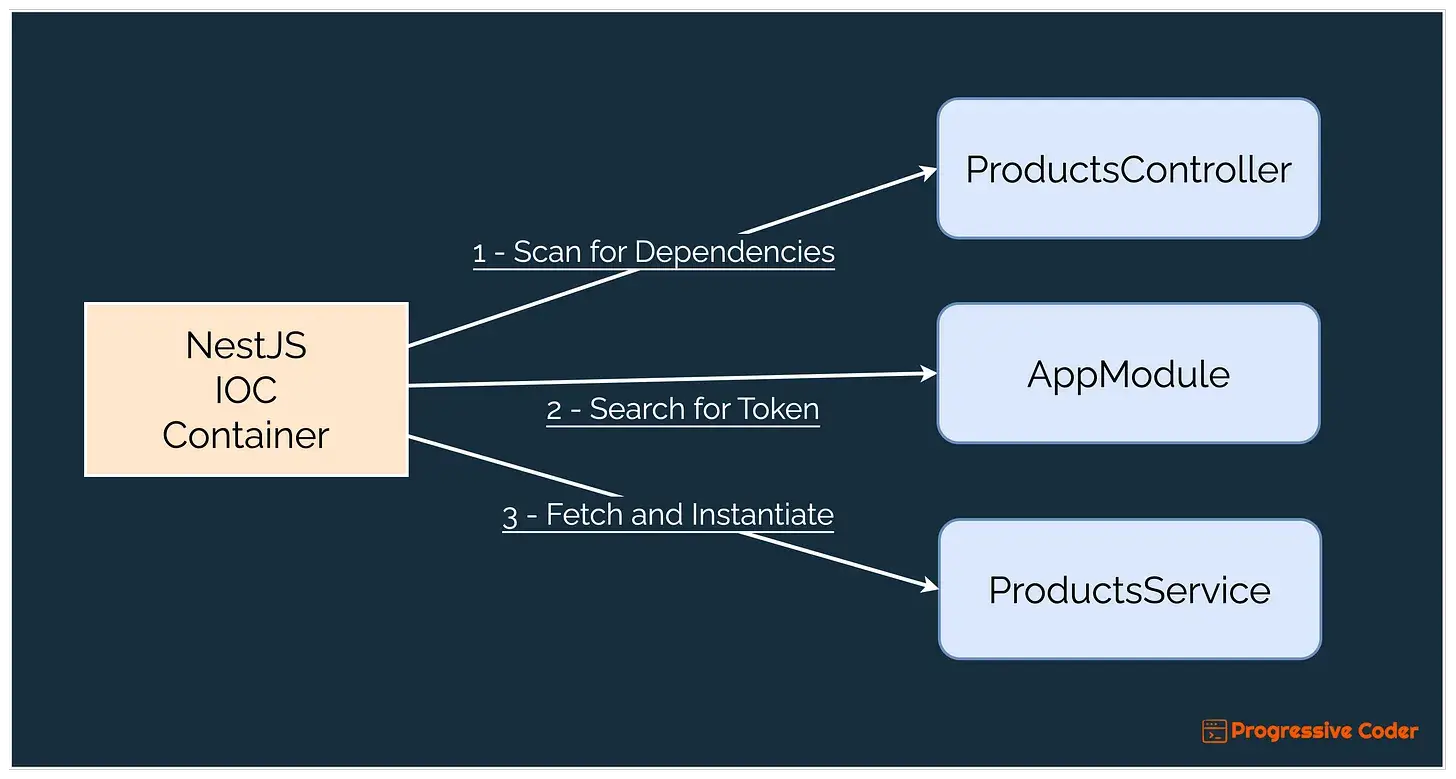
What is happening under the hood when we are using NestJS Providers?
Let’s look at each step in more detail:
- When the Nest IOC Container instantiates the
ProductsControllerclass, it looks at the dependencies of this class. Think of the IoC Container as a central registry for all the components in your application. The IoC Container creates instances of the components and manages their entire lifecycle. - When the IOC Container finds that the
ProductsControllerhas declared theProductsServiceclass as a dependency using the constructor, it does a lookup for theProductsServicetoken. - The IOC Container finds that the token points to the
ProductsServiceclass as per the registration within the module. At this point, NestJS creates an instance of theProductsServiceclass, caches it and returns it. - In case the instance is already cached (if the class was already discovered), then NestJS returns the cached instance.
Here’s an illustration showing the steps performed by the IOC Container.
Note that the dependency analysis performed by NestJS is transitive in nature.
For example, if ProductsService had multiple dependencies, NestJS will discover and resolve those as well. The entire scanning operation follows a bottom-up approach.
What’s Next?
The code for this post is available on GitHub. You can download it and play around with it to practice the concepts discussed in this post.
Here’s a summary of what you have learnt:
- Dependency injection with providers
- Creating your first NestJS service using a provider
- Injecting the NestJS provider into a controller
- Registering the provider in the application context
- Testing the GET, POST, PUT & DELETE operations
- Understanding how the Nest IOC container works
With this topic under your belt, you have managed to separate the interface from the business logic of storing and manipulating data.
There are more things to cover when it comes to providers, but I will cover them in future posts
In the next post, you are going to start organizing the code base by structuring your NestJS application into modules.
NestJS is a fundamental pillar in my Cloud & Backend learning path. To know more, don’t forget to subscribe to the Progressive Coder newsletter.
Also, say ‘Hi’ on Twitter for more real-time updates on what’s happening at Progressive Coder
0 Comments