Airflow started as an open-source project at Airbnb. Over the years, it has turned into one of the most popular platforms to create, manage and monitor workflows.
A workflow could be as small as sending an email alert or notification based on some trigger or something as large as a complex machine-learning workflow with many moving parts. In other words, a workflow can be a combination of several tasks that can be executed sequentially or parallel to each other.
Though Airflow is a highly extensible platform with many third-party provider packages available, the core Airflow setup comprises of a Webserver, CLI and a Scheduler. Together, these components form the backbone of a minimal Airflow installation.
In this post, we will look at the step-by-step process to install Airflow on Ubuntu.
1 – Requirements to Install Airflow
Airflow requires Python as a dependency. Therefore, first step would be to check the Python installation on the server where you wish to setup Airflow.
It can be easily achieved by logging in to your server and executing the command python –version or python3 –version.
If the output comes out as Python 3.6.* or above, you are all set to start installing Airflow.
In case you have an older Python version, you can install the latest Python version.
2 – Airflow Installation
Airflow installation needs a home. To establish the same, we can export the AIRFLOW_HOME variable using the below command:
export AIRFLOW_HOME=~/airflowThis step is optional unless we wish to setup AIRFLOW_HOME at a location other than ~/airflow. But we will set it up nonetheless for the sake of example.
Next, we can install Airflow using the below command:
pip3 install apache-airflow==2.1.0Here, 2.1.0 is the Airflow version we wish to install.
Useful Tip
In case we face some issue with pip while executing the above command, we can upgrade pip itself by using the below command:
python3 -m pip install -U pipOnce the pip upgrade is successful, we can try installing apache-airflow once again.
3 – Initializing the Airflow DB
Next step is to initialize the Airflow database.
airflow db initBy default, Airflow uses sqlite database and this command initializes the necessary tables. We can also connect other databases such as PostgreSQL and MySQL but more on that in a later post. After the command successfully finishes, you would also be able to see a bunch of files created in /home/airflow
├── airflow.cfg
├── airflow.db
├── logs
│   └── scheduler
│       ├── 2021-06-21
│       └── latest -> /home/saurabh/airflow/logs/scheduler/2021-06-21
└── webserver_config.py
Here, airflow.cfg file contains the configuration properties for the airflow and various settings. The airflow.db is the database file. Also, there is a log file and webserver_config.py.
4 – Setup Admin User
In order to access Airflow admin, we have to create admin user using the below command:
airflow users create \
    --username admin \
    --firstname Peter \
    --lastname Parker \
    --role Admin \
    --email spiderman@superhero.org
You will be prompted for a password and confirmation.
5 – Start Webserver
Next step is to start the webserver. Below is the command for the same:
airflow webserver --port 8080 -DThe -D option is to start the webserver as a daemon. Once the webserver starts, we can access the same at http://localhost:8080. We can login using the user created in Step 4.
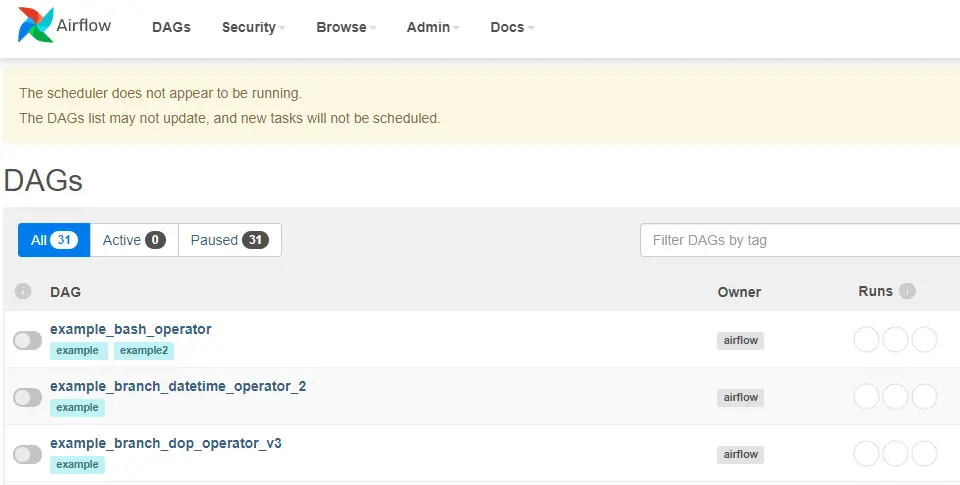
In the above screen, we see a warning about scheduler not running. Also, there will be a list of sample DAGs that form a part of the default installation.
6 – Start Scheduler
The scheduler is the component that actually manages and runs the various jobs. To start the scheduler, we can execute the below command:
airflow schedulerOnce the scheduler starts successfully and refresh the web application in the browser, the warning about the scheduler vanishes. In other words, the webserver is now connected to a valid scheduler instance and ready to execute jobs.
With this we have completed the step-by-step guide to install Airflow with all the core components. In the next post, we will create our first DAG and execute it. The official site for Airflow can be found here.
0 Comments