Static websites are a great way to get your organization online quickly and cost-effectively.
With a static website, you can create a simple web presence without needing to invest in a complex content management system or hosting. You can also use it to create portfolio websites and even small blogs. Additionally, static websites are often faster and more secure than traditional dynamic websites.
Terraform is a remarkably versatile infrastructure-as-code tool for provisioning infrastructure. However, you can also use it for creating your static website quickly and efficiently. In this post, I will take you through the step-by-step approach of using Terraform to create a static S3 website.
1 – Setting up the Terraform Project
First, you need to create a directory to keep your Terraform configuration files.
$ mkdir terraform-custom-module-s3-demo
$ cd terraform-custom-module-s3-demo
Within the root directory of the project, create a folder named modules. This will contain the custom module that will contain the code for provisioning the AWS S3 bucket.
$ mkdir modules
$ cd modules
$ mkdir aws-s3-bucket-static-website
When you create a custom Terraform module, it is considered a good practice to follow a standard structure. Here’s a typical file structure for a custom module:
.
├── LICENSE
├── README.md
├── main.tf
├── variables.tf
├── outputs.tf
None of these files is required or has any special meaning to Terraform. You can create a module with a single .tf file or use any other file structure you like. However, it is a good practice to follow the convention for documentation purposes.
Also, each of these files has a special purpose:
LICENSEcontains the license under which your module will be distributed. This file lets people using it know the terms under which it has been made available. Terraform itself does not use this file.README.mdcontains the necessary documentation about how to use your module. Terraform does not use this file, but services like the Terraform registry and GitHub make use of this file. I recommend using it wherever possible.main.tfcontains the configuration of the Terraform module.variables.tfcontains the variable definitions for your module. When your module is used by others, the variables will be configured as arguments in themoduleblock.outputs.tfcontains the output definitions for your module. Module outputs are made available to the configuration using the module and are used to pass information to other parts of your configuration
By the way, if you are interested in Cloud & Infrastructure, you’d love the Progressive Coder Newsletter where I explain technical concepts in a fun and interesting way.
Subscribe now for free.
2 – Creating the Terraform Static S3 Website Module
Let’s now create the main.tf file for the Terraform static S3 website module.
resource "aws_s3_bucket" "s3_demo_bucket" {
    bucket = var.bucket_name

    tags = var.tags
}

resource "aws_s3_bucket_website_configuration" "s3_demo_bucket" {
    bucket = aws_s3_bucket.s3_demo_bucket.id

    index_document {
        suffix = "index.html"
    }

    error_document {
        key = "error.html"
    }
}

resource "aws_s3_bucket_acl" "s3_demo_bucket" {
    bucket = aws_s3_bucket.s3_demo_bucket.id

    acl = "public-read"
}

resource "aws_s3_bucket_policy" "s3_demo_bucket" {
    bucket = aws_s3_bucket.s3_demo_bucket.id

    policy = jsonencode({
        Version = "2012-10-17"
        Statement = [
            {
                Sid = "PublicReadGetObject"
                Effect = "Allow"
                Principal = "*"
                Action = "s3:GetObject"
                Resource = [
                    aws_s3_bucket.s3_demo_bucket.arn,
                    "${aws_s3_bucket.s3_bucket.arn}/*",
                ]
            },
        ]
    })
}
To put things simply, this configuration creates a public AWS S3 bucket hosting a website with an index page and an error page.
In the process, it creates a bunch of AWS resources:
- The
aws_s3_bucketresource block provisions the S3 bucket based on the name and tags provided to the module. - Next, the
aws_s3_bucket_website_configurationresource configures the bucket and defines theindex_documentanderror_document - Next, you define the
aws_s3_bucket_aclresource block to set the access control permissions. Since this is a static website, you need to set theaclvalue topublic-read. - Lastly, you also declare the
aws_s3_bucket_policyto allow incoming requests.
Notice that there is no provider block in this configuration.
When Terraform processes a module block, it inherits the provider from the enclosing configuration. Therefore, it’s not advisable to include provider blocks in modules.
The Variable Block
You also need to declare the variables for your Terraform custom module. Though, you can do it in the main.tf file, it is generally better to create a separate file named variables.tf.
Here are the contents of the file:
variable "bucket_name" {
  description = "Name of the S3 bucket. Must be unique."
  type        = string
  default     = "saurabh-test-bucket-2023-01-07"
}

variable "tags" {
  description = "Tags to set on the bucket."
  type        = map(string)
  default     = {}
}
You have two variables bucket_name and tags with default values.
When creating a module, ask yourself which resource arguments you want to expose to the module’s end users as input variables.
For example, you might decide to expose the index and error documents to end users of the module so that they can configure it. However, you may not choose to declare a variable to set the ACL because you must set your bucket’s ACL to public-read to host a static S3 website.
Ultimately, it is a matter of deciding the level of customization that you want to provide to the consumer of the module.
Variables declared in modules that aren’t given a default value are considered required and therefore, you must set them whenever you use the module.
The Output Block
While creating a custom Terraform module, you should also consider which values to add as outputs.
This is because outputs are the only supported way for users to get information about resources configured by the module.
For our Terraform static S3 website module, below is the outputs.tf file.
output "arn" {
  description = "ARN of the bucket"
  value       = aws_s3_bucket.s3_demo_bucket.arn
}

output "name" {
  description = "Name or id of the bucket"
  value       = aws_s3_bucket.s3_demo_bucket.id
}

output "domain" {
  description = "Domain name of the bucket"
  value       = aws_s3_bucket_website_configuration.s3_demo_bucket.website_domain
}
Just like variables, outputs in Terraform custom modules perform the same function as they do in the root module but are accessed in a different way.
You can access a module’s output from the configuration that calls the module through the following syntax: module.<MODULE NAME>.<OUTPUT NAME>.
Also, note that module outputs are read-only attributes.
3 – Using the S3 Custom Module in the Main Module
Now that you have defined the Terraform static S3 website module, you need to use the custom module in the project’s main module.
Below is the main.tf file of the project’s root directory.
provider "aws" {
    region = "us-west-2"
    profile = "terraform-user"
}

module "website_s3_bucket" {
  source = "./modules/aws-s3-bucket-static-website"

  bucket_name = "saurabh-test-bucket-2023-01-07"

  tags = {
    Terraform   = "true"
    Environment = "dev"
  }
}
If you notice, the project-level main.tf file contains the provider block where you need to configure the AWS region and IAM user that you want to use.
In the module block, you need to provide the location of the static S3 website module’s source code. You can also pass the variables such as bucket_name and tags.
Also, here are the contents of the root directory’s output file (outputs.tf).
output "website_bucket_arn" {
  description = "ARN of the bucket"
  value       = module.website_s3_bucket.arn
}

output "website_bucket_name" {
  description = "Name (id) of the bucket"
  value       = module.website_s3_bucket.name
}

output "website_bucket_domain" {
  description = "Domain name of the bucket"
  value       = module.website_s3_bucket.domain
}
Installing the Custom Module
To use the module, you need to install it in the configuration’s root directory.
There are a couple of ways you can do so:
- Use
terraform initwhich will update the backends and also update any modules - Use
terraform getto update and install modules
Since our project is new, we can directly use terraform init.
When installing a local module, Terraform will directly refer to the source directory. Due to this, Terraform will automatically notice changes to local modules without having to re-run terraform init or terraform get.
4 – Provisioning the Static S3 Website using Terraform
You can now apply the configuration using the terraform apply command. If everything worked fine, you should see the output as below:
Apply complete! Resources: 4 added, 0 changed, 0 destroyed.

Outputs:

website_bucket_arn = "arn:aws:s3:::saurabh-test-bucket-2023-01-07"
website_bucket_domain = "s3-website-us-west-2.amazonaws.com"
website_bucket_name = "saurabh-test-bucket-2023-01-07"
You can also check the details in the AWS Console. There should be a new S3 bucket.
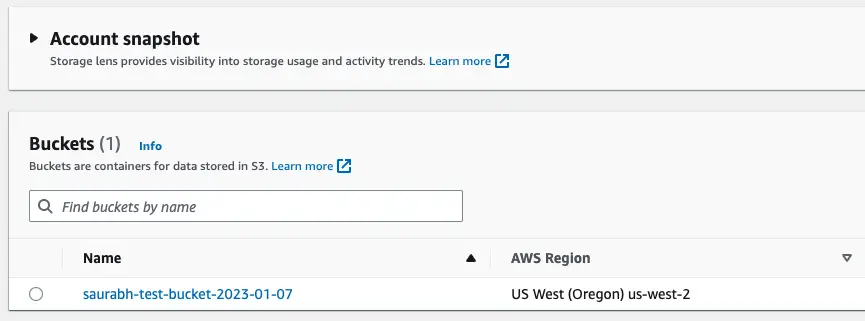
However, at this point, the bucket is empty.
You need to copy the index.html and error.html to the S3 bucket using the below command:
$ aws s3 cp modules/aws-s3-bucket-static-website/www/ s3://$(terraform output -raw website_bucket_name)/ --recursive --profile terraform-user
upload: modules/aws-s3-bucket-static-website/www/error.html to s3://saurabh-test-bucket-2023-01-07/error.html
upload: modules/aws-s3-bucket-static-website/www/index.html to s3://saurabh-test-bucket-2023-01-07/index.html
Basically, this will copy the template files from the www folder to the S3 bucket. You need to place the HTML files in the www folder.
See the below example for the index.html file.
<!DOCTYPE html>
<html lang="en" dir="ltr">
  <head>
    <meta charset="utf-8">
    <title>S3 Demo Website</title>
  </head>
  <body>
    <p>Welcome to the S3 Demo Website</p>
  </body>
</html>
The S3 bucket name is fetched from the output of the terraform output command.
With this, you can now access your static S3 website created with Terraform by accessing the URL http://saurabh-test-bucket-2023-01-07.s3-website-us-west-2.amazonaws.com/index.html.
5 – Destroying the Terraform Static S3 Website
In case you want to destroy the static S3 website created using Terraform, you need to first delete the HTML files from the bucket.
Run the below command:
$ aws s3 rm s3://$(terraform output -raw website_bucket_name)/ --recursive --profile terraform-user
delete: s3://saurabh-test-bucket-2023-01-07/index.html
delete: s3://saurabh-test-bucket-2023-01-07/error.html
Once the deletion is successful, run the terraform destroy command to delete the S3 bucket.
Conclusion
In this article, you learnt how to use Terraform modules to provision a static S3 website. To make the process more modular, we created a custom module and used that to provision the S3 bucket.
The code for this entire project is available on GitHub.
In case you are interested in learning more about Terraform, here are a few posts that might interest you:
- How to create an EC2 cluster with VPC & Subnets using Terraform Module
- How to deploy Nginx on EC2 with Terraform
If you have any comments or queries about this post, please write them in the comments section below.
Anyways, before we end this post, a quick reminder about the Progressive Code Newsletter where I explain Cloud, Infra & Backend concepts in a fun & interesting manner so that you never forget what you’ve learned.
I’m 100% sure you’d love it.
Subscribe now and see you over there.
0 Comments