In this post, we will create an efficient Dockerfile for NodeJS Application from scratch. Docker and NodeJS are two exciting technologies that have come up in this decade.
If you don’t know much about Docker, here’s a post that can help you start.
Understanding the Basics of Docker
>>Click to understand the basics of Docker
Together, these two technologies can help you build web-applications using NodeJS and deploy them to Docker containers. Basically, by dockerizing your NodeJS applications, you can efficiently deploy these applications on any platforms that support Docker.
In this post, we will follow the below plan:
- Build a NodeJS App using Express framework
- Understand how a NodeJS App actually runs
- Create a Dockerfile to run the NodeJS Application
- Set up the correct port mapping
- Specify the correct working directory for the container
- Avoid unnecessary rebuilds and minimize cache busting
By following the above steps, we will have complete insight about the process of creating Dockerfile for NodeJS application. Also, we will have complete understanding of all the pitfalls and how we can avoid those.
1. Creating a NodeJS Application
To serve our example, we will create a very basic NodeJS application. This is because our main intention is to understand the Docker part. Therefore, we simply want a NodeJS application that can receive incoming requests and send back a response.
The Express framework allows us to build such an application pretty easily.
We will create our project directory and name it docker-nodejs-app. Inside this folder, we will create a file named index.js.
const express = require('express');

const app = express();

app.get('/', (req, res) => {
    res.send("Hello World from Docker NodeJS App")
})

app.listen(8080, () => {
    console.log("Listening to requests on Port 8080")
})
Also, we create a package.json file in the same folder. Basically, this file specifies the dependencies that our NodeJS application requires.
{
    "dependencies": {
        "express":"*"
    },
    "scripts": {
        "start":"node index.js"
    }
}
Below is our project structure.
.
├── index.js
└── package.json
With this, we are basically done with our NodeJS application. As you can see, it is a very simple application that uses Express framework to expose an endpoint. Whenever we hit that root endpoint, we will get the Hello World message.
Also, at the end we setup our application to listen to port 8080.
2. Understand how a NodeJS App Actually Runs
Now that our NodeJS application is ready, let’s understand how it actually works. This understanding will basically help us in designing an efficient Dockerfile for NodeJS application.
Below is an illustration to demonstrate how a typical NodeJS application can be started.
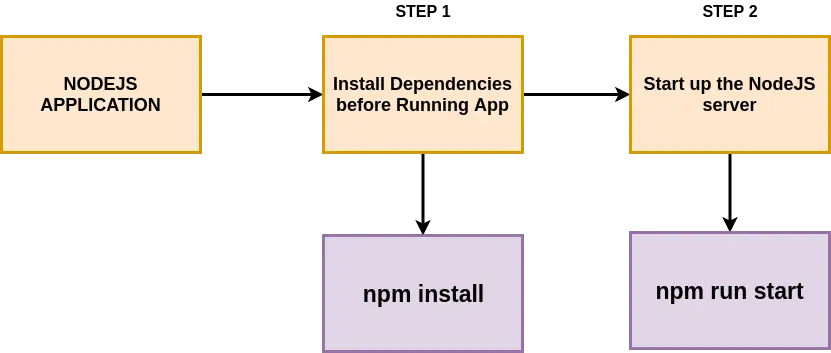
As shown above, a typical NodeJS application requires two steps:
STEP 1 – Install dependencies for the application. To do so, we need to issue the npm install command.
STEP 2 – Once the dependencies are installed, we can start the application. To do so, the command is npm run start.
With this, we can now see quite clearly that if we need to create a Dockerfile for NodeJS Application, we definitely need to take care of these two steps.
3. Dockerfile for NodeJS Application
Now that we are clear on what needs to be done, let’s start the process of Dockerizing our NodeJS application. In other words, let’s put together a Dockerfile for our application.
To do so, create a new file named Dockerfile (no extension required) in the root of our docker-nodejs-app project.
Also, to understand things better, we are going to go over the process iteratively.
3.1 – Putting together a bare minimum Dockerfile for NodeJS Application
As a first trial, below is our Dockerfile.
#Specify a base image
FROM node:alpine

#Install dependencies
RUN npm install

#Default command
CMD ["npm","start"]
Here, we first get a base image called node:alpine. This is a lightweight node docker image having node and npm already installed. Next, we run npm install. And lastly, we attach the command npm start to the image.
We can build a Nodejs Docker image out of this Dockerfile using the below command at the root project level. Do not forget the dot at the end. Basically, this dot specifies the build context for our image. In this case, the build context is our current project directory.
docker build .However, we will get an error message as below. Basically, it says that the Docker build image process could not find the package.json file. Even though the file was present in our project.
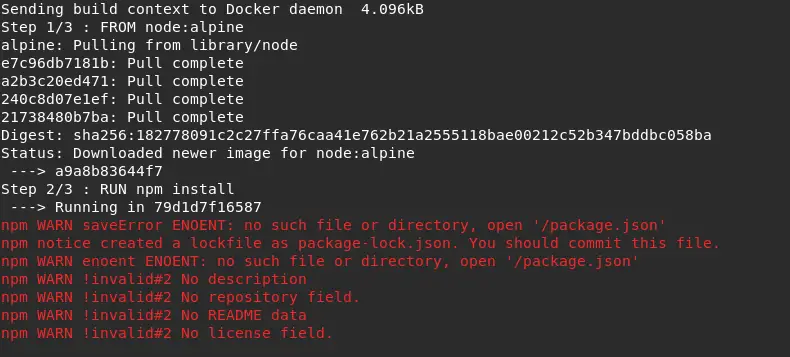
Let’s understand why this error message came up and how can we correct it.
3.2 – Fixing the Dockerfile
To fix the Dockerfile, we should first understand what’s happening behind the scenes with our first try.
The below illustration can help make things clearer.
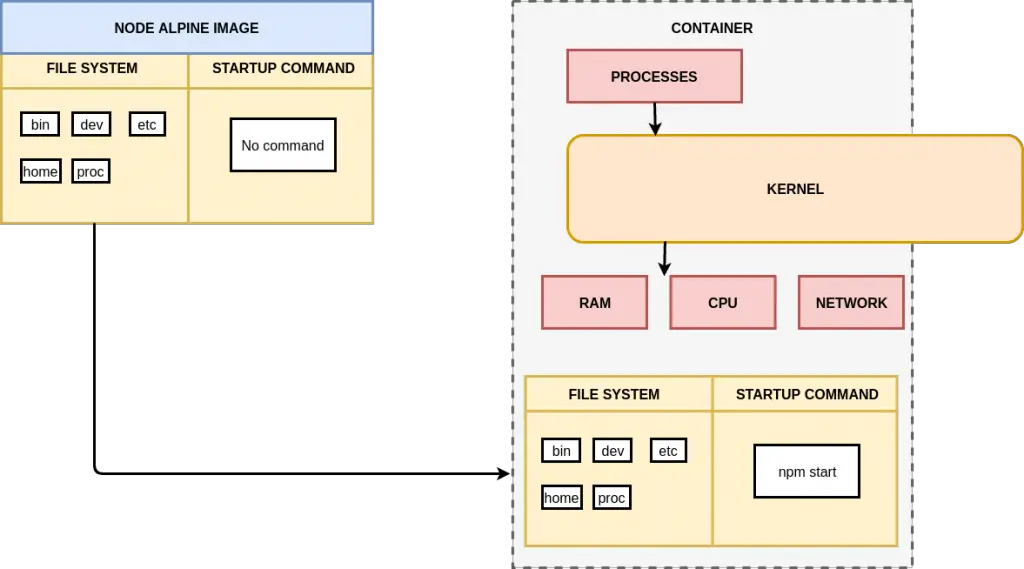
The above diagram shows that initially we have just the node:alpine base image. It has a particular file system snapshot. When this base image is used to create a Docker container through the build process, a new image is created where the file system from the base image is copied for.
However, as can be seen, there is no trace of the package.json file inside the container. This is because the node:alpine base image doesn’t know anything about this file. This file is currently sitting on our hard-drive and not connected to the base image.
Therefore, to fix this issue, we need to copy our project files over to the container as one of the steps in the Dockerfile. Wit this in mind, we can now update the Dockerfile as below:
#Specify a base image
FROM node:alpine

#Copy the project
COPY ./ ./

#Install dependencies
RUN npm install

#Default command
CMD ["npm","start"]
Notice the COPY statement that we added. Basically, it takes two arguments. The first argument (./) is the folder path on our desktop relative to the build context. The second argument (./) is the location where we want to copy into our container. In this case, it is the root path of the container.
We can run the Docker build process again with the below command. This time, we will also tag the image. Tagging can be easily done using the -t flag.
docker build -t progressivecoder/docker-nodejs-app .This time, our image will be built successfully. You might see a couple of warnings in the process but those can be ignored.
We can now also run the container using the image tag.
docker run progressivecoder/docker-nodejs-appIf everything is fine, we will see the below log entry showing our NodeJS application starting up successfully.
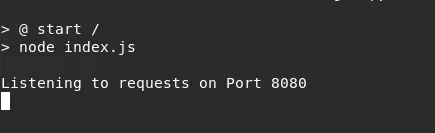
However, on trying to access http://localhost:8080, we will get an error.
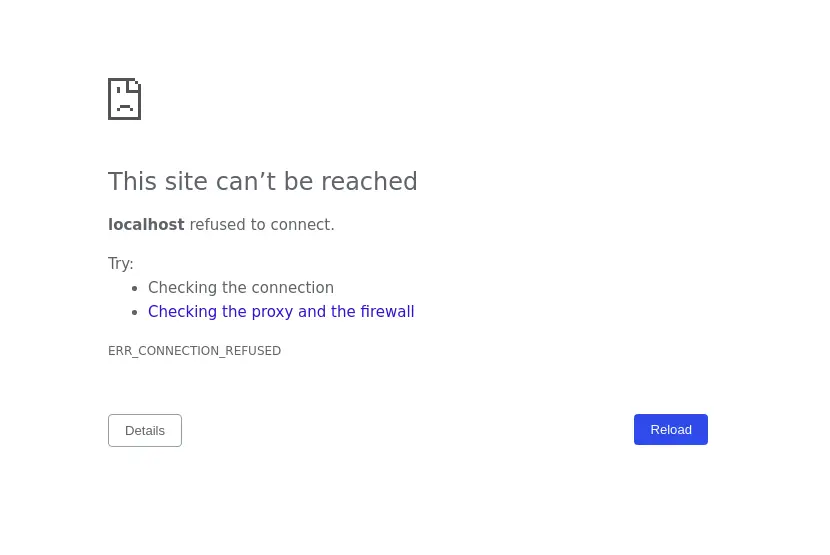
4. Setting up the Port Mapping
Even though are Docker image was successfully built, we still were not able to access our server on http://localhost:8080. Clearly, there is still something missing.
The below illustration can help throw some light on the issue.
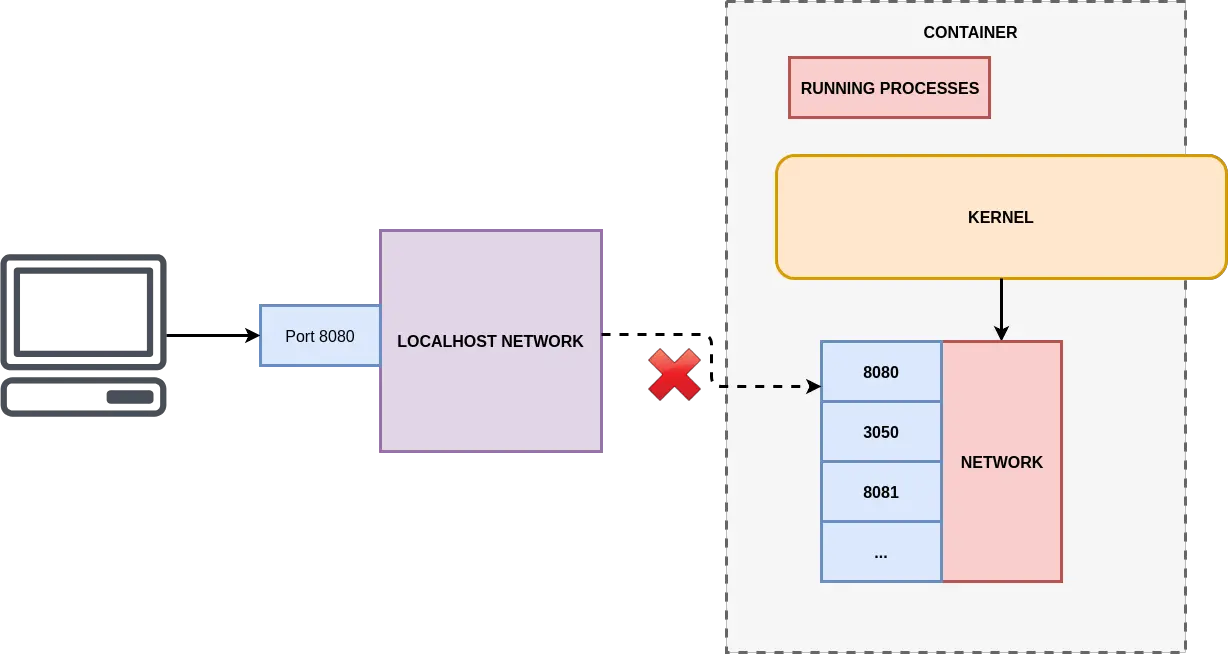
Basically, we make a request through our browser to the localhost network on our computer. By default, no traffic that comes to our computer is routed to the container. The container essentially has its own isolated set of ports.
To set up the connection between our localhost (or any other machine) and the container’s port, we need to setup a port mapping. In other words, this port mapping would specify how the incoming request should be forwarded to the appropriate container port.
To specify this port mapping, we have to change the command we are using to run our containers. Below is the command:
docker run -p 8080:8080 progressivecoder/docker-nodejs-appBasically, here we are using -p flag to map our localhost’s port 8080 to the container’s port 8080.
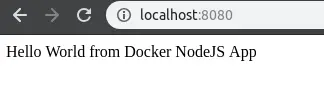
The container starts up again. And now we can see that our Hello World message was successfully shown in the browser. Basically, we now have a running NodeJS Docker Container that is able to serve incoming requests.
NOTE: This rule is only applicable for incoming traffic. Our containers are still able to communicate outside. We just saw it in action when the npm install command was able to pull the dependencies from the internet.
5. Specify the correct working directory for the container
Even though we now have a running NodeJS Docker Container and are also able to access the single endpoint, there’s one more thing left. To see that thing, we will start our container again. However, this time we will try to access the shell of the container using the below command.
docker run -it progressivecoder/docker-nodejs-app shThis will start the container in interactive mode and also provide us a command line interface. We then access the file system using the command ls.
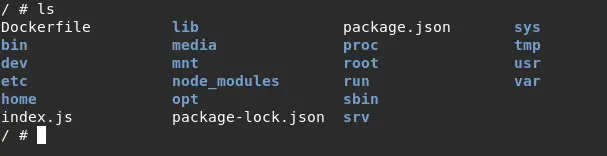
As you can see above, the files that we created in our project (package.json, index.js etc) are all present in the root directory.
This is not an ideal setup. In this case it works fine. However, this type of setup might lead to issues if we have similar named files or folders in our project. For example, our NodeJS application can very easily have a folder named lib. With this setup, we might accidentally overwrite existing folders of the base image.
To fix this, we will add another command to our project’s Dockerfile. Below is the updated Dockerfile.
#Specify a base image
FROM node:alpine

#Specify a working directory
WORKDIR /usr/app

#Copy the project
COPY ./ ./

#Install dependencies
RUN npm install

#Default command
CMD ["npm","start"]
Basically, this new Docker command WORKDIR will specify a working directory for our project within the container. Any subsequent steps in the Dockerfile will happen relative to the specified working directory.
We can now again build a new image using the docker build command. Next, we execute the docker run command in interactive mode with shell access. This time, we will directly login to the working directory. On inspecting the file system, we should see our project files.

6. Avoiding unnecessary builds and minimize cache busting
We are almost done with our Dockerfile for NodeJS application. However, there is still one small thing left that can make our Dockerfile process more efficient.
To demonstrate it, we will make a minor change in our application code. Basically, we will change the Hello World message slightly.
const express = require('express');

const app = express();

app.get('/', (req, res) => {
    res.send("Hello World Again from Docker NodeJS App")
})

app.listen(8080, () => {
    console.log("Listening to requests on Port 8080")
})
Next, we will build a new Docker image using the docker build command. If we observe the Docker build process logs (Step 4/5), we can see that our dependencies are being downloaded again. However, we didn’t change anything on a dependency level. And yet, the Docker build process is rebuilding everything from scratch and not using the cache.
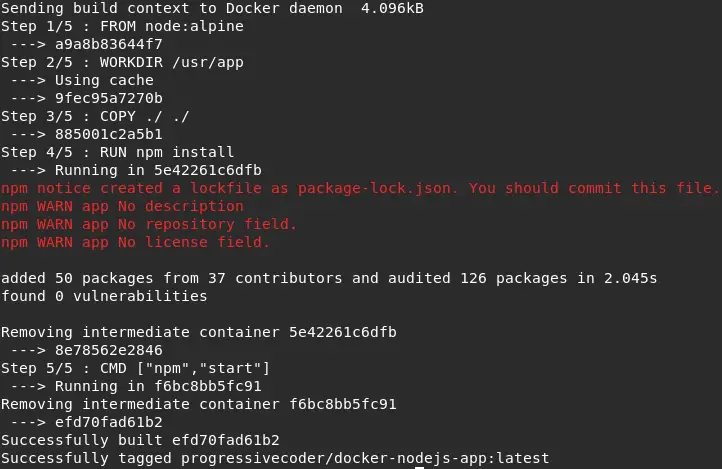
Basically, in step 3, Docker build copies our project file and sees that have modified the index.js. Therefore, all future steps have to be executed again without using the cache.
This is not an ideal situation for big projects with a ton of dependencies. Each time, the Docker npm build process is going to take a lot of time even if we are simply making some minor code changes.
To make things better, we can make a slight modification to our Dockerfile. Basically, we can copy our project files in stages.
See below Dockerfile to check the modifications. First, we copy the package.json file. Then, we run npm install. Lastly, we copy the remaining files.
#Specify a base image
FROM node:alpine

#Specify a working directory
WORKDIR /usr/app

#Copy the dependencies file
COPY ./package.json ./

#Install dependencies
RUN npm install

#Copy remaining files
COPY ./ ./

#Default command
CMD ["npm","start"]
After this change, we can build the NodeJS Docker image once again using docker build command. Then, we make another minor change in our index.js file. And then we build again to see our modifications in action. This time, we can see that npm install didn’t happen again.
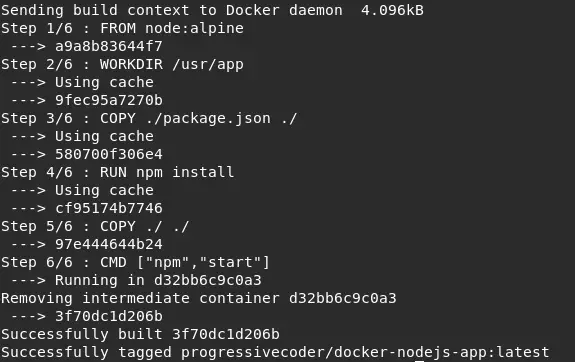
As we can see in the above screenshot, all steps till Step 5 are using cache. This is because there’s no change in our project till that step. This way we avoid unnecessary builds and also minimize the cache busting.
Conclusion
With this, we have successfully managed to create a Dockerfile for NodeJS application.
We have dockerized the NodeJS application with a bunch of optimizations and best practices. In the process, we also learned a few common pitfalls and made a few tweaks to avoid those. Now, we have a great Dockerfile example that can be extended for future needs as well.
The code for this application is available on Github for reference.
If you do have any comments or queries, please mention in the comments section below.
Happy Learning!
0 Comments