The NestJS Scheduling package comes with an API that allows us to create dynamic cron jobs and much more. In this post, we are going to look into how to setup a NestJS Dynamic Cron Job using the Dynamic Schedule API.
This post basically follows from our previous post on NestJS Task Scheduling. Therefore, I will recommend you go through that post first and then come back to this one.
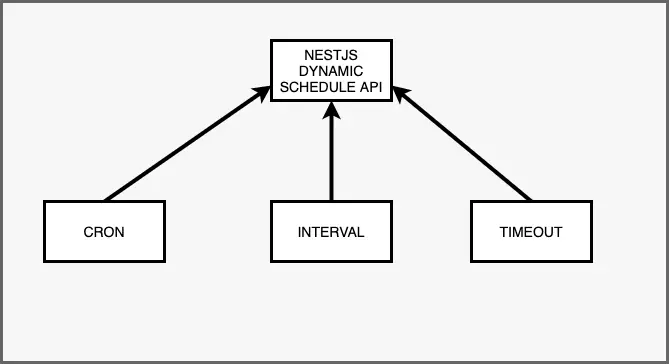
1 – Dynamic Schedule API
The @nestjs/schedule package comes with a dynamic API. This API helps us manage declarative cron jobs, intervals and timeouts. We can also create and update jobs, intervals and timeouts. In other words, we can modify the properties at runtime.
From an installation point of view, it is sufficient to have the NestJS schedule packages that we already installed in the previous post.
$ npm install --save @nestjs/schedule
$ npm install --save-dev @types/cron
2 – NestJS Dynamic Cron Job
Let us first look at dynamic cron job management using the API.
2.1 – Managing the Cron Job
Below example code helps demonstrate the use of the dynamic API.
constructor(private schedulerRegistry: SchedulerRegistry){}

@Cron('4 * * * * *', {
    name: 'messaging',
    timeZone: 'America/New_York'
})
triggerMessage(){
    console.log("Triggering Message Sending");
}

stopCronJob() {
    const job = this.schedulerRegistry.getCronJob('messaging');

    job.stop();
    console.log(job.lastDate());
}
Let’s understand what is going on in the above snippet:
- We first inject an instance of the SchedulerRegistry using the constructor. The SchedulerRegistry is part of the @nestjs/schedule package. You can read more about injecting providers into services in this detailed post on NestJS Providers.
- Second , we have the method decorated with @Cron() decorator. This is a named cron job and it executes every 4 seconds.
- Lastly, we have the method stopCronJob(). Basically, we use the getCronJob() method available as part of the SchedulerRegistry to get access to the cron job with name messaging.
- Finally, we call the stop() method to stop the cron job from further execution.
There are several methods available to the CronJob instance.
- stop() – This methods stops a job that is scheduled to run.
- start() – This method basically restarts a job that is stopped.
- setTime(time: CronTime) – This method stops a job, sets the new time and restarts it.
- lastDate() – As the name suggests, this method basically tells the last date the job executed.
- nextDates(count: number) – This method returns the upcoming schedule of a job. In other words, upcoming job execution dates. The input count is the number of dates needed.
2.2 – Creating a Cron Job
We can also dynamically create a new cron job as below:
addNewJob(jobName: string, time: string) {
    const job = new CronJob(`${time} * * * * *`, () => {
      console.log(`time (${time}) for job ${jobName} to run!`)
    })

    this.schedulerRegistry.addCronJob(jobName, job);
    job.start();

    console.log(`Job ${name} added for every ${time} seconds`)
}
As you can see, we create a CronJob instance using the constructor. This is part of the cron package.
The constructor basically takes the time as input. We place the time in the cron pattern (in this case, seconds). The second input to the constructor is a callback function. Basically, this callback function is executed when the cron timer fires.
Next, we use the addCronJob() method of the SchedulerRegistry to register the new job.
2.3 – Deleting a Cron Job
The deleteCronJob() method from the SchedulerRegistry class helps delete a cron job. See below example:
deleteJob(jobName: string) {
    this.schedulerRegistry.deleteCronJob(jobName);
}
We only pass the name of the job as input.
2.4 – Fetching Cron Jobs
We can also get a list of all the cron jobs using getCronJobs() method.
getCronJobs() {
    const jobs = this.schedulerRegistry.getCronJobs();

    jobs.forEach((value, key, map) => {
      console.log("Value:", value);
    })
}
Basically, the getCronJobs() method returns a map. We iterate over this and get access to individual jobs.
3 – NestJS Dynamic Intervals
As discussed earlier, the dynamic API also supports intervals and timeouts.
3.1 – Managing the Interval
We can access the interval and do something with it as below:
@Interval('messaging', 3500)
triggerMethodBasedOnNamedInterval() {
    console.log("Triggering the method after 3.5 seconds based on named interval");
}

clearInterval() {
    const interval = this.schedulerRegistry.getInterval('messaging');
    clearInterval(interval);
}
Basically, we use the getInterval() method of the SchedulerRegistry. Then, we use the standard clearInterval() method to clear the interval. Basically, we simply pass the Interval instance obtained from the getInterval() method.
3.2 – Adding a New Interval
Adding a new interval is also quite straightforward. See below example:
addNewInterval(intervalName: string, intervalTime: number){
    const callback = () => {
      console.log(`Inteval ${intervalName} executing at time ${intervalTime}`);
    }

    const interval = setInterval(callback, intervalTime);
    this.schedulerRegistry.addInterval(intervalName, interval);
}
We create a callback function. Then, we basically create a new interval by using the standard javascript setInterval() method by passing callback and intervalTime as input.
Lastly, we use the addInterval method of the SchedulerRegistry class. This method takes the name of interval and the interval instance as input.
3.3 – Deleting an Interval
Deleting an interval is as easy as calling the deleteInterval() method.
deleteInterval(intervalName: string) {
    this.schedulerRegistry.deleteInterval(intervalName);
}
Here, the input is the interval name.
3.4 – Fetch Intervals
To list all intervals, we can simply use the getIntervals() method.
listAllIntervals() {
    const intervals = this.schedulerRegistry.getIntervals();

    intervals.forEach(key => console.log(`Interval: ${key}`));
}
4 – NestJS Dynamic Timeouts
Lastly, we also look at how the dynamic API also supports timeouts.
4.1 – Managing Timeouts
We can access a timeout instance and perform some action upon it as follows:
@Timeout('messaging', 3500)
handleNamedTimeout() {
    console.log("Calling method after 3.5 seconds based on named timeout.")
}

clearTimeout() {
    const timeout = this.schedulerRegistry.getTimeout('messaging');
    clearTimeout(timeout);
}
As you can see, we have a timeout named messaging. We get access to it using the getTimeout() method of the SchedulerRegistry. Next, we clear the timeout using the standard javascript clearTimeout() method.
4.2 – Adding a New Timeout
We can also very easily add a new timeout. See below code snippet.
addNewTimeout(timeoutName: string, milliseconds: number) {
    const callback = () => {
      console.log(`Timeout ${timeoutName} executing after ${milliseconds}`);
    }

    const timeout = setTimeout(callback, milliseconds);
    this.schedulerRegistry.addTimeout(timeoutName, timeout);
}
Basically, it is quite similar to adding an interval. We create a callback and then create a standard javascript timeout using setTimeout(). Finally, we add the timeout using the addTimeout() method of the SchedulerRegistry.
4.3 – Deleting a Timeout
Deleting a timeout is also pretty straightforward. See below snippet.
deleteTimeout(timeoutName: string) {
    this.schedulerRegistry.deleteTimeout(timeoutName);
}
As you may have guessed, we use the deleteTimeout() method available as part of the SchedulerRegistry.
4.4 – Fetch Timeouts
Lastly, we can also get a list of timeouts. See below example:
listTimeouts() {
    const timeouts = this.schedulerRegistry.getTimeouts();
    timeouts.forEach(key => console.log(`Timeout Name: ${key}`))
}
Basically, we use the getTimeouts() method of the SchedulerRegistry.
Conclusion
With this, we have successfully looked how to setup a NestJS Dynamic Cron Job using the Dynamic Schedule API. Apart from cron jobs, we also covered intervals and timeouts that can be managed using the same dynamic API.
If you have any comments or queries, please feel free to mention in the comments section below.
0 Comments