Spring Boot Security using UserDetailsService is one of the conventional methods of securing Spring Boot applications. Earlier, we looked at the simplest way to enable Spring Boot Security. Although it is a reasonable approach, it is not the best approach.
The approach using UserDetailsService is a far better option to secure Spring Boot Microservices.
And that is exactly what we are going to look at in this post. So let’s start.
Creating the Security Configuration
In order to enable a more fine-grained control over the authentication and authorization process, we need to extend the WebSecurityConfigurerAdapter class. This is done by creating a new configuration class SecurityConfig as below:
@Configuration
public class SecurityConfig extends WebSecurityConfigurerAdapter {

    @Override
    protected void configure(AuthenticationManagerBuilder auth) throws Exception {
        auth.inMemoryAuthentication()
                .withUser("admin")
                .password("{noop}admin").authorities("ROLE_ADMIN");
    }

    @Override
    protected void configure(HttpSecurity http) throws Exception {
       http.httpBasic()
               .and()
               .authorizeRequests()
               .anyRequest().authenticated();
    }
}
Let’s understand what’s going on here:
- First, we are overriding the configure() method. We basically provide the AuthenticationManagerBuilder instance with an in-memory user object. This in-memory user has the username of admin and password of admin. Also, we have given this user the authority named ROLE_ADMIN.
- We override another variation of the configure() method that takes in an instance of HttpSecurity. We instruct the object to use httpBasic as well as authenticate all incoming requests.
- We are also using “{noop}” parameter before the password to prevent an error related to PasswordEncoder not present. This parameter instructs Spring Security to continue without expecting a PasswordEncoder bean.
Now, we can start up the application using the below command.
clean package spring-boot:runIf you try to visit http://localhost:8080/swagger-ui.html, there will be a prompt for username and password. On entering username as admin and password as admin, the access will be granted. Any other credentials will result in failure to login or access the resource.
Defining the User Entity
The above approach was using an in-memory User. On face value, it isn’t much different from what we discussed in the Spring Boot Security Basic Authentication post. Maybe, the above approach can work if you only have a couple of users for your application.
However, in a typical application, we would ideally want a user database. In this database, we can store the user credentials and their associated roles. We would also want Spring to authenticate users based on this user database.
This approach is known as Spring Boot Security using UserDetailsService. Here, we would be using the UserDetailsService interface.
Fortunately, Spring Security already provides us with interfaces to do so.
First, we would define a User Entity in our application as below.
@Entity
public class User implements UserDetails {

    @Id
    @GeneratedValue(strategy = GenerationType.AUTO)
    private Long id;

    private String username;

    private String password;

    private boolean accountNonExpired;

    private boolean accountNonLocked;

    private boolean credentialsNonExpired;

    private boolean enabled;

    @Enumerated(EnumType.STRING)
    @ElementCollection(fetch = FetchType.EAGER)
    private List<Role> roles;

    public User() {
        this.accountNonExpired = true;
        this.accountNonLocked = true;
        this.credentialsNonExpired = true;
        this.enabled = true;
    }

    public Long getId() {
        return id;
    }

    public void setId(Long id) {
        this.id = id;
    }

    @Override
    public String getUsername() {
        return username;
    }

    public void setUsername(String username) {
        this.username = username;
    }

    @Override
    public String getPassword() {
        return password;
    }

    public void setPassword(String password) {
        this.password = password;
    }

    @Override
    public boolean isAccountNonExpired() {
        return accountNonExpired;
    }

    @Override
    public boolean isAccountNonLocked() {
        return accountNonLocked;
    }

    @Override
    public boolean isCredentialsNonExpired() {
        return credentialsNonExpired;
    }

    @Override
    public boolean isEnabled() {
        return true;
    }

    public void grantAuthority(Role authority) {
        if ( roles == null ) roles = new ArrayList<>();
        roles.add(authority);
    }

    @Override
    public List<GrantedAuthority> getAuthorities(){
        List<GrantedAuthority> authorities = new ArrayList<>();
        roles.forEach(role -> authorities.add(new SimpleGrantedAuthority(role.toString())));
        return authorities;
    }

}
Here, we are implementing the UserDetails interface. The UserDetails interface is provided by the Spring Security module. This interface expects us to implement a few methods that are annotated with @Override.
Another important thing to note here is the List of Roles for the user. We use these roles and convert them to a list of Granted Authority in the getAuthorities() method.
In order to access the data in the User Entity (or table), we also declare a Spring Data JPA repository.
public interface UserRepository extends JpaRepository<User, Long> {

    Optional<User> findByUsername(String username);
}
We declare one method here i.e. findByUsername(). This will be used in the UserDetailsService implementation.
Implementing the UserDetailsService
We are now almost halfway through implementing Spring Boot Security using UserDetailsService.
Next step is to implement the UserDetailsService as below:
@Service
public class UserService implements UserDetailsService {

    @Autowired
    private UserRepository userRepository;

    @Override
    public UserDetails loadUserByUsername(String s) throws UsernameNotFoundException {
        Optional<User> user = userRepository.findByUsername(s);

        if (user.isPresent()){
            return user.get();
        }else{
            throw new UsernameNotFoundException(String.format("Username[%s] not found"));
        }
    }
}
UserDetailsService is an interface provided by Spring Security module. We have to override one method provided by the interface i.e. loadUserByUsername().
As I mentioned earlier, we will be using the findByUsername() method from the UserRepository. If we find the user, we return it. Else, we throw a UsernameNotFoundException.
Configuring Spring Security
This is the last step to implement Spring Boot Security using UserDetailsService.
Now that we have implemented UserDetailsService, it is time to modify our Security Configuration class.
By default, Spring Security also requires a PasswordEncoder. In the case of in-memory approach, we avoided using an encoder by suffixing the password with the parameter “{noop}“. However, we will be using a PasswordEncoder.
In this case, we will be use the BCryptPasswordEncoder.
To use it, we can declare another Configuration class in which we create a Bean that returns an instance of the BCryptPasswordEncoder. See below:
@Configuration
public class BCryptEncoderConfig {

    @Bean
    public BCryptPasswordEncoder passwordEncoder(){
        return new BCryptPasswordEncoder();
    }
}
Next, we will update our SecurityConfig class as follows:
@Configuration
@EnableWebSecurity(debug=true)
public class SecurityConfig extends WebSecurityConfigurerAdapter {

    @Autowired
    private UserDetailsService userDetailsService;

    @Autowired
    private PasswordEncoder passwordEncoder;

    @Override
    protected void configure(AuthenticationManagerBuilder auth) throws Exception {
        auth.authenticationProvider(authenticationProvider());
    }

    @Override
    protected void configure(HttpSecurity http) throws Exception {
       http
               .httpBasic()
               .and()
               .authorizeRequests()
               .anyRequest().authenticated();
    }

    @Bean
    public DaoAuthenticationProvider authenticationProvider(){
        DaoAuthenticationProvider provider = new DaoAuthenticationProvider();
        provider.setPasswordEncoder(passwordEncoder);
        provider.setUserDetailsService(userDetailsService);
        return provider;
    }

}
Let’s understand what we have done here:
- We create a DaoAuthenticationProvider that uses our PasswordEncoder and the UserDetailsService. We inject the PasswordEncoder and UserDetailsService into the Configuration class using @Autowired.
- In the configure() method where we setup AuthenticationManagerBuilder, we are now passing our new AuthenticationProvider instance. This will ensure that Spring Security will now be using the UserDetailsService and the PasswordEncoder we just created.
- We also annotate the class with @EnableWebSecurity(debug=true). You should remove it before putting the application in production.
We are almost done implementing Spring Boot Security using UserDetailsService.
There is one missing piece, however. We still don’t have a user. Ideally, a new user will register to our application through some online form or through an API call. However, in this case, we will simply insert a user into our application at start-up time.
@Component
class DemoCommandLineRunner implements CommandLineRunner{

	@Autowired
	private VehicleRepository vehicleRepository;

	@Autowired
	private UserRepository userRepository;

	@Autowired
	private PasswordEncoder passwordEncoder;

	@Override
	public void run(String... args) throws Exception {

		Vehicle audi = new Vehicle();
		audi.setId(UUID.randomUUID());
		audi.setVehicleIdentityNumber("Reg#1234");
		audi.setMake("Audi");
		audi.setModel("Q5");

		vehicleRepository.save(audi);

		Vehicle tesla = new Vehicle();
		tesla.setId(UUID.randomUUID());
		tesla.setVehicleIdentityNumber("Reg#6789");
		tesla.setMake("Tesla");
		tesla.setModel("Model S");

		vehicleRepository.save(tesla);

		User user = new User();
		user.setUsername("application-user");
		user.setPassword(passwordEncoder.encode("password"));
		user.grantAuthority(Role.ROLE_ADMIN);

		userRepository.save(user);
	}
}
Here also, we are wiring the UserRepository and the PasswordEncoder bean. After inserting a couple of Vehicles in our vehicle table, we are inserting a new user as application-user. We are setting the password as password for the user after encoding it. Also, we are granting it the role of Admin.
Testing the Application
We can start-up the application now using the below command.
clean package spring-boot:runOnce the application starts up, you can visit http://localhost:8080/swagger-ui.html. This time also, you will be prompted to enter username and password.
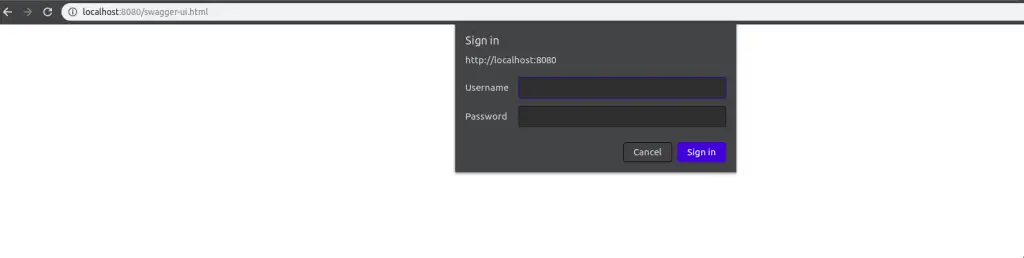
If you enter wrong credentials (user or password), you will be prompted again. Also, in he application logs, you would be able to see the Security Exception getting triggered.
If you enter the correct credentials (in our case application-user and password), you will be granted access to the resource. In this case, the Swagger UI will be displayed. The same approach will be applicable for all other end-points in our application.
Conclusion
We have now successfully implemented Spring Boot Security using UserDetailsService.
The code till this point is available on Github.
However, there are still a few topics unexplored in this with regards to Roles and Authorizations. We will be exploring those in the upcoming posts.
So stay tuned!

5 Comments
Faisal · October 25, 2019 at 3:59 pm
Great article,
but there is one flaw, if you hit Login controller, after making one, from some client like post man or soap ui, with valid username and password it authenticates that user as usual.
but once user is authenticated, if you try to hit the same url with correct userName but wrong password, it still authenticates the user and allows access to the resource.
How to fix this?
Andy · February 6, 2020 at 3:15 pm
Thanks U so much for this guide. The only without Thymeleaf. You save my life.
Saurabh Dashora · February 11, 2020 at 10:28 am
Hi Andy!
Glad to know it helped.
George · February 18, 2022 at 11:51 am
Your loadByUsername(s) method in your UserDetailsService implementation class returns a user instead of a UserDetails object. This will result in a syntax error because the return type expected is different from what is passed.
Saurabh Dashora · February 18, 2022 at 1:57 pm
Hi, It works because User implements UserDetails