In this post, we will look at the process to launch AWS EC2 Instance in a step-by-step manner.
To follow and try this demo on your own, you would need to create an AWS Account.
I would also suggest you to create an IAM user using which you can login to your AWS Management Console.
After launching the AWS EC2 Instance, we will also access it using SSH.
But before that, let’s understand what AWS EC2 is and the various features it brings to the table.
What is AWS EC2?
Amazon Elastic Compute Cloud (more commonly known as Amazon EC2) provides scalable computing capacity in Amazon Web Services.
In other words, using AWS EC2 eliminates your need to invest in hardware up front. As a developer, you can simply focus on developing your application. Using AWS EC2, you can basically launch as many or as few virtual servers as you need.
Amazon EC2 enables you to scale up or down to handle changes in requirement or sudden spikes in incoming traffic in your application.
Important Features of AWS EC2
AWS EC2 provides the following features:
- Virtual computing environments also known as instances.
- Pre-configured templates for these instances. These templates are also known as Amazon Machine Images (AMIs). Basically, AMIs package the bits you need for creating a server (such as operating system or additional software dependencies).
- Various different configurations of CPU, memory, storage and network capacity. They are also known as instance types.
- Secure login information using key pairs. AWS keeps the public key while you get the private key.
- Storage volumes for temporary data. When you stop or terminate an instance, the data is also deleted. It is also known as instance store volumes.
- Persistent storage volumes for your data using Amazon Elastic Block Storage (or Amazon EBS).
- Multiple physical locations for your resources known as Regions and Availability Zones.
- Firewall setup that enables you to specify the protocols, ports and source IP range that can reach your instances using security groups.
- Static IPv4 address for dynamic cloud computing. This feature is also known as Elastic IP addresses.
- Metadata (also known as tags) to better identity your AWS EC2 resources.
- Virtual networks that you can create on your own. Basically these networks are logically isolated from the rest of the AWS cloud. They can also be connected to your organization’s network (known as virtual private cloud).
Creating AWS EC2 Instance
Having understood what AWS EC2 is and also its various features, it is now time to create our own AWS EC2 instance and launch it.
Let’s start with the step-by-step process to Launch AWS EC2 instance.
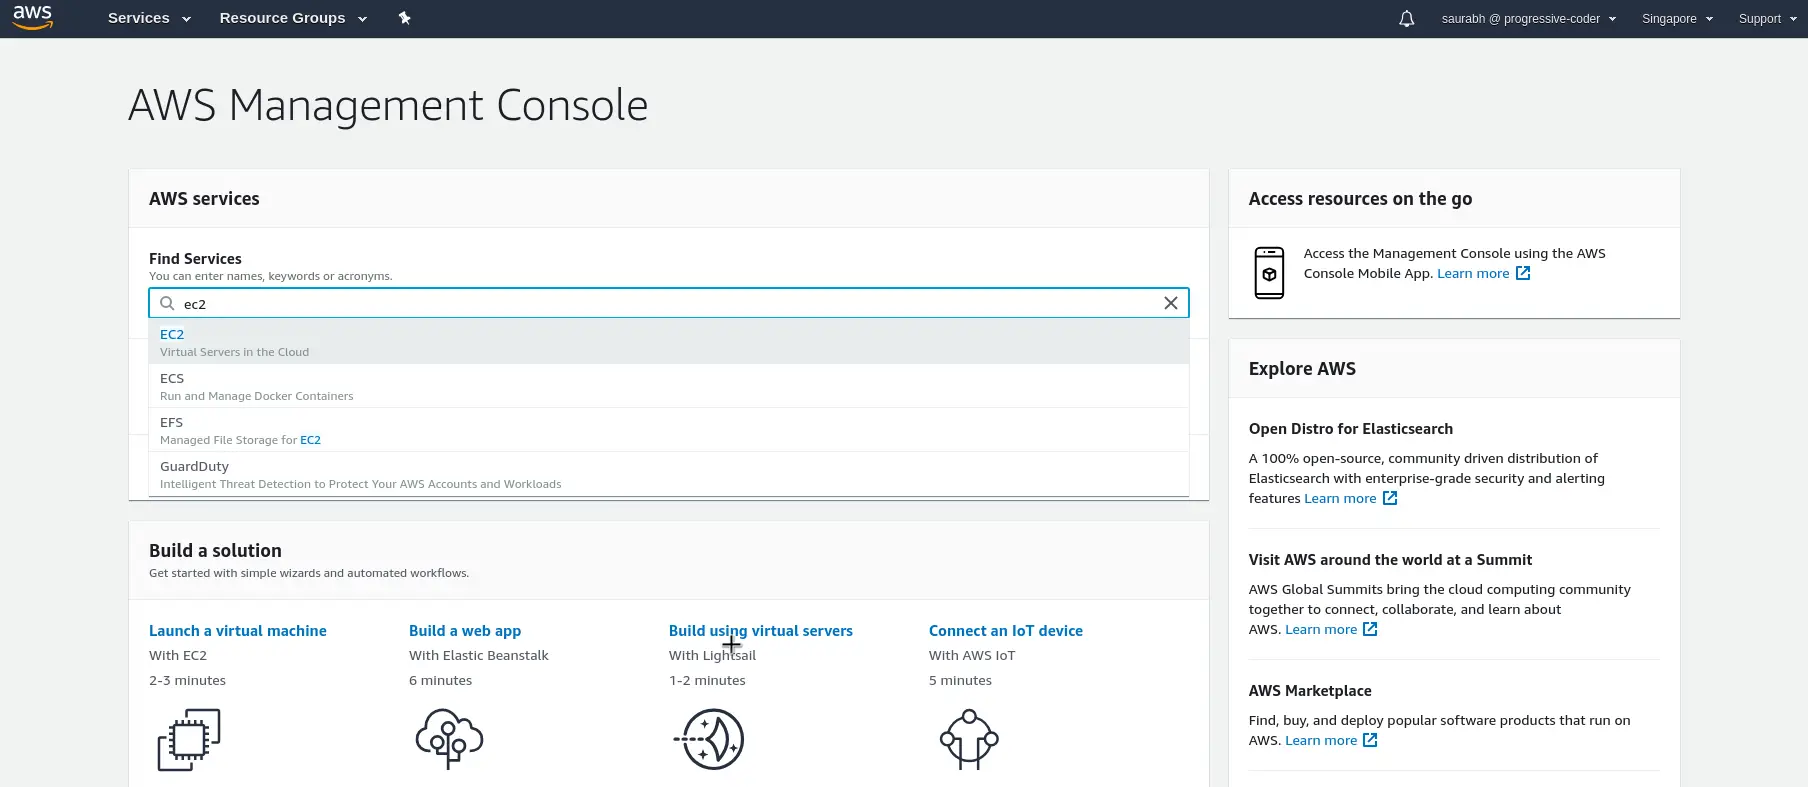
Step 1 – Navigating to EC2 Page
The very first step is to search for EC2 in the search bar in the AWS Management Console and clicking the first search item to navigate to the EC2 dashboard.
Step 2 – Click the Launch AWS EC2
You will see the below page where you can see some information about the instances. Since we don’t have any active running EC2 instances, we can see details like 0 Running Instances shown at the top of the screen.
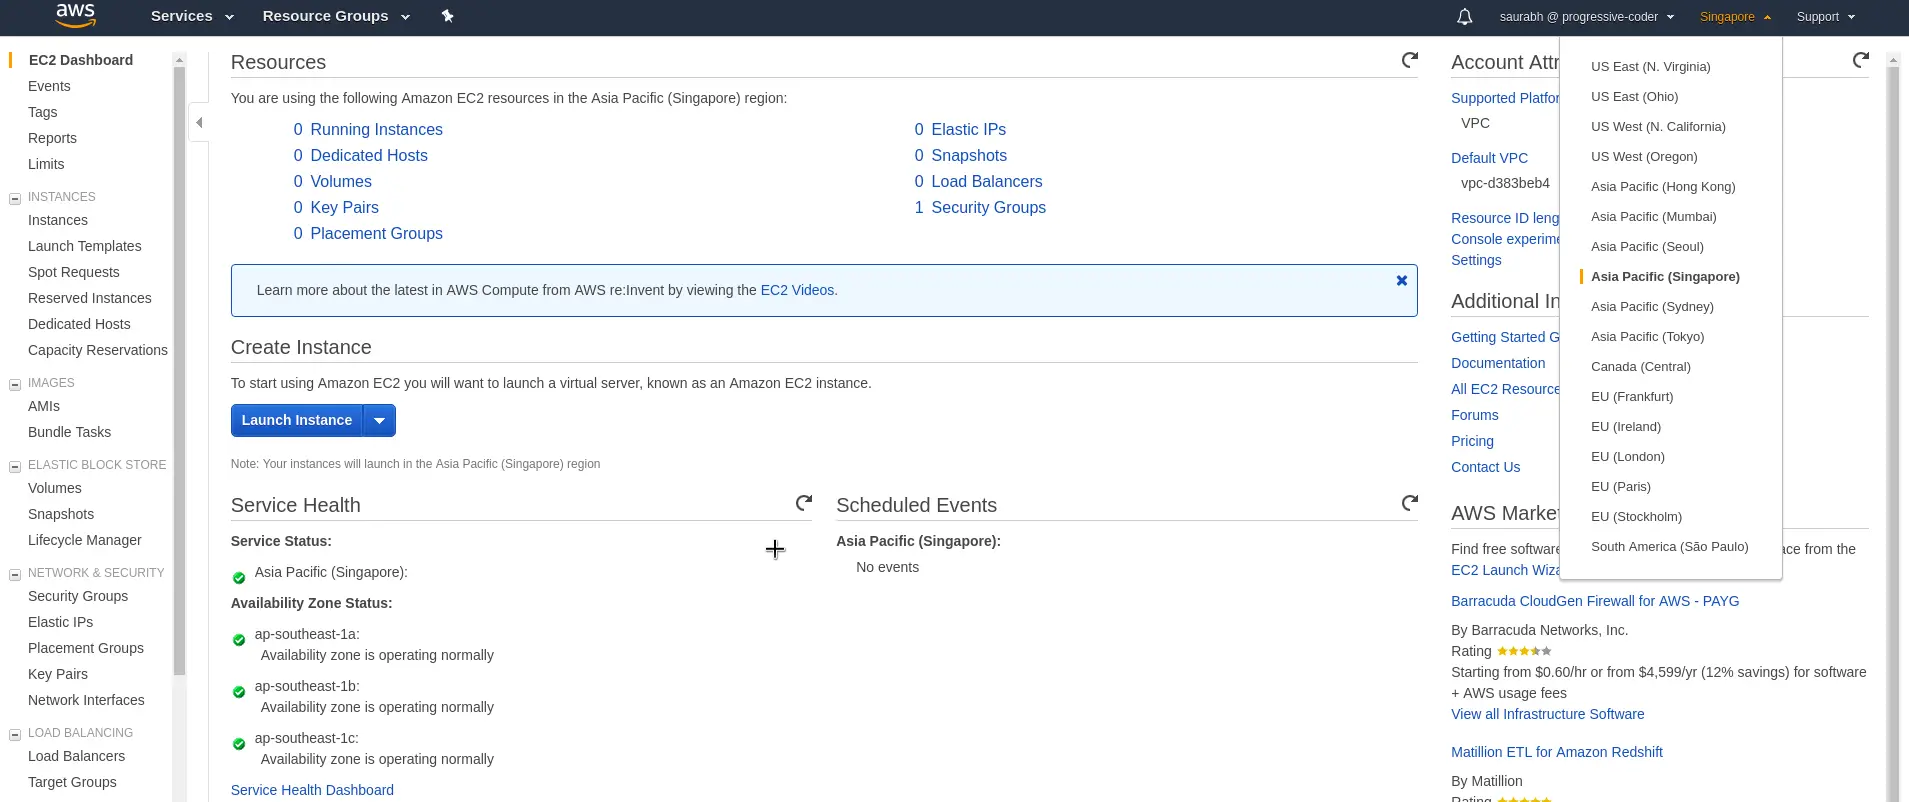
At this point, we should also select the Region in which we want to host our AWS EC2 instance. In my case, I have selected the Singapore region. However, you can select a region that’s closer to you.
Once this is done, click the big blue Launch Instance button to move further in the process.
Step 3 – Choose an Amazon Machine Image or AMI
The first step in the workflow for provisioning an Amazon EC2 is to choose an appropriate Amazon Machine Image or AMI.
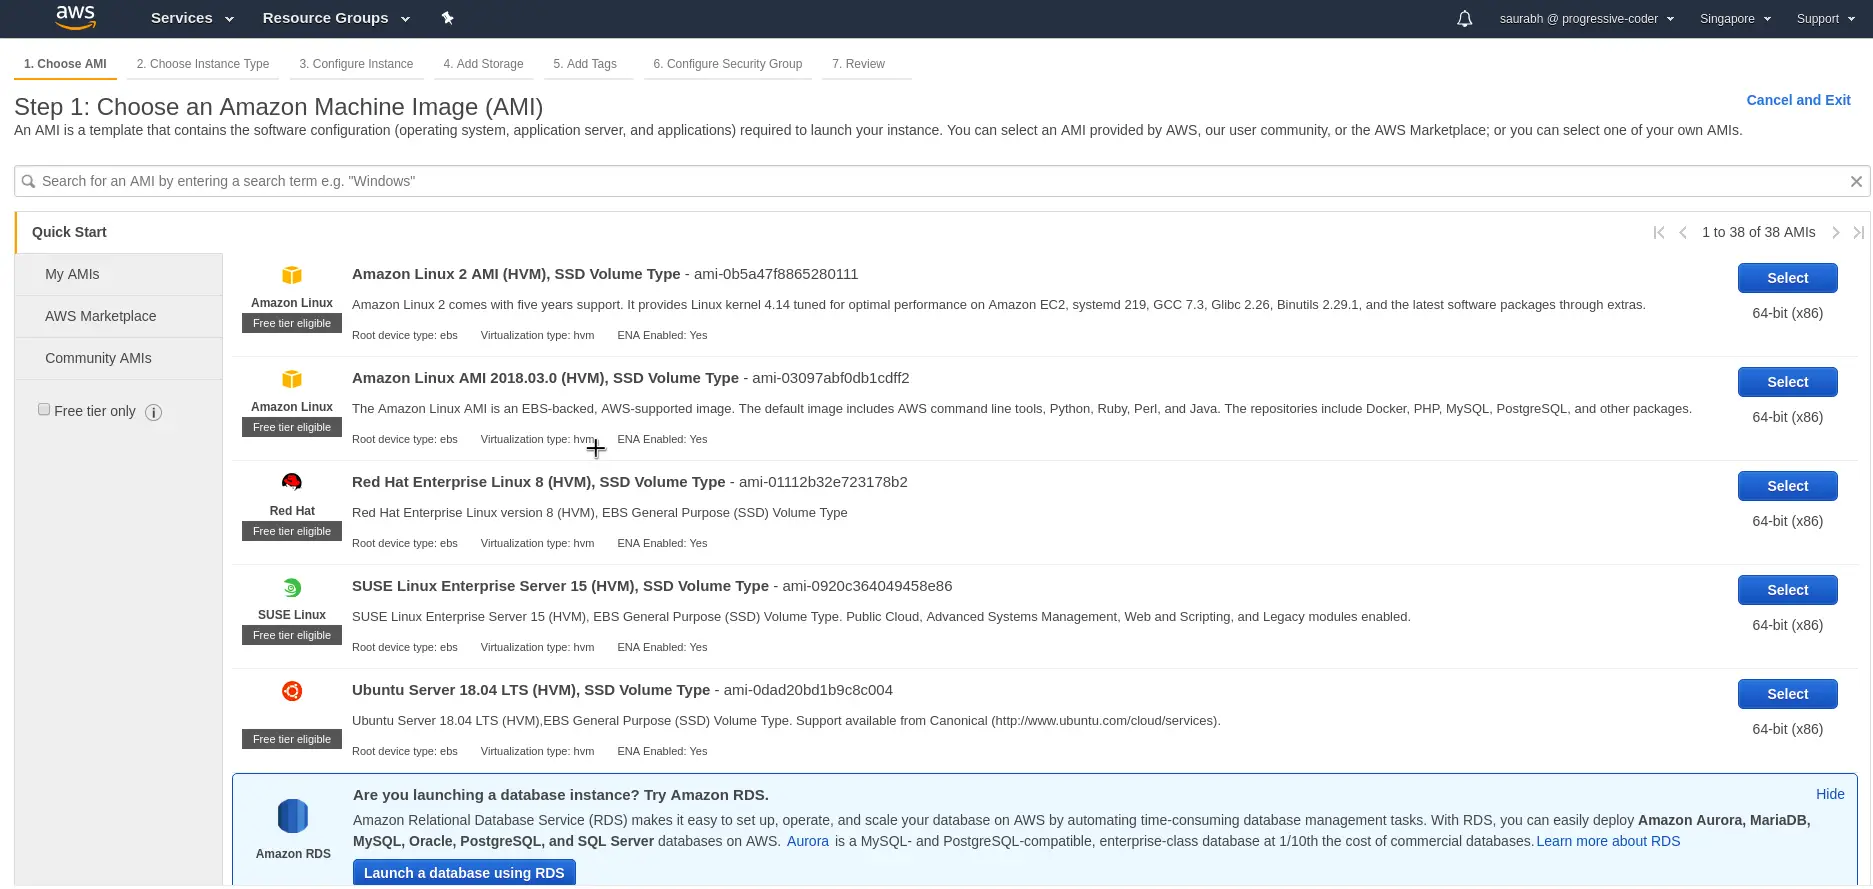
As you can see, it is a huge list of options. You can select from a range of servers including Ubuntu, Red Hat Linux, Amazon Linux and also Windows Servers.
For demo purposes, I will go for Amazon Linux 2 AMI. It is also the first AMI on the list and also the most important to know about if you are planning to appear for AWS Certified Solutions Architect certification exam. It is also free-tier eligible.
Click the Select button next to Amazon Linux 2 AMI to continue.
Step 4 – Choose AWS EC2 Instance Type
As we discussed earlier, there are various AWS EC2 configuration options you can choose from. These are the various AWS EC2 Instance Types as shown in the below screen:
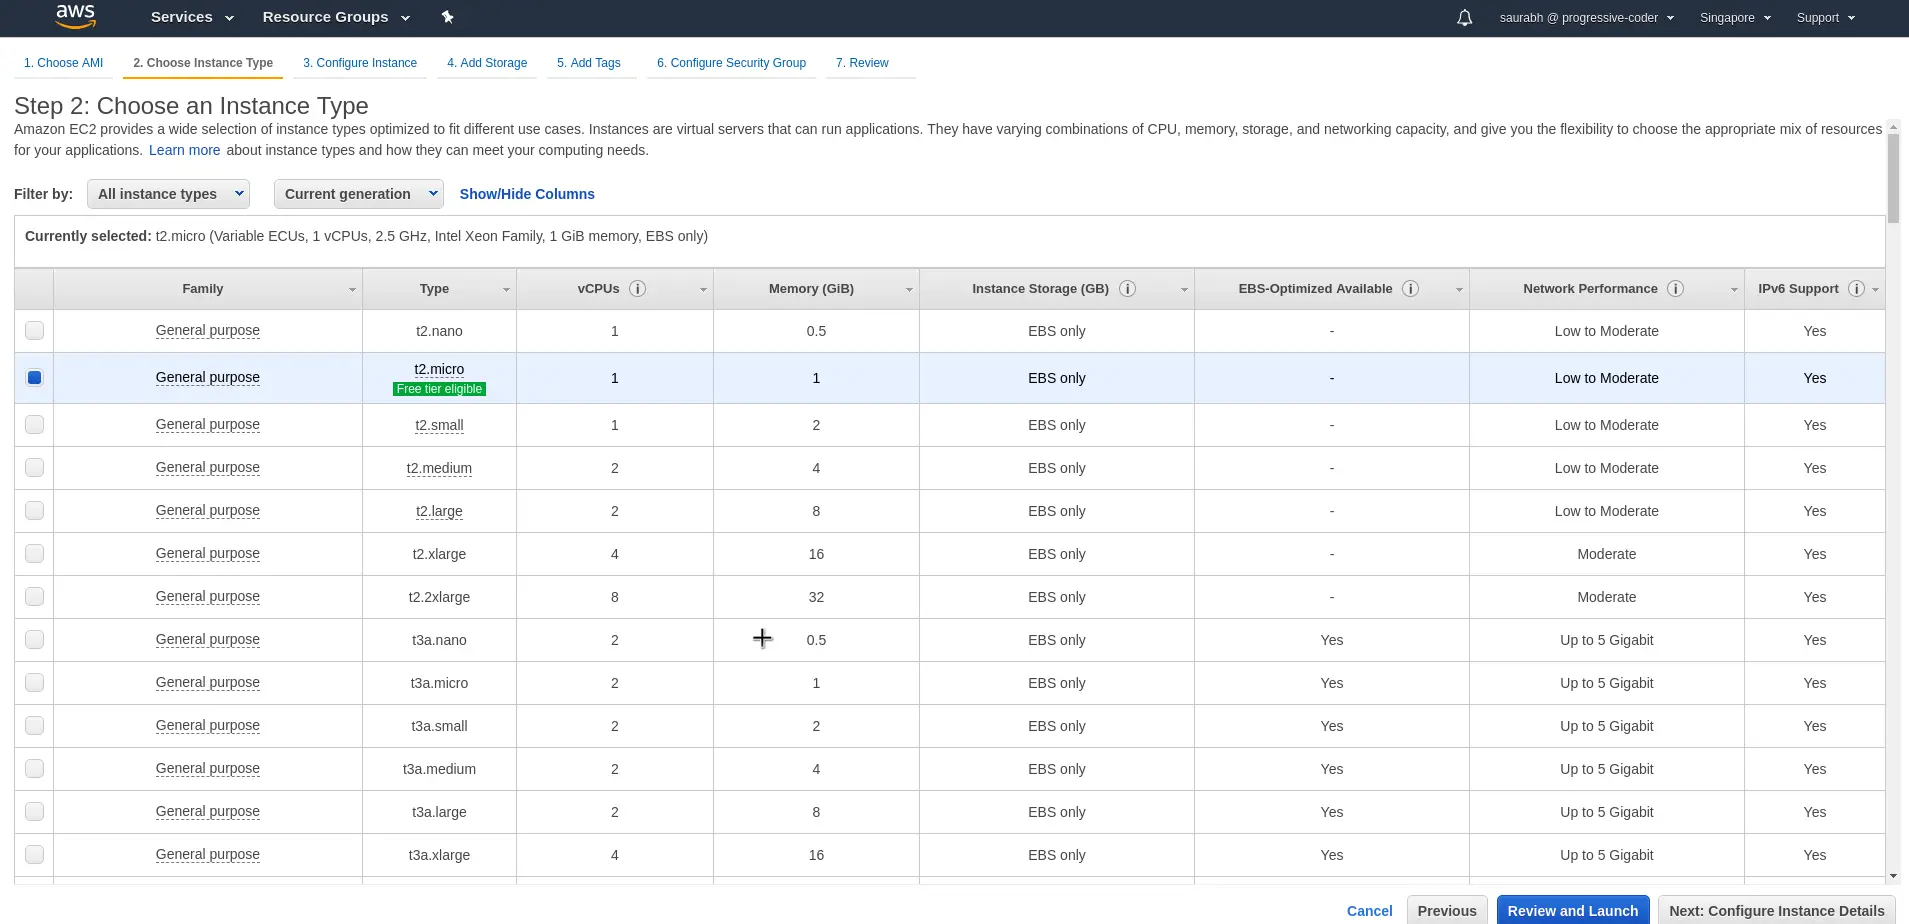
It’s a simple choice for us right now. Unless there is an extremely important use case that warrants otherwise, we will simply choose the t2.micro instance type. It is the only type eligible for free-tier.
Now, there is the big blue button that says Review and Launch. However, we will click on Next: Configure Instance Details to look at other options in the workflow.
Step 5 – Configure Instance Options
The next screen provides some more options to configure our instance.
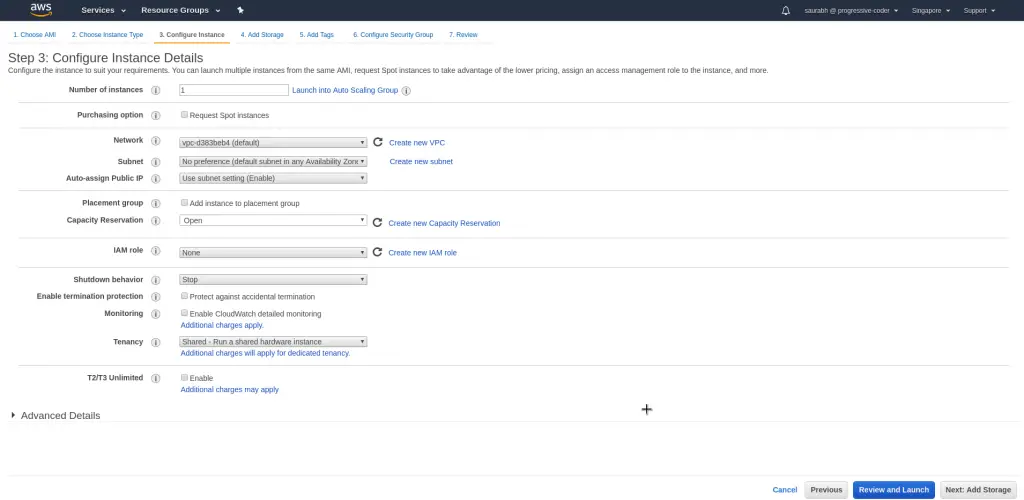
Here, we can select some additional things. For example, you can provide Number of Instances. Also, you can choose different purchasing options. You can also select Network, Subnet and Public IP.
For the time being, you can simply leave the default settings and click on the Next: Add Storage.
Step 6 – Add Storage
You have the option to add additional storage to an AWS EC2 instance. This can be done using the Add Storage screen in the workflow.
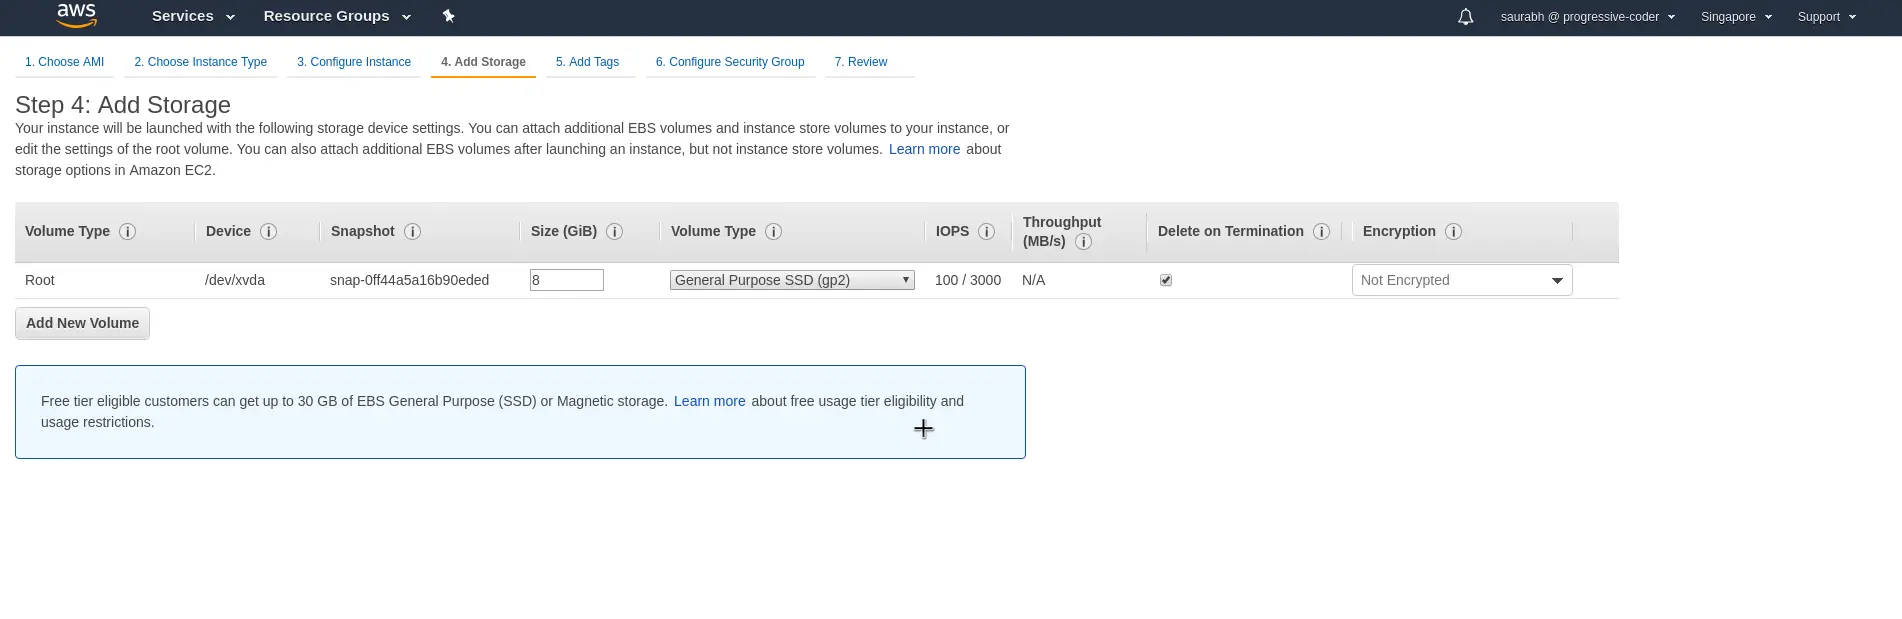
By default, you will see the root volume /dev/xvda. Note that the Delete on Termination checkbox is marked true. This means that when the EC2 instances will be terminated, the storage will be wiped.
We can also add more storage. However, that part will be covered in a future post.
Step 7 – Add Tags
Next, you can add tags to better identify your instance.
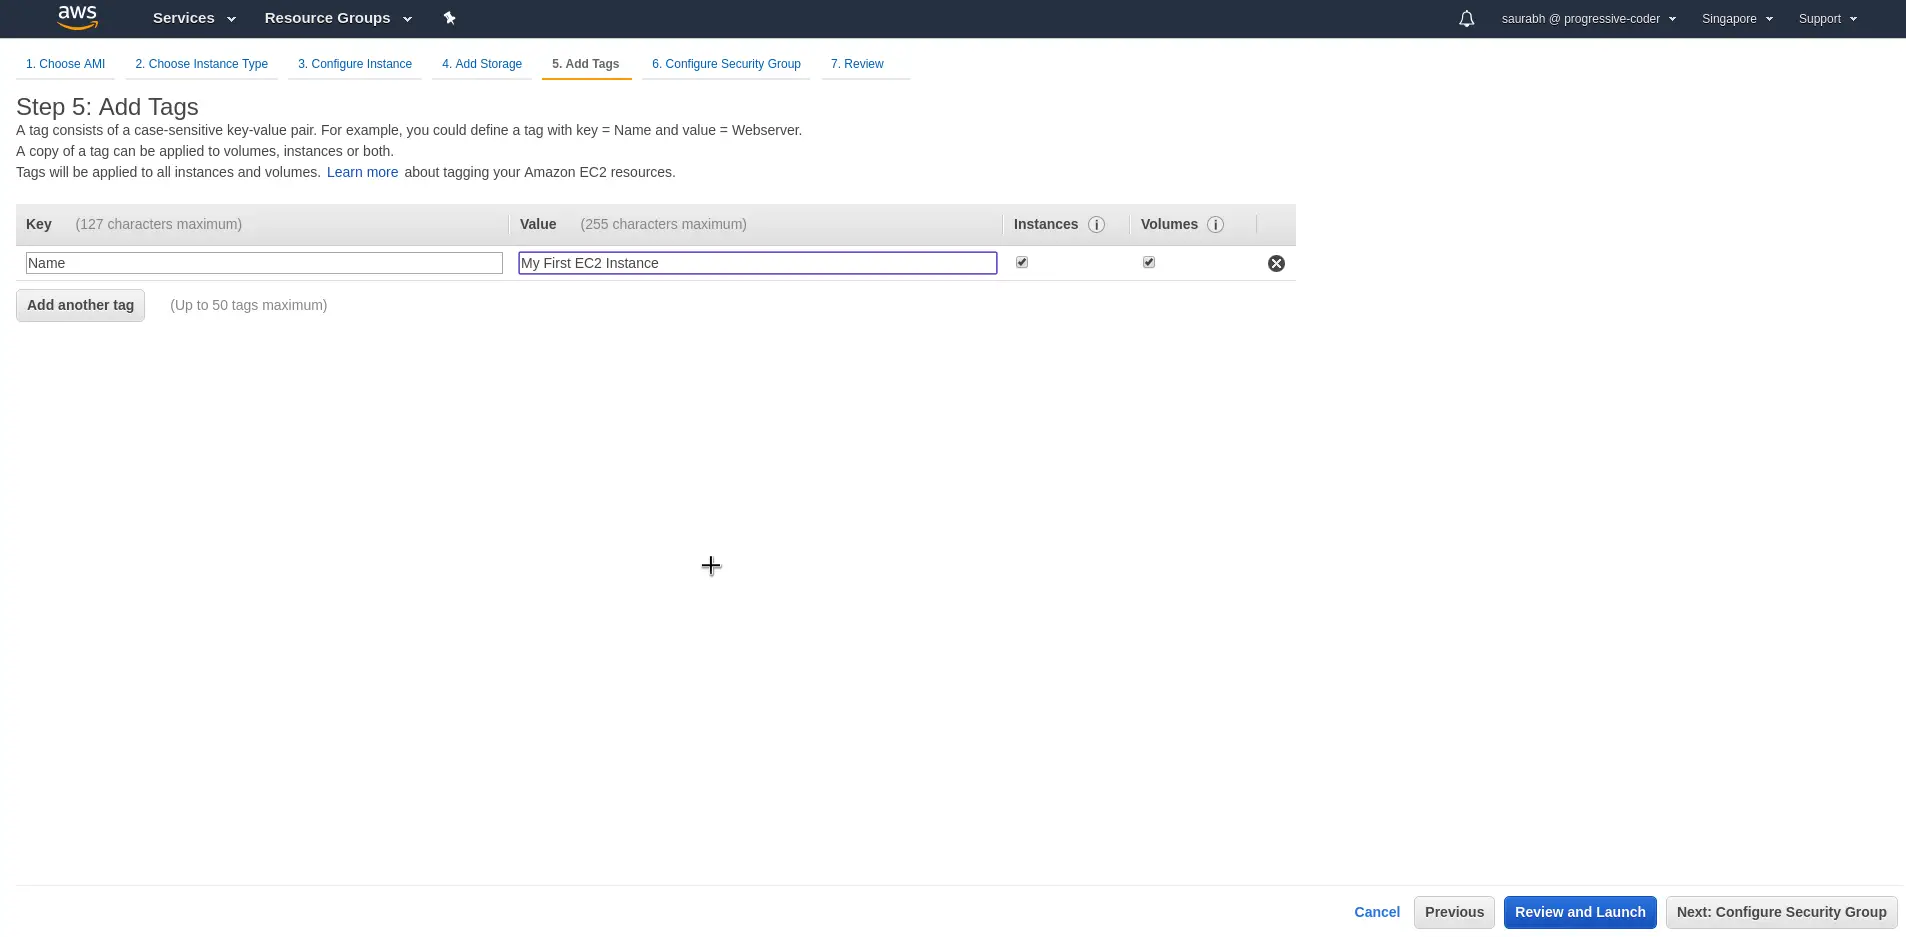
Here, for demo purpose, we have added a tag ‘Name‘ with value ‘My First EC2 instance‘.
Step 8 – Configure Security Groups
Security group is an extremely important part of AWS EC2 instance creation process. Basically, a security group is a set of firewall rules that control the traffic for your instance.
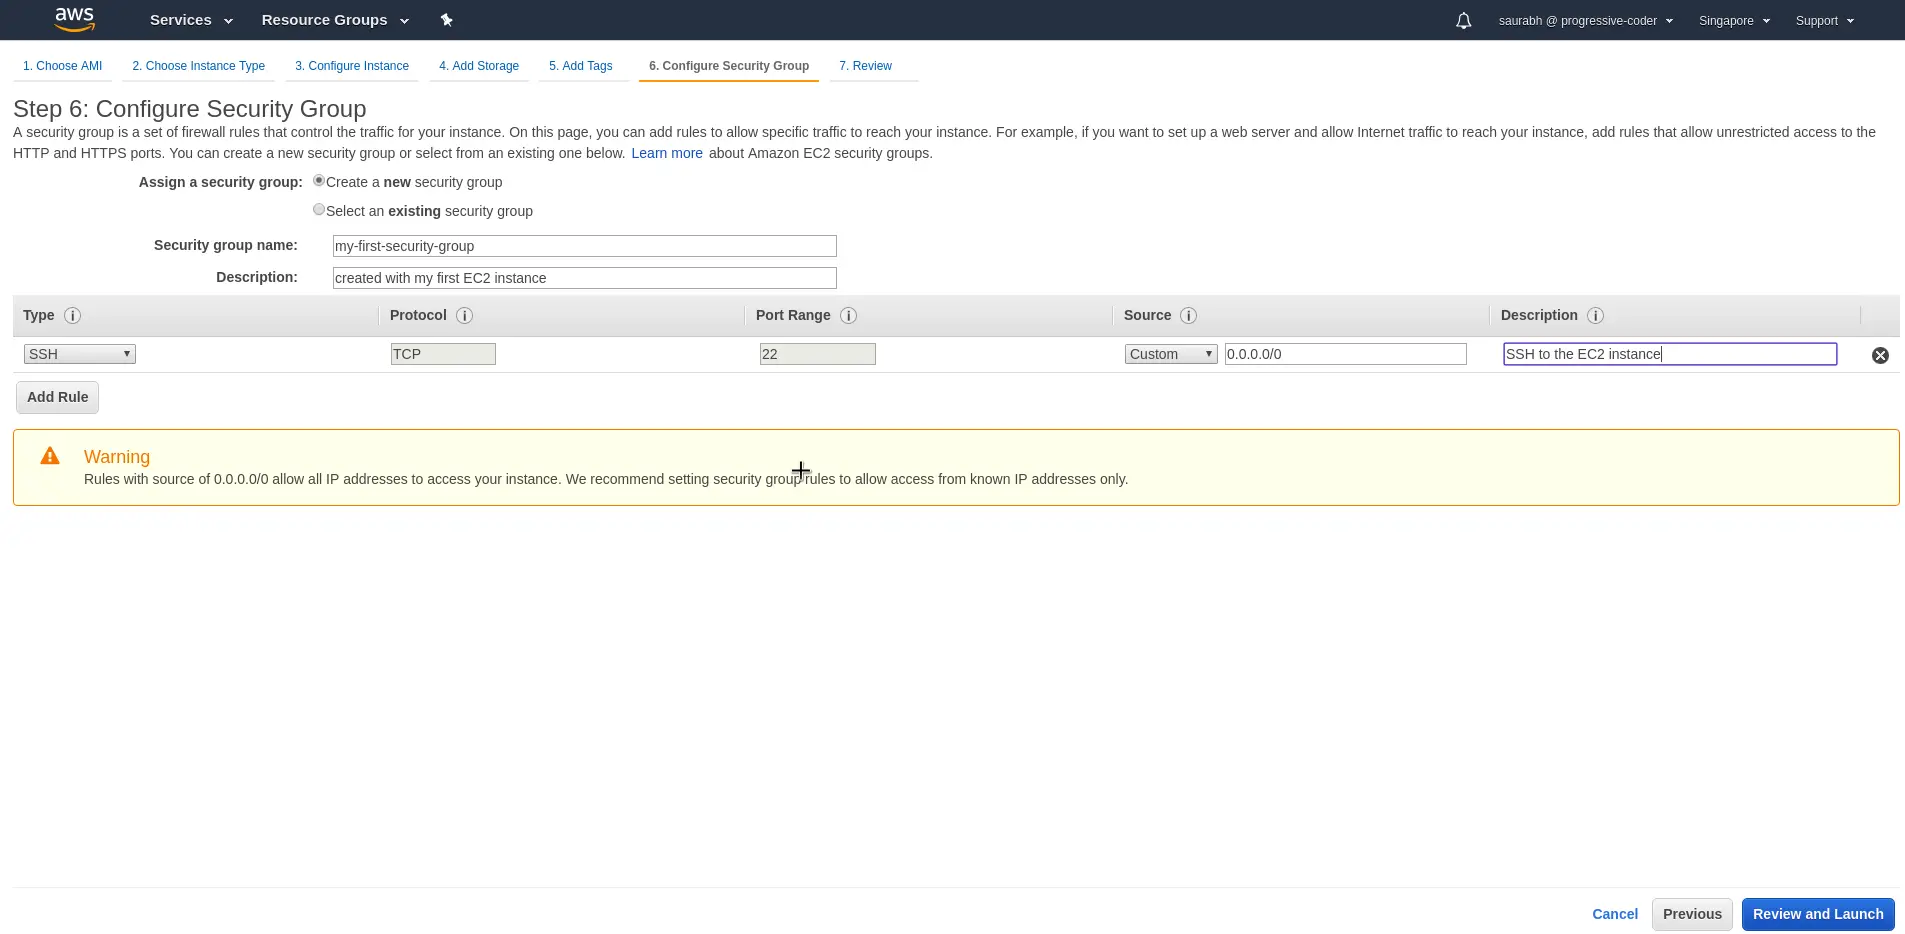
By default, only one rule is enabled. This is to SSH into the AWS EC2 instance through port 22. And we will see how that is done a little later in this post.
We also gave an appropriate Security Group Name and some description to identify the security group.
The next step is to click on Review and Launch button.
Step 9 – Selecting or Creating Key Pair and Launch the Instance
In this step, we are presented with a screen to review all details about the Amazon EC2 instance before launching. You can review and click the Launch button.
Once that is done, you will see the below dialog box open up that prompts you to Select an existing key pair or create a new key pair.
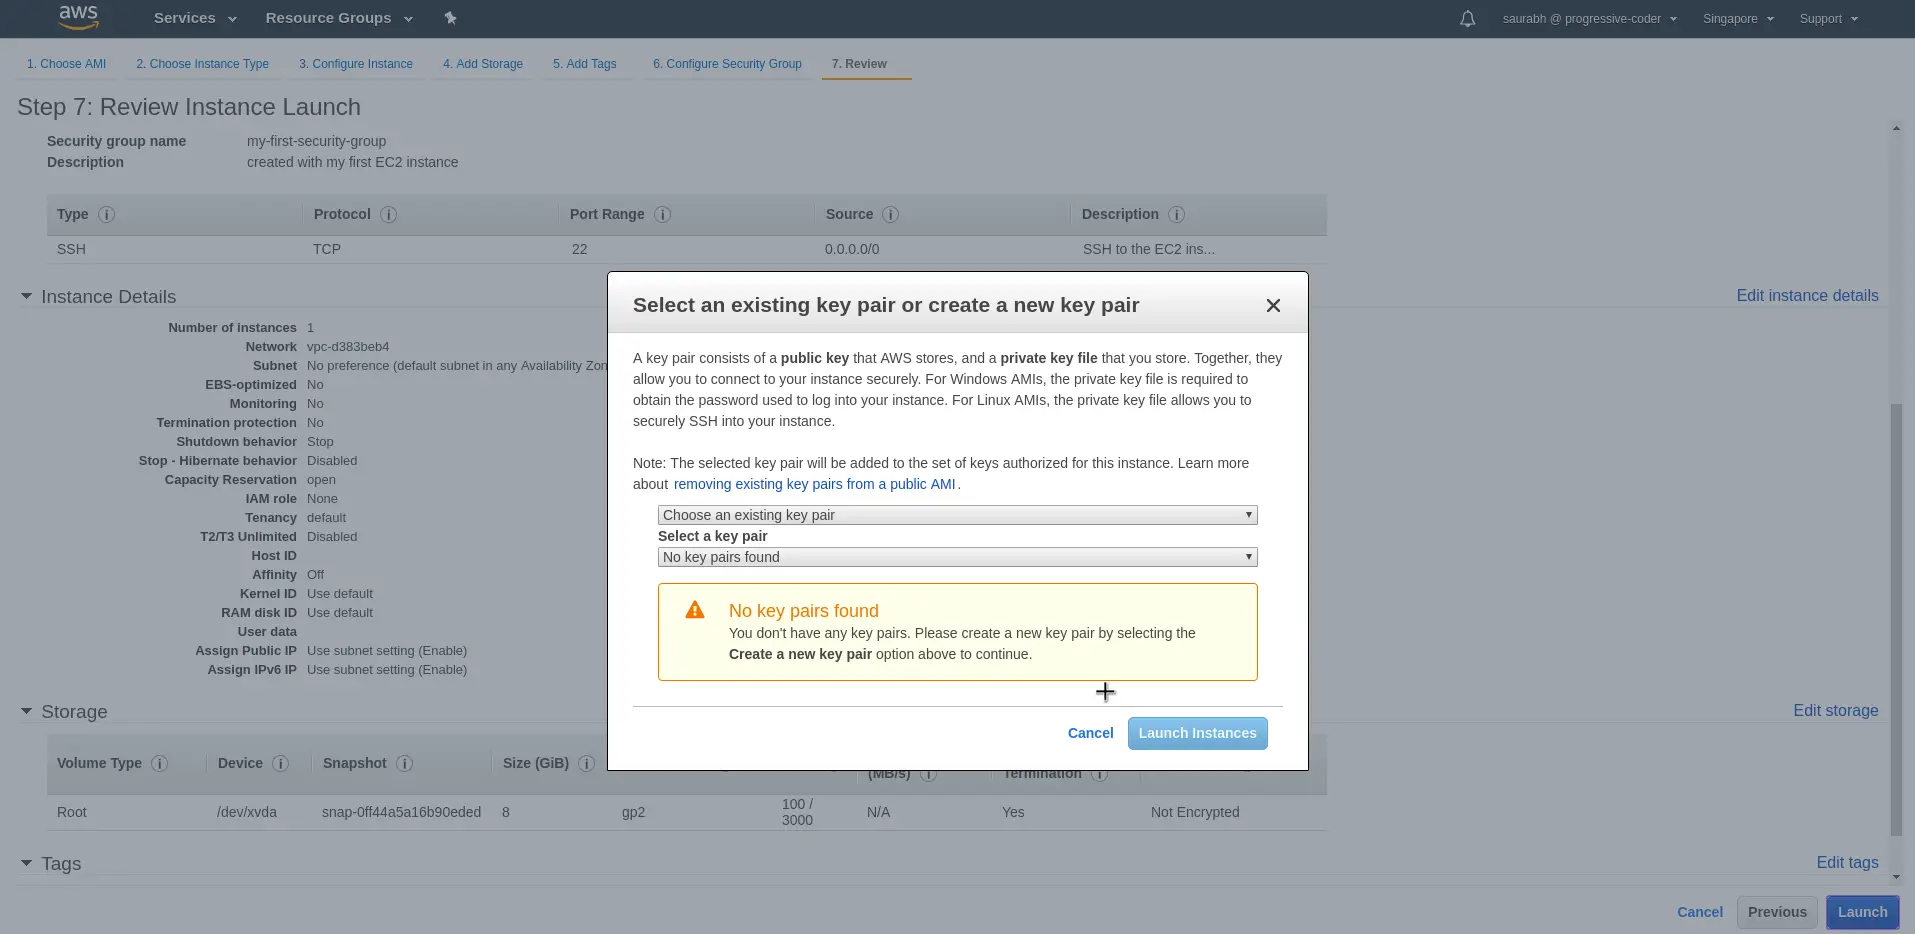
Since we do not have an existing key pair, we can choose Create a new key pair. Also, we need to provide a name to key pair.
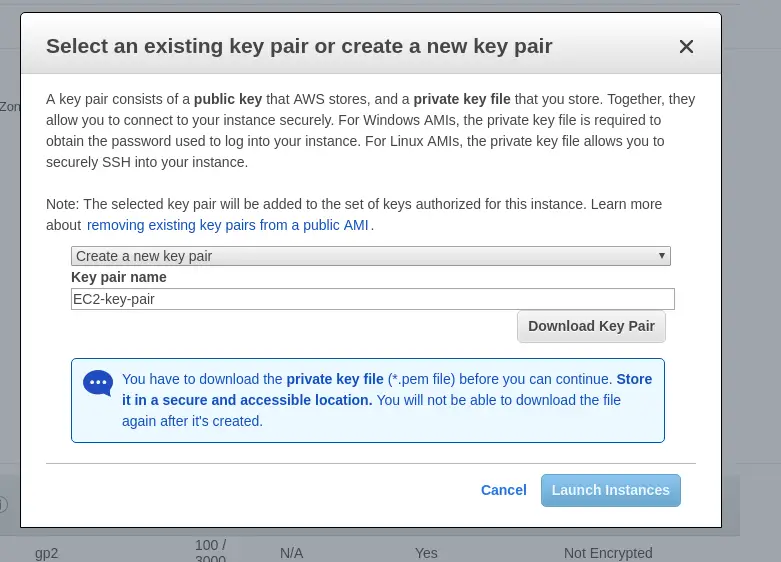
At this point, do not forget to download the private key file or the .pem file to a secure location on your computer.. This is because you cannot download it again after this point.
Once you have download, you can click on Launch Instances to launch AWS EC2 Instance based on our choices in the workflow. You should see the below screen.
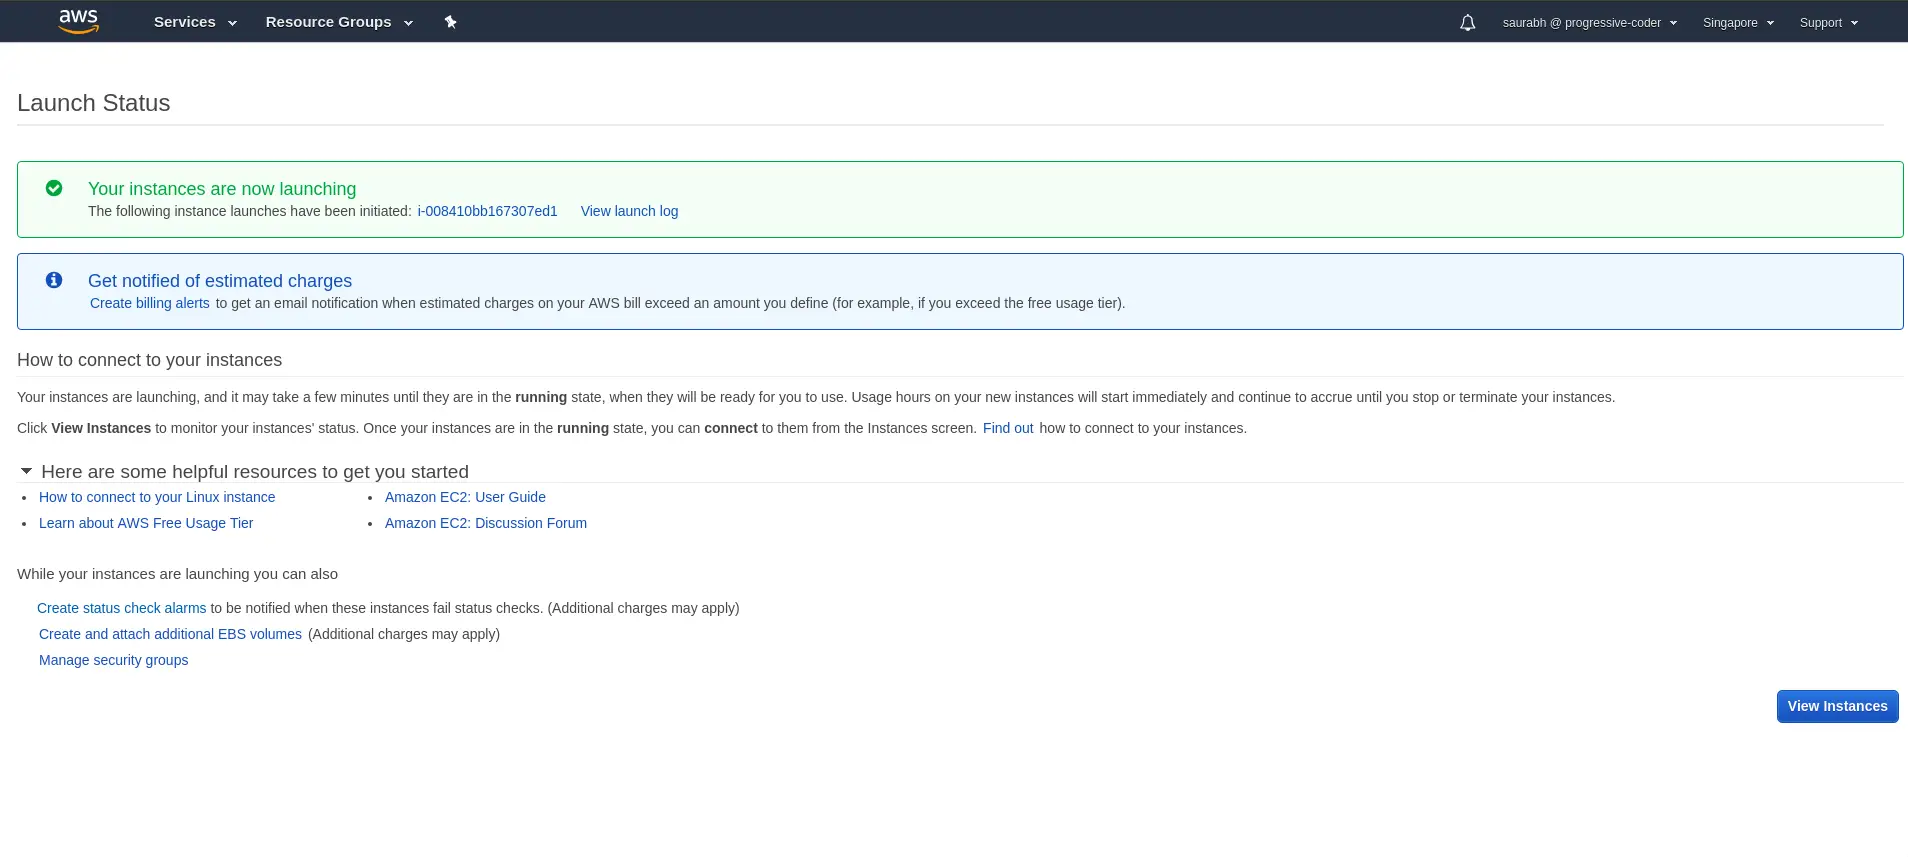
You can proceed further by clicking the View Instances button see the list of instances.
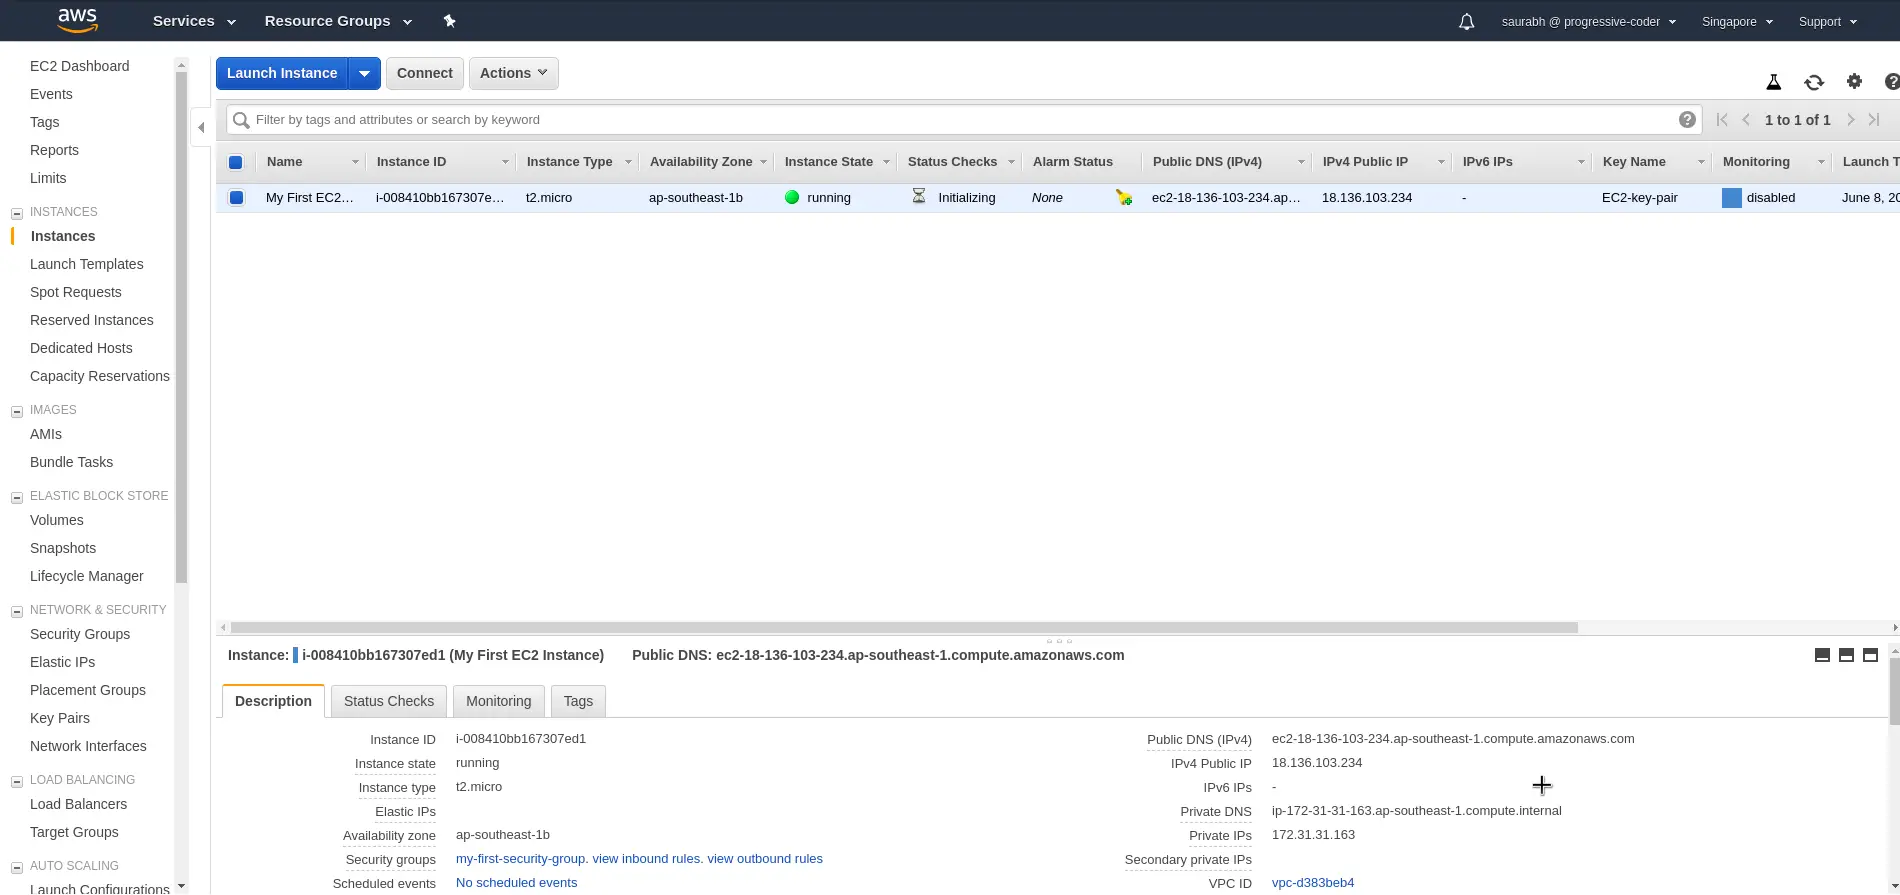
As you can see, the AWS EC2 instance is in Running status.
Step 10 – Accessing AWS EC2 Instance using SSH
Now that our AWS EC2 instance is up and running, we can try and access it using SSH. To do so, we need to check the public IP of our instance. In the below screenshot, this is the IPv4 Public IP.

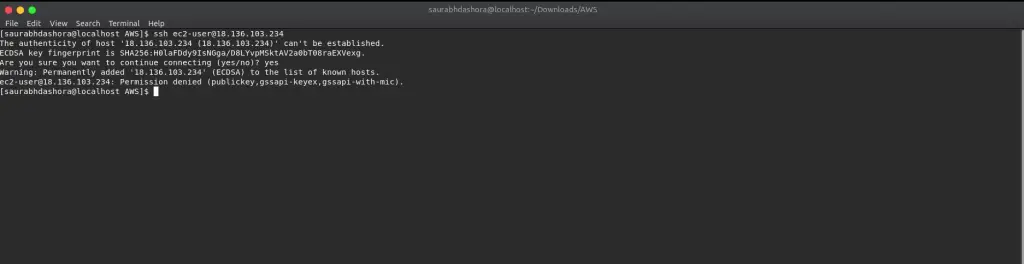
Using this we can go to the terminal (Linux or Mac) and use the below command.
ssh ec2-user@<IP-address>In the first attempt, we should get error as below. This is because we are not using the private key we downloaded.
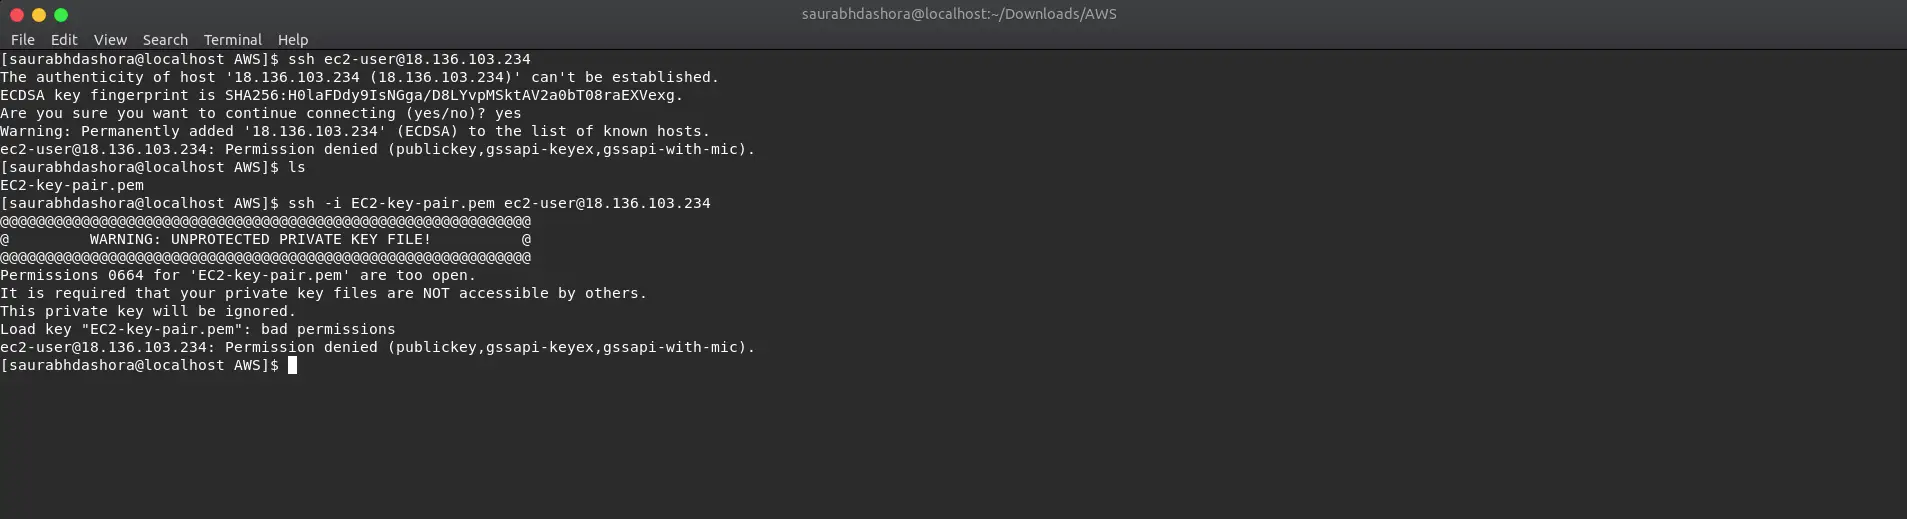
Next, we use the private key to login to our AWS EC2 Instance. Below is the command.
ssh -i EC2-key-pair.pem ec2-user@<IP-address>Basically, we are executing this command from the folder where we placed the private key. However, this time also we will get an error telling us that our private key is not secure enough.
To make the private key secure execute the below chmod command (to change the permissions) followed by previous command once again.
chmod 0400 EC2-key-pair.pem
ssh -i EC2-key-pair.pem ec2-user@<IP-address>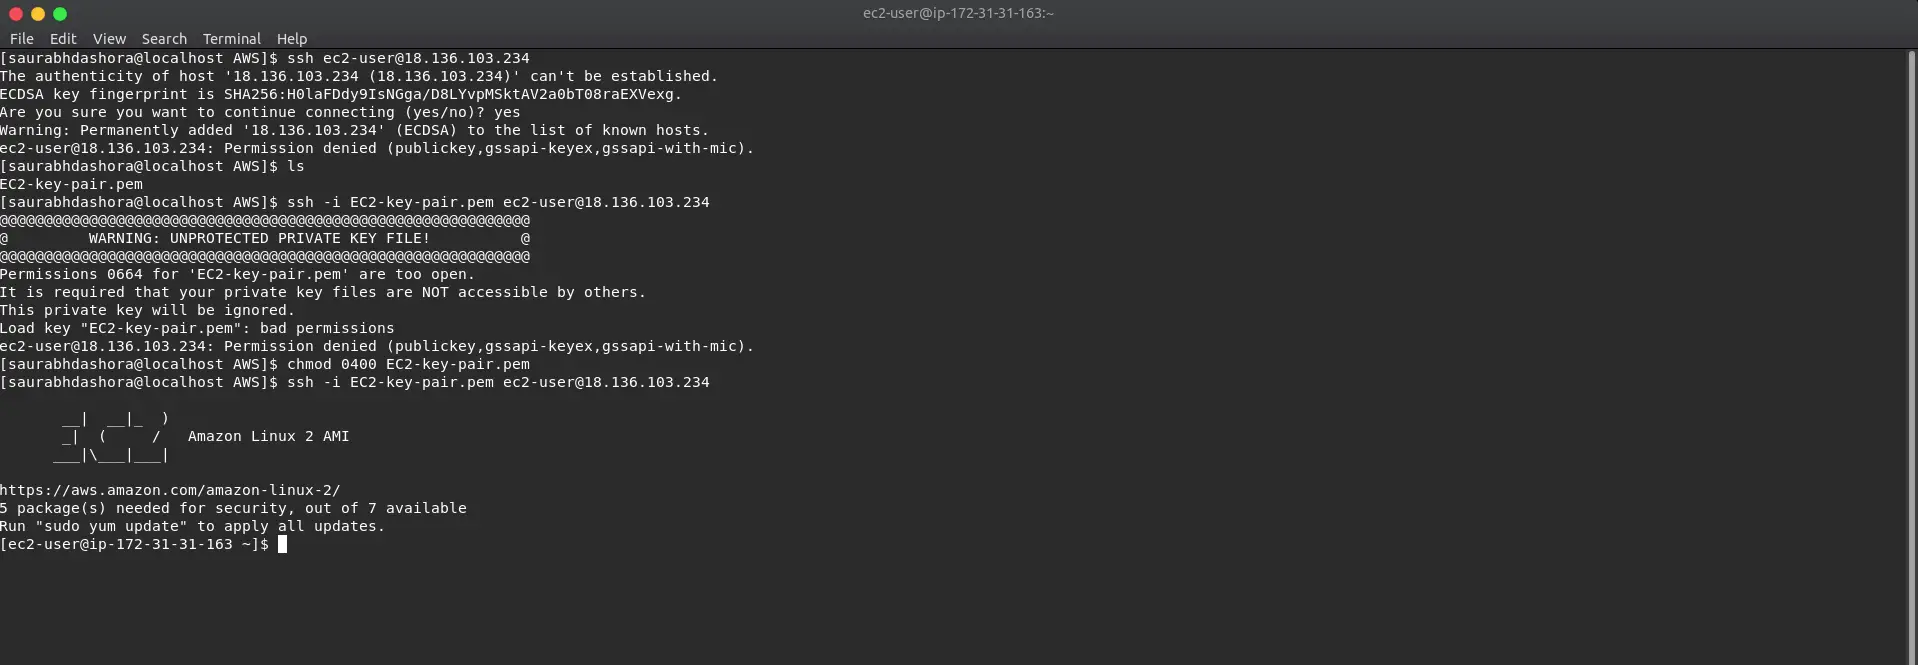
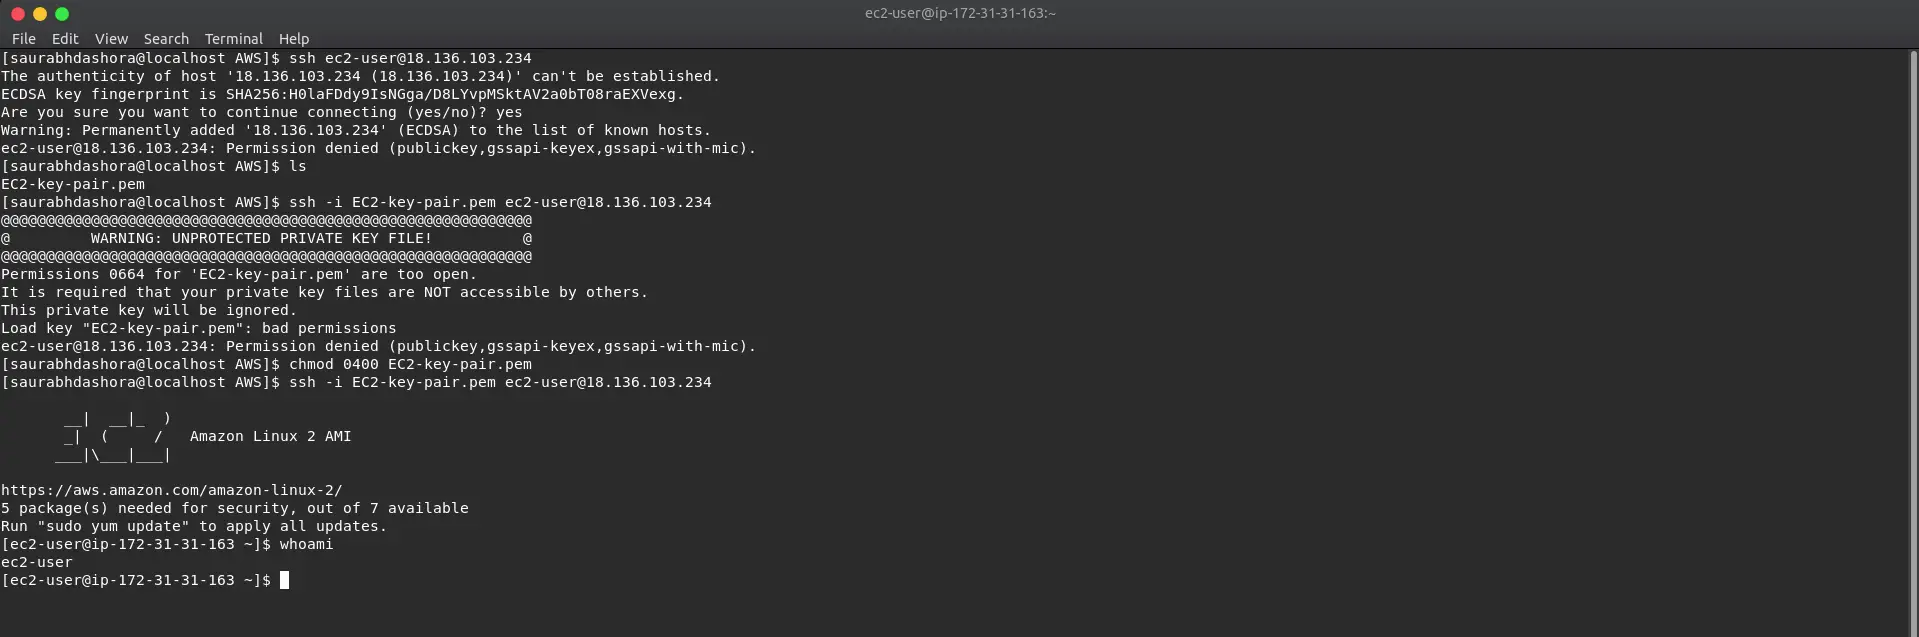
As you can see, you are now logged into the EC2 instance using the ec2-user. To check, you can execute the whoami command in the terminal or ping google.com.
Lastly, you can exit the EC2 by typing the exit command.
Conclusion
With that we are basically done. We created and launched AWS EC2 Instance by following the entire workflow.
At the end, we also logged into our newly created AWS EC2 instance through SSH and executed few commands inside our Amazon Linux 2 instance.
This completes our demo for this post. If you have any queries or comments, do sound off in the comments section below.
Happy Learning!
0 Comments