Using a combination of NestJS and GraphQL, you can build some amazing backend services. There are two main approaches to create a NestJS GraphQL application – code-first and schema-first. In this post, we will focus on NestJS GraphQL Schema First approach.
In case you are interested, you can also check out the code-first approach.
1 – NestJS GraphQL Dependencies
We need to install a bunch of dependencies to get our NestJS GraphQL application working properly.
$ npm install @nestjs/graphql @nestjs/apollo graphql apollo-server-expressNestJS provides official integrations for Apollo and Mercurius in order to facilitate GraphQL usage. Since we are going to use Apollo, we install the official @nestjs/apollo package. Also, we install the @nestjs/graphql package. This is basically the core package to enable NestJS GraphQL integration. Also, we install the base graphql package and apollo-server-express.
Apart from the main package, we have to install an additional package ts-morph. This is a compiler wrapper for code manipulation and transformation.
$ npm install --save-dev ts-morphNote that ts-morph is a development dependency only.
2 – Create the GraphQL Schema
In the schema-first approach, we need to first create a schema file. GraphQL schema is written using the Schema Definition Language (also known as SDL). In case you are new to GraphQL terminologies, you can read more about the core concepts of GraphQL.
A NestJS project can contain several schema definition files. At the time of application startup, NestJS combines these files in memory. The advantage of this approach is that you can split your schema into different files and place them close to their resolvers in the project hierarchy.
We will create a very simple schema file in src directory. See below:
type Query {
    hello: String!
}
As you can see, we declare a query type. The only query we support as part of our application is hello. It is expected to return a string.
3 – Setup NestJS GraphQL Schema First Module
We need to configure the GraphQL Module to support the schema first approach. To do so, we make the below changes to the App module.
import { ApolloDriver, ApolloDriverConfig } from '@nestjs/apollo';
import { Module } from '@nestjs/common';
import { GraphQLModule } from '@nestjs/graphql';
import { join } from 'path'
import { AppController } from './app.controller';
import { AppService } from './app.service';

@Module({
  imports: [
    GraphQLModule.forRoot<ApolloDriverConfig>({
      driver: ApolloDriver,
      typePaths: ['./**/*.graphql'],
      definitions: {
        path: join(process.cwd(), 'src/graphql.ts')
      },
      playground: true
    }),
  ],
  controllers: [AppController],
  providers: [AppService],
})
export class AppModule {}
Let us understand the configuration in more detail:
- We call GraphQLModule.forRoot() function in the module imports and provide a configuration object containing some important properties.
- The driver property specifies that we are using the ApolloDriver.
- Next, we have typePaths. This property basically specifies the format and location of the schema files within our project. The GraphQL schema file we created in the previous section will be picked up based on this property.
- Next, we have the property definitions. Depending on our GraphQL SDL files, NestJS will generate corresponding Typescript definitions (i.e. classes and interfaces). The definitions property specifies the path to the typescript file. This is a great feature to keep our schema changes in sync with the Typescript definitions. The @nestjs/graphql package automatically generates these files from the abstract syntax tree by using the ts-morph package.
- Finally, we have the playground property set to true. This enables the GraphQL playground UI where we can test our GraphQL API.
By default, the definitions file contains Typescript types as interfaces. See below:
/*
 * -------------------------------------------------------
 * THIS FILE WAS AUTOMATICALLY GENERATED (DO NOT MODIFY)
 * -------------------------------------------------------
 */

/* tslint:disable */
/* eslint-disable */
export interface IQuery {
    hello(): string | Promise<string>;
}

type Nullable<T> = T | null;
In case we want to generate classes instead of interfaces, we need to specify another configuration option known as outputAs.
definitions: {
   path: join(process.cwd(), 'src/graphql.ts'),
   outputAs: 'class',
},
Note that the graphql.ts file gets automatically created when we start the application. In the last section, we will learn how to generate the same on-demand as well.
4 – Creating the GraphQL Resolver
Next step is to create a resolver. Basically, a GraphQL resolver’s job is to resolve incoming queries and perform some action on them.
See below:
import { Query, Resolver } from "@nestjs/graphql";

@Resolver()
export class HelloResolver {

    @Query(returns => String)
    async hello() {
        return "Hello, World"
    }
}
To specify a resolver, we have to use @Resolver() decorator. The method that resolves a particular query needs the @Query() decorator. In this case, the query name matches the name of the handler function. When the server receives a request of query type hello, it invokes the hello() method of the HelloResolver.
5 – Configuring the App Module
We need to make another minor change to the App module. Basically, we need to make the application aware of the HelloResolver class.
import { ApolloDriver, ApolloDriverConfig } from '@nestjs/apollo';
import { Module } from '@nestjs/common';
import { GraphQLModule } from '@nestjs/graphql';
import { join } from 'path'
import { AppController } from './app.controller';
import { AppService } from './app.service';
import { HelloResolver } from './hello.resolver';

@Module({
  imports: [
    GraphQLModule.forRoot<ApolloDriverConfig>({
      driver: ApolloDriver,
      typePaths: ['./**/*.graphql'],
      definitions: {
        path: join(process.cwd(), 'src/graphql.ts'),
      },
      playground: true
    }),
  ],
  controllers: [AppController],
  providers: [AppService, HelloResolver],
})
export class AppModule {}
We add the HelloResolver to the providers array. NestJS will automatically create an instance of the resolver and make it available during application run time. You can read more about providers in this detailed post about NestJS Providers.
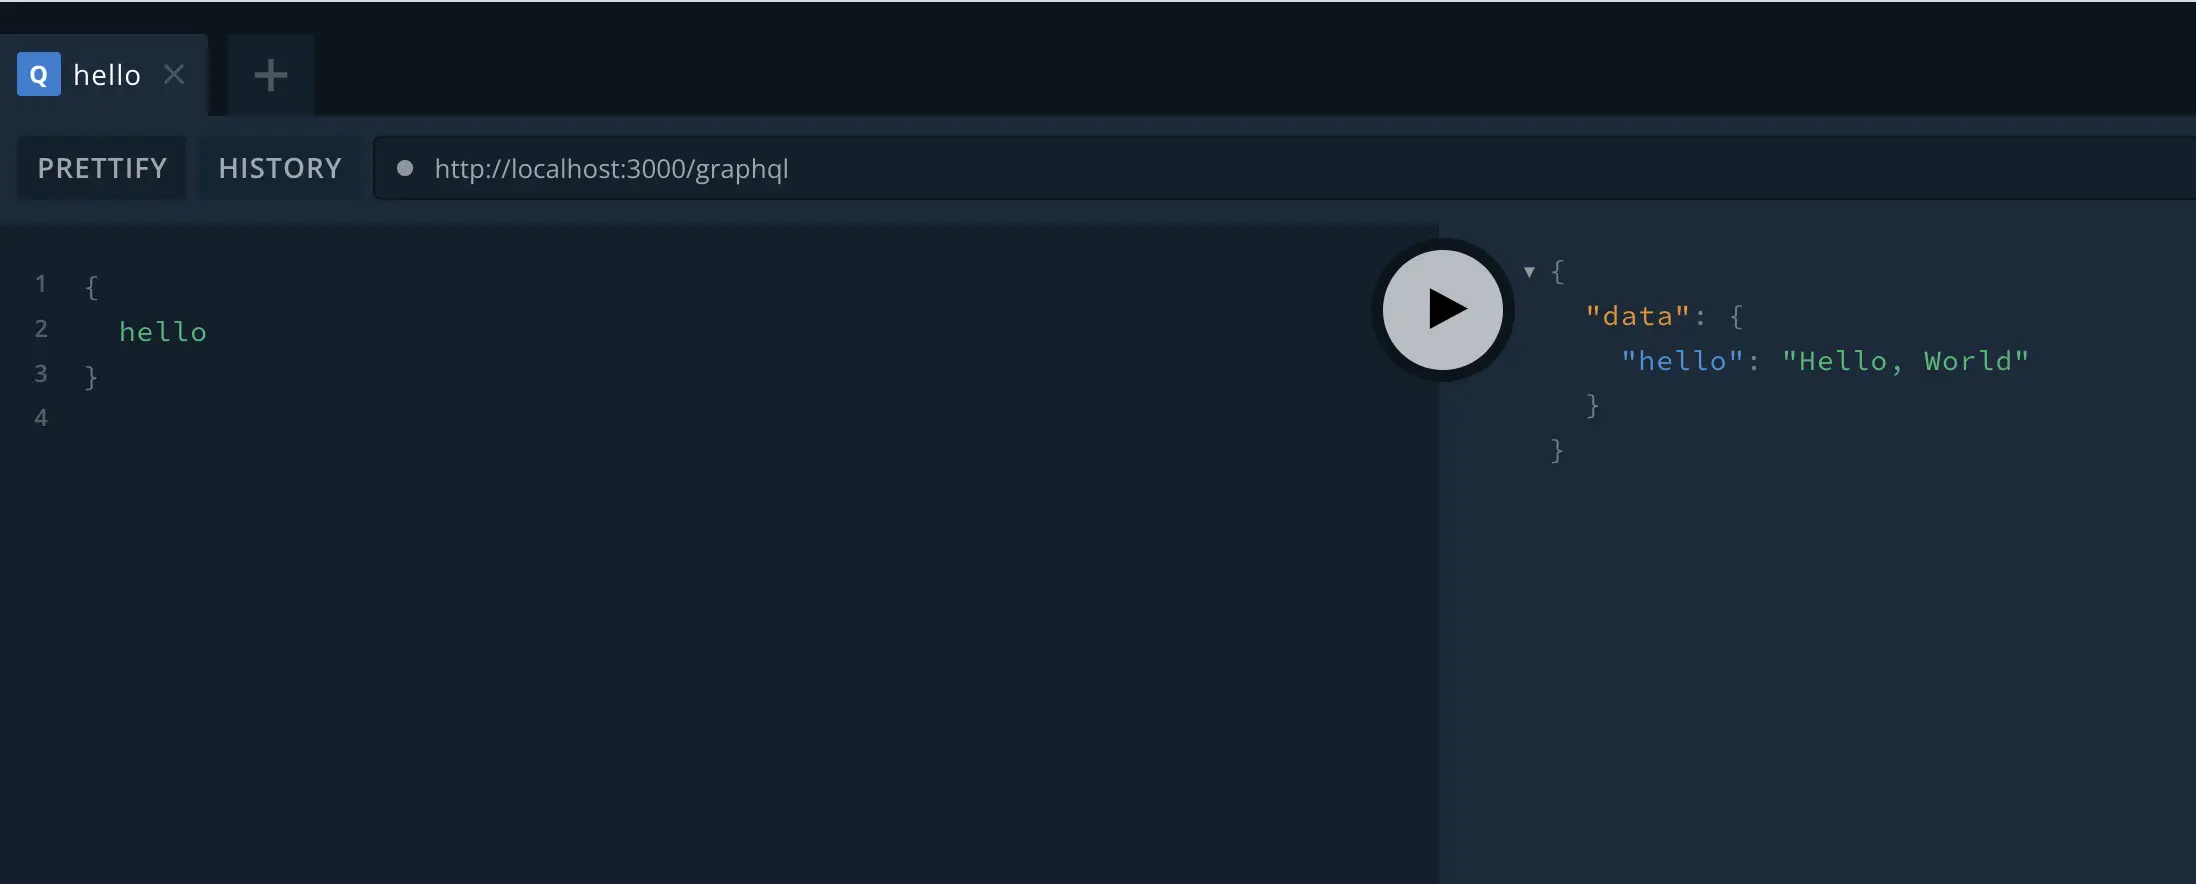
Our application is now ready. To start the app, we need to execute npm run start and visit http://localhost:3000/graphql. This will load the GraphQL playground where we can try the queries.
6 – On-Demand Generate GraphQL Typescript Definitions
We can also generate GraphQL Typescript definitions on-demand.
To do so, we have to create a script file as below and place it in the src directory.
import { GraphQLDefinitionsFactory } from "@nestjs/graphql";
import { join } from "path";

const definitionsFactory = new GraphQLDefinitionsFactory();

definitionsFactory.generate({
    typePaths: ['./src/**/*.graphql'],
    path: join(process.cwd(), 'src/graphql.ts'),
    outputAs: 'class'
})
If you notice closely, this is basically the same configuration as the App module. Only difference is that this file is independent of the application start up process. It uses the GraphQLDefinitionsFactory class from the @nestjs/graphql package.
We can now run this using the below command.
$ ts-node ./src/generate-typingsThis will generate the graphql.ts file based on the schema file.
We can also configure this script to run in watch mode by setting the watch flag to true.
import { GraphQLDefinitionsFactory } from "@nestjs/graphql";
import { join } from "path";

const definitionsFactory = new GraphQLDefinitionsFactory();

definitionsFactory.generate({
    typePaths: ['./src/**/*.graphql'],
    path: join(process.cwd(), 'src/graphql.ts'),
    outputAs: 'class',
    watch: true
})
Whenever we change the schema file, the Typescript types will be automatically generated.
Conclusion
With this, we have successfully built a NestJS GraphQL Schema First example. In doing so, we covered the various configuration options along with building a very small query to demonstrate how everything fits together.
The code for this post is available on Github.
If you have any comments or queries about this post, please feel free to mention them in the comments section below.
2 Comments
mrig · July 12, 2023 at 10:00 am
This was extremely useful, I wish there were more details. But it surely gave me a boost. Thank you.
Saurabh Dashora · July 18, 2023 at 1:02 am
Thanks for the gr8 feedback!