In this post, we will write a Kubernetes Create Pod YAML file to spawn a new pod using Kubectl.
If you are new to Kubernetes, you can go through my introduction to Kubernetes post. In a nutshell, Kubernetes is a container orchestration system.
We will also be using Docker images in this post. So if you are new to Docker itself, you can go through this series of posts about Docker Step-by-Step Learning.
1 – What is a Kubernetes Pod?
In Kubernetes terms, a Pod is a group of one or more containers. These containers can be Docker containers. Also, the containers that are part of the Pod share storage and network.
Basically, a Pod should group containers that have tight coupling. In other words, considering a pre-container world, these could be applications running on the same virtual machine or host.
In this post, we will create a Kubernetes Pod to run a Docker container.
2 – Our Docker Image
To create Docker container, we need an image. We already have such an image on Docker Hub. This image basically has a React web application that is served by a Nginx server. Below is the Dockerfile for the same.
#Build Stage Start

#Specify a base image
FROM node:alpine as builder

#Specify a working directory
WORKDIR '/app'

#Copy the dependencies file
COPY package.json .

#Install dependencies
RUN npm install

#Copy remaining files
COPY . .

#Build the project for production
RUN npm run build

#Run Stage Start
FROM nginx

#Copy production build files from builder phase to nginx
COPY --from=builder /app/build /usr/share/nginx/html
We won’t get into the details of it here. However, if you want to know more about how this image was built, you can refer to my post about multi-stage Docker build for a React application.
3 – Kubernetes Create Pod YAML
In Kubernetes, we have to describe the resources using YAML files. For example, if we want to perform a Kubernetes Create Pod operation, we have to describe a Pod resource using YAML.
You can create a YAML file using any editor of choice in your personal work-space. Below is how a Pod Template file looks like:
apiVersion: v1
kind: Pod
metadata:
  name: docker-react-pod
  labels:
    component: web
spec:
  containers:
    - name: docker-react-app
      image: dashsaurabh/progressive-coder
      ports:
      - containerPort: 3000
Basically, here we describe how our Pod should be defined. Important thing to note here is the image. This image points to the name of our Docker React Application image on Docker Hub. You can check out more details about the YAML file at Pod Template YAML.
Next, we also have to define a Kubernetes Service YAML template file. Basically, a Kubernetes service is needed to access our application through the browser.
Below is how the Service template file looks like:
apiVersion: v1
kind: Service
metadata:
  name: docker-react-node-port
spec:
  type: NodePort
  ports:
    - port: 3050
      targetPort: 80
      nodePort: 31515
  selector:
    component: web
The Service points to the our Pod using the selector label. The type of the service is NodePort. You can check out more details about each option in the post about Kubernetes Service YAML Parameters.
4 – Applying the YAML using Kubectl
Once we create the files, it’s time to apply these files to our Kubernetes cluster. To do so, we use Kubectl. Basically, Kubectl is like a Command-Line Interface (CLI) to interact with Kubernetes cluster.
To apply the Pod, we have to run the below command:
kubectl apply -f docker-react-pod.yamlIf Kubernetes is setup correctly on your machine, you should see the below message:

Next, we can apply the Service file using the below command:
kubectl apply -f docker-react-node-port.yamlBelow is the output in the command line.

Usually, if there is an error in our YAML files, this step will show the error message and we can try to correct those errors.
5 – Checking the Running Pod and Application
Now that the files are applied, we can check if the Kubernetes resources are successfully created.
For example, we can check the pods using the below command:
kubectl get podsYou should see a list of all the pods as below:

Note that the status of the docker-react-pod is Running.
We can also check the services using the below command:
kubectl get services
Here, we can see two services. However, you can ignore the Kubernetes service as it is related to our Kubernetes cluster. The other service is the one that we applied through Kubectl.
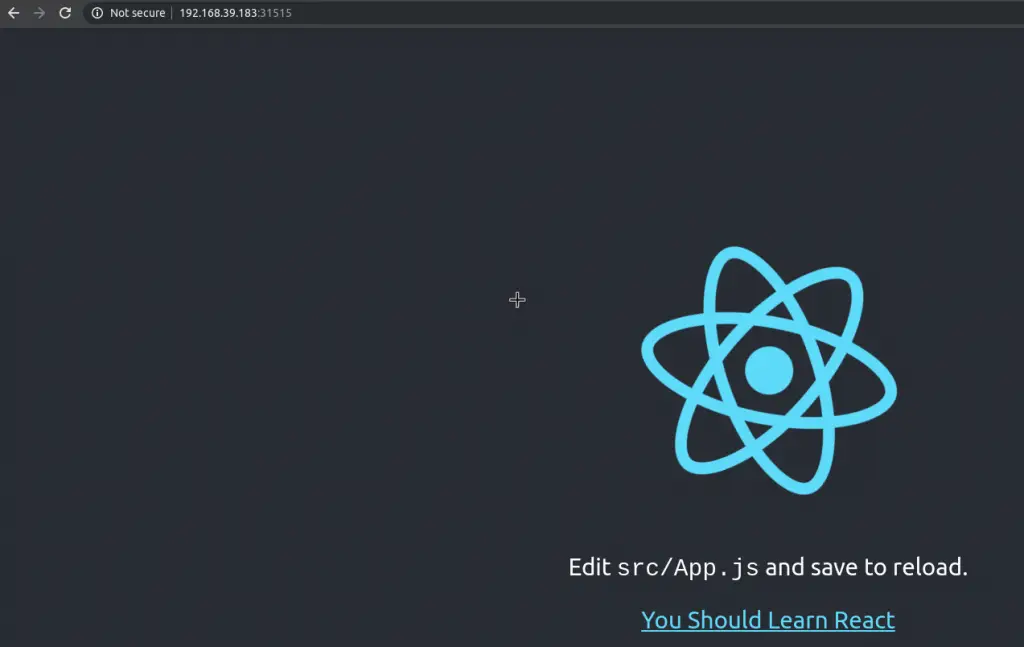
We can also check our application by accessing it in the browser. To do so, we have to first find out the IP of our Kubernetes cluster.
In my case, I’m using Minikube and hence, I can find the IP using the command minkube ip.
Using the IP address printed in the console, we can access the application on port 31515. This port is the one we defined as the NodePort in our Service definition.
Conclusion
With this, we have successfully used Kubernetes Create Pod to create a new Pod. We also created a Kubernetes Service and attached it with our Pod. This allowed our application running on the Pod to be accessible from the browser as well.
The YAML files to describe the Pod and the Service are available on Github.
If you have any comments or queries, please feel free to sound off in the comments section below.
0 Comments